How to use limit switches in a project circuit?

Berninia

Joined Nov 21, 2015
19
As an aside, please consider including a safety switch that requires both hands be used if there is any chance of one being in the crush zone when it operates.
He does not sound like a 9 year old to me. But just in case, it would be best if he stays in bed, which is a good safe space.
 

shortbus

Joined Sep 30, 2009
10,049
f my machine is not finished yet I am wondering how you are so certain that my machine will or will not be classified as a mandrel bender???
Some rotary draw benders have an obvious wiper arm visible, yet it is possible to draw the tube using other hold methods.

I just can not see how they are any less a mandrel bender if employing a mandrel device inside the tube...
A bender like the one you show in the picture will cause the outside of the bend to flatten, unless it is a thick wall tube, it will still flatten but not as much. I'm not saying it isn't possible to bend without the wiper block, but the use of a wiper block gives a much truer bend through out the bend on both the ID and OD of the tube.

Most of the rotary draw benders are being used because they are less expensive to tool up. They were originally used just for solid stock, but people started experimenting and for many things they work OK, but not as good as a wiper die bender.

It has just been in recent posts that you started mentioning adding a mandrel. Up until now you never mentioned having or using one. All of your references to what you were building definitely not mandrel type. They aren't as easy to use as you may be thinking and I'm pretty sure they won't work with a rotary die very well. Because of the tendency to flatten the outside of the tube as they bend.

Was just trying to give you some help and saving you from having to rebuild your project. But seems like it's not wanted or necessary.
 

Thread Starter

fiftyv8

Joined Jan 29, 2018
223
I hear you and I am always up for a discussion.
I have read a lot on these machines and still remain humbled by my lack of knowledge.
From what I see, owning a mandrel for each size tube is almost cost prohibtive for the average guy.
My machining skills are basic and while I believe I could make what is required, to jme it would be like taking on a whole new project as I am as slow as a wet week and my lathe is just a baby...
Hence I am picking my fights when it comes to seeing the need to use a mandrel in every event as part of my anticaipated bending proceedures.
From what I can ascertain to date is, that a mandrel is generally required when bending thin wall tube or tight radius bends.
Being a newbie to this world of bending, I am yet to determine what might be a tight radius and when a wall becomes thin, other than to experience first hand.
For me at least, it is kind of a Christopher Columbus thing, sailing into the new world...

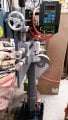
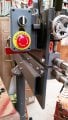
Previously, I have built a homemade Bead Roller from scratch using a VFD and all the safety function stuff as I ain't parshall to squashed and pinched fingers.
My Bead Roller turned out to be a very successful build project, although programming Chinese made VFD's has made me a little gun shy to say the least...

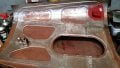
My most recent project with the Bead Roller was to make a half hood for a hot rod.
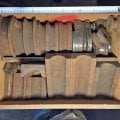
I have also scored a box of tube bender forms which I hope will make life somewhat easier when I finally get my bender working.
 

Attachments

shortbus

Joined Sep 30, 2009
10,049
I have read a lot on these machines and still remain humbled by my lack of knowledge
I was a machinist/die maker my whole life starting in high school. One place I worked made a lot of specialized machinery and some of them used bent tubes as part of the frames. Then I got into Jeeps and off roading then dune buggies. I installed a lot of roll cages and had most of the tubes bent by the company that made the tubes for the machines. That was fine for the ones to fit a certain model of Jeep but when you start doing things to fit other stuff they charged for set up times. And it got expensive. Bought a JD2 and stared doing the bends myself.

But seeing how and asking questions at the bending place I learned a lot about why they had different types of benders. The rotary bender you showed earlier bends like a manual conduit bender. It makes a bend but also makes the out side edge of the bend flatten out, due to the stretching and not being supported.

And the internal mandrels don't just have to be a different size for each tube diameter they have to be linked to the actual bender it's self, to keep it in place while the bend is being made.

And the bend radius's are pretty well already decided on. Look at all of the different companies making the dies catalogs, they are all the same radius's per tube diameter. They have already done the research to find what is possible and causes the fewest problems.
 

Thread Starter

fiftyv8

Joined Jan 29, 2018
223
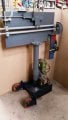
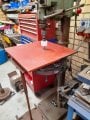
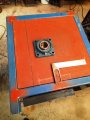
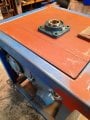
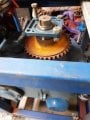
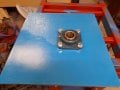
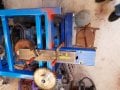
I've been focusing on the top plate for the bender which will finish the table off, but also support my additional 3rd bearing on the large gearbox.
I am using what I have where possible and I had a piece of 16mm steel plate with an unknown history.
It is much thicker than required but what the hell.
I needed to find the centre to match the shaft from the gearbox and cut a hole for the shaft to come thru.
Trying to be accuarte was challenging .
Lucky me I did not quite score a bullseye but was darn close.
The hole I cut is a whisker off center but will still work.
The next challenge was get the flange bearing to align with the shaft and transfer hole marking across to the plate, being extremely accurate etc...

Unfortunately, for me this plate must have been exposed to heat and maybe quenching some time in its life as it was just so hard in places, mostly where I wanted to drill and use the hole saw.
It was no mean feit cutting a 65mm diameter hole using a hole saw thru a piece of 16mm plate and that was before considering its weight.
It was hard work nad way less fun that I could have hoped for.
Eventually I got the big hole cut and then 3 of the 4 flange bearing holes.
There is always that surprise around the corner when venturing into the wilderness and mine was that my pedestal drill lacked enough throat depth to reach and be able to drill the 4th hole.

'Thank God for friends with well equipped garages.
Yep, had to phone a friend and last night we nailed the last hole.
Just when I thought the hard part was done, next step was to tap and thread the 4 holes for 5/8" UNC bolts.
Again I had all the gear, but tapping thru that hard plate was a real gym style work out, so much for building my upper body and shoulders.

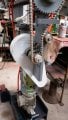
Anyway, that is where I am up to right now and will take a little time to contemplate my next steps which will be mounting and connecting that idle shaft and sprocket to the main table and getting all the chain the right length etc.
There is also an additional keyway required which is not at the end of the idle shaft so, just when I thought I was going well with doing keyways, I now need to figure out a way to cut in this new keyway part was down the shaft.
Internal keyways I am on top of, but those external keyways on the shafts without a milling machine test me...
 

Attachments

Thread Starter

fiftyv8

Joined Jan 29, 2018
223
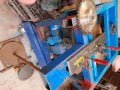
With the cold mornings, I decided to get the oxy torch out and bend a bit of flat bar in readiness for attaching a hook locking mechanism to my earlier posted form.
Helps to warm up.

Just ticking jobs off the To Do list.

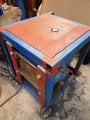
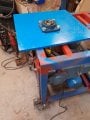
*Painted the underside of my plate table and attached the bearing.

*Also started figuring out a length and position of my cantilever idle shaft and how it will attach to the main frame etc.

*I am also trying to make a gizmo for my lathe to improve the way I do keyways.
No pic of the gizmo yet but I will try to post it when done...
 

Attachments

Thread Starter

fiftyv8

Joined Jan 29, 2018
223
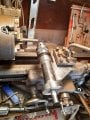
Well, I finished fabricating my two gizmo's that hopefully will make life a little easier for me on this and future projects.

I had to bite the bullet and get them done, otherwise everytime I need to repeat the same process from basics and I am kinder getting a little tired of that.

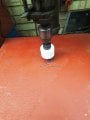
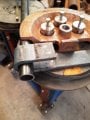
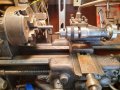
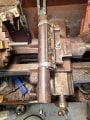
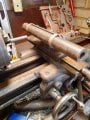
So now I have a holder for doing external keyways in round bar that will handle the smaller sizes I get involved in, plus a steady mounted drill chuck that upto now, I have not really had a need for, but I decided while I was doing the other holder, I might as well get it made.

Since I only own a humble small lathe, the drill chuck is limited, but I see it being capable of at least spoting and starting holes parallel with the lathe chuck and definitely it will be able to do off set holes (flange) when required, something that I would use if I had it, and now I do.
It is just driven by a hand electric drill and fortunately I got it spot on with accuracy and alignment.

Cost of parts for the drill was two bearings and a threaded chuck from ebay totalling $26.00
Now, I will keep a collection of short and broken drill bits as a stock for this drill since full length bits just wont fit.

The keyway bar holder pretty much cost nothing.
I guess if I purchased new radiator hose clamps, that would be the only cost but I've just employed old ones that I have kept as spares.

While both these gizmo's in the pictures are useable, I have now undercoated them and hope to paint them in a day or so.

I also purchased a 2nd morse tapered drill chuck (for my tail stock) specifically to hold my center drill bit as I am tired of installing and removing it as required.
This has been a good opportunity to kind of improve my efficiency when machining by up dating some of my tooling capability.

I am self taught on the lathe and have learned a lot by initially doing things the hard way.
Plus YouTube in more recent times has been a great source of knowledge for somebody like me.

In the near future, I plan on making a tidy unit to hold all my machining stuff or a trolley that I can pull up next to me when machining.
There is always something to do that can help improve life in my shop...
 

Attachments

shortbus

Joined Sep 30, 2009
10,049
I at one time did something similar to make a grinding head for the lathe. I had a job to open up a bore in hardened part that was chucked in the lathe. Made a fixture to hold a hand held air grinder in the tool post, using a couple of hose clamps to keep it stable. Since then I bought an old Dumore grinding head to do similar work.
 

MaxHeadRoom

Joined Jul 18, 2013
30,772
Since I only own a humble small lathe, the drill chuck is limited, but I see it being capable of at least spoting and starting holes parallel with the lathe chuck and definitely it will be able to do off set holes (flange) when required, something that I would use if I had it, and now I do.
It is just driven by a hand electric drill and fortunately I got it spot on with accuracy and alignment.
Commonly known on a CNC machine as a Live Axis. ;)
 

Thread Starter

fiftyv8

Joined Jan 29, 2018
223
My next improvement will be to acquire a accurate 3 jaw chuck, but I must find a suitable attachment plate to hold it and connect it to my main drive shaft.
Owning old lathes can be a problem to source parts etc, as I dont want to spend a lot of money for over the counter new items.
A good 3 jaw chuck will speed up many of my processes.
I actually like the 4 jaw chuck and I am getting pretty darn good and setting it up, but it would be nice to be a little quicker some days...
 

Thread Starter

fiftyv8

Joined Jan 29, 2018
223
Probably could try, if I find the right 3 jaw chuck that I like and want to get it attached.
I figure I could attempt it rather than know I could do it.
I've never cut a thread using the lathe yet.
I am prettyu sure the thread required for this plate is a 1" BSP from memory.
I assume that I make up the outline of what I want, then cut the thread and then face the mating surface to accept the chuck.
Now I have that off set drill, it will be easy to drill the flange bolt holes to bolt the chuck to the plate...
 

Thread Starter

fiftyv8

Joined Jan 29, 2018
223
In hindsight, I probably could have used a smaller 3/8" chuck instead of the 1/2" item I did use for my off set drill, which may have afforded me a little more elbow room for drilling perpendicular stuff.
 

Thread Starter

fiftyv8

Joined Jan 29, 2018
223
The best thing I have ever done for my lathe, was to buying a quick change tool post, now they are something.
I knew nothing about them at the time, but during a USA visit and staying with a good friend who use to work for Boeing in OR, he suggested that I find myself a set while visiting and as he was a machinst his advice proved to be invaluable to a novice like me.
 

shortbus

Joined Sep 30, 2009
10,049
My next improvement will be to acquire a accurate 3 jaw chuck,
That is the problem though finding one that is accurate. Where I served my apprenticeship they only used the 3 jaw chucks when you had a piece of stock that was over size on the diameter for the part needed, or just to face off a part that was cutoff after being made. When new a high priced 3 jaw is pretty accurate , but I'd never buy another used one, got burned and wasted my money on the two I bought.

Most people that use them even in a real machine shop over tighten them, doing that then spreads the grooves the jaws move in. Once that happens the concentricity of them goes out the window. and with most newer inexpensive chucks it happens fast since they are usually cast iron instead of cast or forged steel.
 

shortbus

Joined Sep 30, 2009
10,049
The best thing I have ever done for my lathe, was to buying a quick change tool post, now they are something.
And I have to disagree with you there, too. The lantern style tool post while being so very old, is much more adaptable to machining odd things and positions. My newest lathe can't even use one so I had to invest in a quick change tool post, an Aloris knockoff.

One reason I don't like them is for threading. You have two choices either stick the part out of the spindle really far or don't ever use the tail stock and a center. The size of the main tool post body takes up too much room. With a lantern tool post you have a much smaller foot print to work with.

And I don't even understand the idea that the QC post is easier to get on center. If you know what your doing they are both the same to adjust the tool height.
 

Thread Starter

fiftyv8

Joined Jan 29, 2018
223
I hear you guys on the QC bulky side, I have encountered that several times already.
I trhought it was just my inexperience at the time.
The 3 Jaw chuck, I have dreams of it saving me time setting up, but I guess there is always likely to be a down side on taking the easy route.
I have become very proficient at setting up a 4 Jaw and truely believe it to be the best and most reliable method especially after what you have just said about 3 jaws.

I will only seek a new 3 Jaw item on your advice then.
Thanks for the informed advice.
 

shortbus

Joined Sep 30, 2009
10,049
I have become very proficient at setting up a 4 Jaw and truely believe it to be the best and most reliable method especially after what you have just said about 3 jaws.
Almost any thing you can hold with a 3 jaw will be able to be held better in a 4 jaw. If you do a lot of small diameter stuff, 1 inch/25mm or under a better way to spend money is a collet set up.

And I know what you mean about getting fast when using a 4 jaw all the time. some of the places I worked at it was funny to watch guys trying to get something true in a 4 jaw.
 

Thread Starter

fiftyv8

Joined Jan 29, 2018
223
Yes, I hear you about setting up a 4 Jaw chuck.
I laugh now when thinking about how bad I was at setting up a 4 Jaw in the beginning, remembering that I had now help.
Simarly, parting off, now that can be a real art.
I had all but given up trying to be any good at that, but now after much persistence I finally enjoy success when parting off.
 
Top