Facebook
 Google
 GitHub
 Linkedin
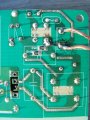
http://forum.allaboutcircuits.com/attachment.php?attachmentid=17663&d=1269498114
alright. well i will do that when i get home and post the voltages. so your telling me you think the - side of jack conector is faulty?
cause with fuse out + side reads 114 VAC.
alright. well i will do that when i get home and post the voltages. so your telling me you think the - side of jack conector is faulty?
cause with fuse out + side reads 114 VAC.