Hmm, never saw that before. Every thing from all of the makers app notes say one is needed, never saw where a certain frequency was involved. The need came from something to do with dt/vt. Got that from the last App Note I read on the gate resistor, just last week. https://www.fairchildsemi.com/application-notes/AN/AN-9068.pdf Learn something new every day here.
This document is fascinating. Some concepts are coming together. Please holler if I'm wrong:
dv/dt is the rate of switching. Faster = less time transitioning between off/on where resistance is present while current is flowing... creating heat.
It appears "Eoff" and "Eon" are the units of measure to quantify that heat, measured in uJ, which I'm assuming is micro joules.
An example: If I were switching is at 10khz, and 100uj is lost each switch (25uJ Eon, 75uJ Eoff) this means that I would be generating one joule of heat loss each second, or one Watt in losses.
(Interesting that losses seem to be 3x higher for shutting off a MOSFET than when turning it on.)
I'm guessing heat is bad and dictates life of the MOSFET. Do circuit designers look at a loss wattages vs lifespan chart to select their components? Is that a thing?
If thermal losses decrease and performance improves as the gate resistance approaches zero, why not just use Zero?
"Ringing" is the only answer I'm hearing. I haven't gotten to this in the textbooks yet, but I'm guessing ringing is a resonance in the wire between whatever is generating the signal and the gate. I'm guessing that if not checked, the resonance will get to an amplitude enough to charge the MOSFET gate capacitor, giving an unwanted MOSFET closure.
I think in the end you will need to use mosfet gate drivers along with your Arduino. This will allow you to both drive the gates closer to the mosfets and use more amperage to do it. This is the way most motor drive circuits work too. Or you could use a "shield" of some type with the Arduino. The shield does the same thing as a gate driver just more expensive.
I'm definitely going to try the circuit I drew earlier that doesn't use a driver first. Hopefully I get to experience why I need a driver. And then, yes, based on everything I'm hearing, a driver will provide higher performance with less bugs and longer lifespan. I'll see if I can figure out how to add one of those next.
It would take a h- bridge to make two way movement.
This shows it moving backward im using small magnets I'm hunting down some more.
This is powered at 12 volts 5 amps
Nice! Thank you. I just ordered 10 of the MC34151PG.
"Do not attempt to construct the driver circuit on wire−wrap or plug−in prototype boards." Well, damn.
How do DIY people construct driver circuits? (googling leads me to believe that "wire-wrap" is the perf board technique I did earlier)
I'm working on drawing up how I plan to build the entire circuit.
These statements imply that the IGBT doesn't need a gate driver, but can run be controlled directly from a microcontroller. Is that correct? If so, absolutely. Sign me up. I need to go read about IGBTs.
It's always be my understanding that IGBT's are slower than Mosfet's. That for low frequency's(slower switching) you pick an IGBT when using high current.
My application definitely has (relatively) slower switching needs and I'm trying to maximize current, further support of going down the IGBT path, especially if it doesn't need a driver circuit.
I gave your circuit a try of course i don't have your coil but the MOsFET
not last long using the arduino to switch the gate it started smoking as soon as the
arduino set to gate high.
The circuit I posted the smoke rolls off the FET at 5 volts
same circuit with 12 volt on the gate it works fine.
It would take a h- bridge to make two way movement.
This shows it moving backward im using small magnets I'm hunting down some more.
This is powered at 12 volts 5 amps
First of all, thank you for investing time to build stuff in response to my project questions. Really nice of you.
Secondly, yes, you are correct: No explosion. AND, you're using a breadboard... ha! This is pretty strong evidence that my explosion issue comes from me giving weak gate voltage from the microcontroller as you suggest. This also further supports the notion that I should be using a gate driver that can provide 10 Volts. (you're giving 12V, but that is out of spec for the IRL540 MOSFET).
I'm still not sure about the IGBT, but feeling confident about the driver/MOSFET solution concept.
(you're giving 12V, but that is out of spec for the IRL540 MOSFET).
At 5 volt it just sits and try's to turn on so I just used the coil power witch was 2 volts out of being 10
but the voltage drops when the coil comes on I think that where you are having problems.
It drops a 12 supply to 8 volts to get 5 amps into the coil.
My first supply was only 2 amp it can peek out at 3 amps I try not to lol
But using a arduino it's a no go the smoke rolls off the MOSFET
I gave your circuit a try of course i don't have your coil but the MOsFET
not last long using the arduino to switch the gate it started smoking as soon as the
arduino set to gate high.
The circuit I posted the smoke rolls off the FET at 5 volts
same circuit with 12 volt on the gate it works fine.
Wow. These look perfect. Automotive ignition is pretty close to my application in function. I ordered 10, to arrive next week.
Later in this project, when I look into using analogWrite commands to try to smooth out the motion or to experiment with soft shots, I'll probably have to come back to using gate drivers. Then again, maybe not, testing will reveal a lot.
I'm really surprised that the Gate Voltage Threshold is only 1.8V on this thing. Super easy. I could even have the LEDs in series with the gate signal to show which of my four coils is firing. Thanks again for your help and suggestions.
That's funny the arduino is way slower then these are it cant write that fast using analogWrite commands as you may think
If you want out switch them you'll have to code using avr gcc maybe even use asm.
Regarding the 2 explosions. The first one is when the MOSFET died, probably due to over current. A lot of times when MOSFETs die, they go into full conducting mode. So being full on, it got hot and blew up.
I really think you are drawing more current than you think you are. On the 4 multimeters that I tested, on 200 ohm scale, touching the leads together I get .7 to 1.4 ohms. Are you doing that first to subtract that number from your coil ohms?
Have you tested it with an ammeter? If you don't have one, you can use a push button switch and fuses as someone mentioned earlier. You can use progressively larger fuses until they stop blowing and something else starts smoking.
In one of those videos, it took a couple seconds to blow the MOSFET. You don't really want it on that long, do you? In motor mode, you would be cycling through the 4 coils one at a time. Even with a high current, you might get away with that if the pulses are a few milliseconds long.
When I am playing with a high current project like yours, I would put a 12 volt headlight or break light bulb in series with the coil and get everything working before applying full load.
You know that Arduino analog out is 5 volt PWM, right?
Sorry if some of this has been mentioned. I didn't re-read 130 posts.
That's funny the arduino is way slower then these are it cant write that fast using analogWrite commands as you may think
If you want out switch them you'll have to code using avr gcc maybe even use asm.
Interesting. Arduino, regarding analogWrite: "The frequency of the PWM signal on most pins is approximately 490 Hz. On the Uno and similar boards, pins 5 and 6 have a frequency of approximately 980 Hz.
I'm not seeing exact numbers on how fast the IGBTs switch, but a chart in your documentation says "f=1Mhz", so I'm guessing these things must be able to handle 1,000,000hz no problem. Wow. What ignition system needs 1Mhz? What ignition system needs 10hz?
Regardless, you are very correct. I did not realize the arduino can only switch at a 5,000th the speed that IGBTs can apparently handle. Wow. big difference. Thanks for the heads up.
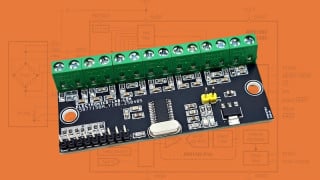
This picture. Thank you.
I had no idea the real purpose behind the hole in the back. HA! Its so obvious now. And screw it directly to a heat sink. Of course.
I was planning to sand down the magnet wire to fit into the perf board. Yes, I will get screw terminals like you have there. Thank you.
Keep in mind that an arduino's flimsy output pin cannot provide enough current to switch a mosfet at a high speed, even a logic-level fet. That's why I strongly recommend you use a driver in your next test.
I really think you are drawing more current than you think you are. On the 4 multimeters that I tested, on 200 ohm scale, touching the leads together I get .7 to 1.4 ohms. Are you doing that first to subtract that number from your coil ohms?
Nope. I've never considered there being a standing offset in my multi-meter resistance reading. I'll check. I did a quick google and it seems I can expect 4ohms in a 1000ft of 16Ga copper wire. (I don't remember exactly what I used on the coil, I think it is 16...). I probably have 60-80 feet, so maybe ~0.25 ohms. Very different than the .5 ohms I measured. Doubles the current. Toasts the 28A max rating. Good looking out.
Have you tested it with an ammeter? If you don't have one, you can use a push button switch and fuses as someone mentioned earlier. You can use progressively larger fuses until they stop blowing and something else starts smoking.
I have never tested anything higher than 10A because of the warnings on my ammeter. Yours is the first mention of this fuse method of testing current levels. Seems course and expensive, but better than anything else I have... I'll give it a shot.
In one of those videos, it took a couple seconds to blow the MOSFET. You don't really want it on that long, do you? In motor mode, you would be cycling through the 4 coils one at a time. Even with a high current, you might get away with that if the pulses are a few milliseconds long.
The video shows me giving the MOSFET a singular half second burst. You are correct, in motor mode, the coils will be cycling one at a time through the four coils. As the cue stick starts from rest, the pulse duration will be the longest at the start of the stroke and get shorter as the stick reaches striking velocity.
On slow shots, the pulses will be longer.
Quick back of the envelope calculation: Striking velocity of a break shot is 13m/s. With a stroke distance of 15", each 1/4 inch of stroke (distance between coils) must increase velocity by 0.21m/s. This means the average velocity of the first 1/4" is around 0.12m/s, taking 0.053sec... So on break shots, the pulse duration will start at 53ms, getting shorter from there.
It looks like I won't be getting away a few millisecond bursts.
When I am playing with a high current project like yours, I would put a 12 volt headlight or break light bulb in series with the coil and get everything working before applying full load.
Yes I realize Arduino is a 5V PWM. It feels like you are making a statement (that I'm missing) with this question. What am I missing? If I can PWM at 980hz, I can pulse 52 times in the 53ms mentioned earlier... that seems helpful to control shot strength. No? Please elaborate...
Thanks for joining the conversation. While you're here, any insights why a coil activated inside of another coils doesn't create a motive force? (Post #43)
Keep in mind that an arduino's flimsy output pin cannot provide enough current to switch a mosfet at a high speed, even a logic-level fet. That's why I strongly recommend you use a driver in your next test.
Ahh. This explains what DNA Robotics was getting at.
So another benefit of the driver is to provide additional current as well as being able to step up the voltage from a microcontroller. The reading made it sound like the "Field effect" part of MOSFET meant that it just needs voltage and not current to control the gate... just a little current to charge the gate capacitor... Maybe I'm misinterpreting.
How about those IGBTs Be80Be is suggesting? Driver circuits for them as well? Shortbus is saying they MOSFETs and IGBTs have essentially the same gate, so I'm guessing I do.
Yes, Mosfets and Igbts do have essentially the same gate, although different capacitance values. I suggest you take a look at the datasheets and compare their performance.
Since the mosfet's gate is basically a capacitor, it will draw quite a bit of current for a brief period of time before it saturates and reaches equilibrium. That's the primary function of a gate driver, to provide brief but intense bursts of current at the rated voltage so as to fully charge the gate as quickly as possible.
Look up MOSFET in the linear region LOL thats what happening when you use the arduino could be two reasons for it happening tho.
From What I see I first used a 2 amp supply it couldn't supply the coil.
The second time I used a 5 amp supply the MOSFET didn't heat up.
Yes I turned the gate on with the same supply a little out of spec but it drops a bit so not too bad
Then I tried the UNO this time the MOSFET got hot fast even tho I was using the 12 volt supply with 5 amp output
 Facebook
 Google
 GitHub
 Linkedin