Odd Question for an Odd Problem: Making an Old Scoreboard into a Clock

MisterBill2

Joined Jan 23, 2018
27,631
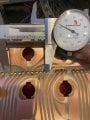
The clock will be a special case, with two counters, for minutes, zero to 59, for hours, 1 through 12, (or 24) One easy scheme will be two CD4017 devices in a counter ring, and then each output driving a single address to light the required segments. No software at all, not that much logic either.
The other scheme will be a binary counter presenting a hex output to an address in a prom, which delivers the segment selection for each number..
Setting will be a very simple process of adding a pulse string to the time base feeding the counter. one button to advance hours, another to advance minutes.
Counting the day's date, and the month will be more complex. Likewise showing AM and PM.
 
Last edited:

Jon Chandler

Joined Jun 12, 2008
1,603
There is not going to be a plug&play solution. Or even a plug&plug&plug&plug&play solution.

TTL decoder chips may be age-approprite to go with the technology, but it will be difficult to decode the non-standard light pattern.

The easiest approach by far will be to use a microcontroller, a clock chip and the circuit I posted. The most difficult parts will be deciding which groups of LEDs to turn on to get different digits. If this doesn't make sense, look at my schematic and figure out which pins to power to get each each digit. 0 – 9 and you'll have it.

Search for a tutorial on creating a clock using an Arduino. That will be a good start but controlling the digits will be different.
 

Jon Chandler

Joined Jun 12, 2008
1,603
This diagram will illustrate mapping a digit. The digits on the scoreboard are mostly very square. Let's consider the number 2. The red circles show the lights to illuminate to get "2". Well, sort of. If we want a digit that looks like a 7-segment display, we need lights A4 and D4 to be illuminated. But each of those lights is grouped with a light we don't want - see the yellow circles.


Lamp A4 is connected to A3. We get both or neither. Same with D4 and D5. So the option is to use the red b ulbs for "2". scoreboard digit two.jpg

This table shows the MCP23017 bits, the digit board pins, and the value to send to make a two appear. A "1" turns that output on, a "0" turns it off.

SCOREBOARD 2 DIGIT BITS.jpg

So we can save a variable named "D2", equal to binary %1100111011001110, and when we send "D2" to the MCP23017, a two will appear.
 

Sensacell

Joined Jun 19, 2012
3,785
The fastest and easiest way you do this would be to replace all the lamps with strings of these RGB addressable LED's
Then you can map out any crazy function you want in software- using some of the existing Arduino libraries for driving these types of lamps. (WS2811 style)

You might be able to just hot-glue the LED's into the existing lamp holes and be done with it.

It's rude and crude, but a fraction of the work of any of the other ideas contemplated.
 

Attachments

MisterBill2

Joined Jan 23, 2018
27,631
There is not going to be a plug&play solution. Or even a plug&plug&plug&plug&play solution.

TTL decoder chips may be age-approprite to go with the technology, but it will be difficult to decode the non-standard light pattern.

The easiest approach by far will be to use a microcontroller, a clock chip and the circuit I posted. The most difficult parts will be deciding which groups of LEDs to turn on to get different digits. If this doesn't make sense, look at my schematic and figure out which pins to power to get each each digit. 0 – 9 and you'll have it.

Search for a tutorial on creating a clock using an Arduino. That will be a good start but controlling the digits will be different.
Who ever mentioned "obsolete TTL decoder chips"???
CMOS technology would be the way to go, and certainly much better than the "Nuts and Volts" arduino scheme. quite likely the original design was created for the best readability, and certainly investigating the current patterns will reveal how that was implemented. which is already available encoded in the wiring of those Ledex stepping relays..

Besides that, unless the TS is already well versed in programming a system that has chosen to use different words for many aspects of it's existence, there will be a big learning curve ahead.
So by no means will using a microcontroller be an easy approach!
It is often wiser to observe and learn rather than to Rip and Replace, and Regret, when creating a new application for whatever you have. Amazingly enough, there is a lot to learn from understanding how others have solved puzzles in the past.
 

Thread Starter

r8f1k

Joined Oct 1, 2023
164
It is amazing how many options so many people have proposed. I am blown away by the help and support of very knowledgeable and creative craftsmen.
 

Jon Chandler

Joined Jun 12, 2008
1,603
If you flip Jon's mapping both horizontally and vertically our pin mappings are the same.
I based my mapping on the belief that the picture in post #16 is:

1. Right side up; the top of the picture is the top of the display.

2. That the picture in post #16 is the back side of the display – the lights face the other side of the board.

In post #26, I have flipped the picture left to right so that it represents the bulb positions when seen from the front (of the scoreboard). The positions in my schematic and digit drawings should represent that point of view. I hope


Regarding bulbs – incandescent #161 bulbs draw 2.7 watts, making the current draw of EACH digit about 5 amps when all bulbs are illuminated. That's a lot of current for the entire scoreboard. I looked at LED versions of the #161 bulb. Surprisingly, they draw MORE current than the incandescent bulbs! All that I found claim to be 3 watts (not 3 watt equivalent).
 

MrChips

Joined Oct 2, 2009
34,855
I am going by the fact that the copper side of the PCB is the BACK VIEW and the TOP etching on the PCB is towards the top.
If I flip your layout our lamp to pin numbers match.
 

Thread Starter

r8f1k

Joined Oct 1, 2023
164
I am going by the fact that the copper side of the PCB is the BACK VIEW and the TOP etching on the PCB is towards the top.
If I flip your layout our lamp to pin numbers match.
Yes, based on the photo I posted, there is an etching indicating 'TOP' at the bottom of the photo. The boards fall down out of the scoreboard so the top of the board is closest to the repair man when dropping the board out.
 

Jon Chandler

Joined Jun 12, 2008
1,603
Screenshot_20231011_090419_Edge.jpg

That little thing??? Gotta read the fine print I guess ;)

@r8f1k could you measure the pitch of the holes (center-to-center distance) where the wires connect? If you have a standard 0.1" pitch header you can see if the holes line up with it or measure the length of the group of 7 pads from end to end. They look like they're on a spacing of 0.1".

If this is true, it wouldn't be too difficult to de-solder the wires and put a header connector in its place, then the driver boards could neatly plug in. Would there be enough room for a board to stick out half an inch or a bit more?
 

Thread Starter

r8f1k

Joined Oct 1, 2023
164
View attachment 304711

That little thing??? Gotta read the fine print I guess ;)

@r8f1k could you measure the pitch of the holes (center-to-center distance) where the wires connect? If you have a standard 0.1" pitch header you can see if the holes line up with it or measure the length of the group of 7 pads from end to end. They look like they're on a spacing of 0.1".

If this is true, it wouldn't be too difficult to de-solder the wires and put a header connector in its place, then the driver boards could neatly plug in. Would there be enough room for a board to stick out half an inch or a bit more?
I can do that!
 

Jon Chandler

Joined Jun 12, 2008
1,603
Thank you. Looks like 0.1" pitch or at least close enough.

Is there enough clearance behind the digit boards when the scoreboard is together to stack A board like the picture? Just one board.

board_stack_lrg.jpg
 

Thread Starter

r8f1k

Joined Oct 1, 2023
164
I based my mapping on the belief that the picture in post #16 is:

1. Right side up; the top of the picture is the top of the display.

2. That the picture in post #16 is the back side of the display – the lights face the other side of the board.

In post #26, I have flipped the picture left to right so that it represents the bulb positions when seen from the front (of the scoreboard). The positions in my schematic and digit drawings should represent that point of view. I hope


Regarding bulbs – incandescent #161 bulbs draw 2.7 watts, making the current draw of EACH digit about 5 amps when all bulbs are illuminated. That's a lot of current for the entire scoreboard. I looked at LED versions of the #161 bulb. Surprisingly, they draw MORE current than the incandescent bulbs! All that I found claim to be 3 watts (not 3 watt equivalent).
Am I doing my math right? Each LED bulb is 5 watts @ 12v should be .42 amps. Is that correct?
 
Top