Light flashing unit for car

Thread Starter

gchq

Joined Dec 27, 2023
69
It might even be a failed voltage regulator.
I don't think there is a SPICE model for a failed regulator.

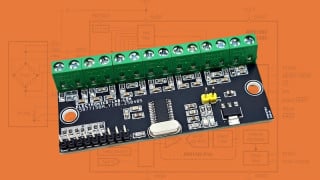
Bear in mind that the actual board works (or worked) so the project is not to repair one, but to replicate it and then update it to something modern. It's a learning curve thing so starting with something simple(ish) and getting help from this forum to correct me when I go off course.
 

Thread Starter

gchq

Joined Dec 27, 2023
69
And unfortunately we do not get to see the connections to the three power transistors, which would help understand the operation of the system.
I am trying to rework to include the three power transistors - everything inside the power circuit will be from the board and the stuff outside are those transistors. To make it easier I have not included the fuse and connectors.

Please let me know if I am heading in the correct direction.

Circuit_07.png
 

Thread Starter

gchq

Joined Dec 27, 2023
69
The poor 555 has some more errors:
I am going off both the circuit as wired on the board I have, and tech docs such as this. They show pins six and two connected and five either not connected (as in both the board I have, or in this example) or using a 0.01f Capacitor.


Circuit_09.png
 

Audioguru again

Joined Oct 21, 2019
6,826
The NE555 will probably burn out of it tries to drive a low impedance (4 ohms or 8 ohms) speaker because its absolute maximum current is only 225mA on Texas Instruments datasheet.
Remove the 100uF capacitor for it to drive a piezo squeaker.
 

MisterBill2

Joined Jan 23, 2018
27,577
The arrangement of the drawing is certainly much easier to follow, but there are quite a few errors, so it is not completed.
BUT the improvement in being able to follow the circuit is quite a big improvement.
AND!!! How do we suddenly have a 555 driving a speaker???
 
Last edited:

eetech00

Joined Jun 8, 2013
4,705
I am trying to rework to include the three power transistors - everything inside the power circuit will be from the board and the stuff outside are those transistors. To make it easier I have not included the fuse and connectors.

Please let me know if I am heading in the correct direction.

View attachment 311780
Looking better.

Another quick tip:

If one end of a resistor, cap, diode, or inductor is connected to +V or ground, it should be positioned vertically
(guideline: supply voltages flow between top and bottom).
If a signal passes through the component (left to right), then position it horizontally.
(guideline: signal flow is left to right).

Remember, these are standard guidelines and not unbreakable rules. Their purpose is to help provide clarity to the circuits functionality.
 
Last edited:

eetech00

Joined Jun 8, 2013
4,705
That is where I get a little fuzzy - can you define signal flow as opposed to voltage flow?
Signal flow can be voltage or current, but I probably should have left out that statement.
Just follow this guideline:
"If one end of a resistor, cap, diode, or inductor is connected to +V or ground, it should be positioned vertically"
Otherwise, position it horizontally.

As an example, C2,C3,C4 in your drawing, post #44, should be positioned vertically.
 

Thread Starter

gchq

Joined Dec 27, 2023
69
Latest incarnation of the schematic - let me know how many mistakes I made please :)
The shaded part is the separate section and I used 12v LED for the standard car bulbs

Circuit_10.png
 

Thread Starter

gchq

Joined Dec 27, 2023
69
"If one end of a resistor, cap, diode, or inductor is connected to +V or ground, it should be positioned vertically."
Otherwise, position it horizontally.
Sooo - taking the latest schematic I need to change R7, R11, R12 and R4 as they are connected to +V, and C1 and C4 as they are connected to earth?
 

MisterBill2

Joined Jan 23, 2018
27,577
The common line from the VR passes right thru two transistors, that is bad practice, it should not do that, move it over to the left. also, Q7 and Q8 can be flipped so that their base connections point to the right, since their base drive comes from that direction, also, the resistors in series with the base drive can have the connection lines simplified a bit. Also, D3 and D4 can be moved much closer to the LEDs they feed, simplifying their connections quite a bit.
And the connection feeding R14, the base resistor for Q4 does not seem correct as it is tied to the common, not some drive signal.
 
Last edited:

Audioguru again

Joined Oct 21, 2019
6,826
I am still wondering about the 555 driving a speaker.
Most 555 datasheets show a high and low maximum output voltage loss of typically 2.5V at 200mA but Texas Instruments says the absolute maximum output current is +/-225mA when the supply is 15V.

A piezo speaker (shrieker?) is a fairly high impedance of about 65 ohms which draws maybe +-75mA.
But an 8 ohms woofer inductance causes it to be 16 ohms at 5kHz which would draw 225mA at +/-3.6V.
Then the NE555 or LM555 will be very hot but safe if it has typical specs and a 12.2V or less supply.
 

Thread Starter

gchq

Joined Dec 27, 2023
69
The common line from the VR passes right thru two transistors, that is bad practice, it should not do that, move it over to the left. also, Q7 and Q8 can be flipped so that their base connections point to the right, since their base drive comes from that direction
Better?

Circuit_11.png
 

daba1955

Joined Apr 27, 2019
218
Please describe exactly what you want the (I assume) 3 outputs to do.

I may have, ready-built, the board to control it. My circuit uses a PIC chip, and can be programmed to do what you want. Originally designed as an R/C plane lighting controller, it has 4 outputs, and 2 inputs. The inputs in the original design were connected to two R/C receiver channels, and the outputs drive 4 MOSFET devices capable of switching huge currents without breaking into a sweat due to their extremely low "ON" resistance. You would not necessarily need the inputs, depending on what you want the function of the outputs to be.

Those 4 outputs were originally designated for NAV lights, Beacon(s), Strobe lights and Landing Lights, but obviously could be used for anything.

Using an Arduino, or similar means there will always be a "pause" on power-on, while the MCU decides if it is being downloaded to (the "bootloader", but the PIC fires up and starts working immediately.

I have used this control board many times, most recently on amber LED flashers for a mates breakdown truck.

Photo shows the size of the PCB compared to a pound coin.

With a detailed explanation of what the outputs need to do, I can easily modify the code accordingly.

2024-01-06 20.38.39.jpg
 
Top