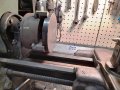
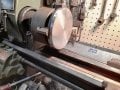
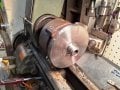
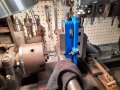
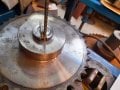
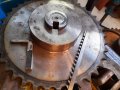
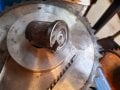
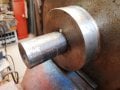
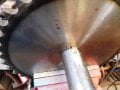
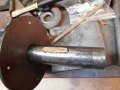
Shortbus, I was going to PM you regarding something I have struck while machining a 6" diameter steel disc.
I wanted to face it both sides and then machine the 3/4" thick edge.
I noted as I reach the outer dimensions of the rotating disc my cutter was struggling and got really hot...
Has this got something to do with rotation speed at the outer extremities???
So your starting at the center? If you choose a speed that seems good for the smaller diameter at center it will be too fast at the outer edge. On something like that I'd choose a speed that was good for the outside and the center will take care of it's self.
Some questions though. What type steel? What kind of cutter, carbide or HSS? What feed rate? If this is an unknown steel it could be extra hard on the outer edge. All of those need to be considered on something like this. One big problem with facing is using to slow of a feed rate, it tend to rub as well as cut the chip off. I also tend to start at the outside to face a part not the center, it seems to work better at least for me.
Well Shortbus, you hit the nail on the head.
The center zone was a mish mash but able to be machined while the outer was almost impossible to have an impact on.
Since my feed was by hand I could only be slow.
My material is always scrap so its history is always a problem
At 3/4" thick and having been flame or plasma cut, I guess its hardness could have been changed.
I reduced my speed and managed to get something close to a facing cut that I was happy with for my needs.
I put a tacho on it while running before changing my speed and was surprised to note the difference between center speed and circumferecial speed. It was a lot different...
Looking back after your comments, I believe th cutting heat prior to my ownership of this piece had hardened the outer edge...
Anyway I did get the job done using insert cutting tips.
My regular grey colour items struggled, but once I swapped to the gold colour tips I felt that I was making progress.
I have since also machined up a center boss and pressed it in and welded it to the disc.
Today, I will cut a keyway into it.
This is not part of my posted project, but side gizmo project I am playing with...
I found out the hard way too about unknown scrap steel. There is only one scrap yard around here that will sell people like us scrap. And they get it from all over the area. I needed a piece of 1/2 inch plate and found a nice piece bigger than I needed so bought it. Don't know what steel it is but ruined a few bandsaw blades before I gave up trying to cut it. I use it now as a flat surface to jig up welding stuff. Can't even drill this stuff either so I put things in place and tack them down to hold position.
It is only recently that I have even had to pay for scrap metal, so I can not even complain if I get a bad piece, but yes you are correct, some stuff is unbelieveably tough.
Probably military scrap from old tanks. hahahaha.....
I scored a vice to go with the other adjustable vertical gizmo I got a week or so back.
My mail man also turned up so I could finally cut my keyway.
I needed a 8mm wide slot so purchased a 7mm cutter and used the adjustment on my new gizmo to cut 0.5mm each side wider.
It has worked out well, but I have discovered my adjustment on the vertical vice holder does have some creep that I must manage.
Some vibration is enough to see it move...
It has worked out well, but I have discovered my adjustment on the vertical vice holder does have some creep that I must manage.
Some vibration is enough to see it move...
That is a good looking vise. But not what I would have gone with for the milling attachment, way too heavy. But if you get a mill later that is a good type to get/have.
When you say movement, are you taking up the backlash in the mill attachment? All threads have to have a certain amount of clearance in them so they can be moved/rotated. A mill or for that matter even the lathe cross feed need to always have the backlash considered when making movement. The lathe it is pretty standard, you dial in the amount of cut, but if you go too far you don't just reverse direction and change to the needed number. You need to back off past the dial number and feed in again to the desired number. If you don't do it like that your in most cases not going to get the correct cut. This backing off like a half or more turn(depending on the wear in the screw) takes out the backlash and then makes the correct movement. The same thing is in the mill table or your attachment. You choose a direction to turn the handle and always turn it that way when moving, even if it means going back past the place you WANT to be. Doing that always, means that the backlash of the screw is considered.
Also did you adjust the mill attachments gibs? Like most mechanical things they don't come right out of the box pre-adjusted. If there is too much play between the slide and the body of the attachment that will allow some unwanted movement when cutting pressure is applied.
Again, not knowing your experience in machine work, I mean no offense if you already know this stuff.
Thanks Shortbus, no mostly I dont know and I am pretty much living what you have said.
I proceed cautiously and take for ever to get a task done, but am always learning and will be all the more proficient on the next job...
I scored a vice locally and took it because it was there as I did not want to wait for the out break of war with China.
I would have much preferred a slightly smaller version.
It is what it is and I will live with that for the time being, allow my little lathe is about at its limit with using it as a mill.
I scpred ,y vice ;ocally and took it because it was there as I did not want to wait for the out break of war with China.
I would have much preferred a slightly smaller version.
It is what it is and I will live with that for the time being, allow my little lathe is about at its limit with using it as a mill.
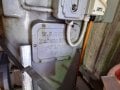
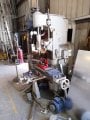
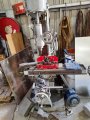
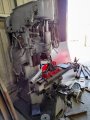
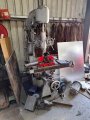
Shortbus, what do you know about these Milling Machines, it is called a Knight...
I have attached several pic's.
It is for sale locally and I have first shot at it, although I remain very reluctant.
That looks more like a jig bore machine than a mill. We had a similar type made by the Moore machine company where I served my apprenticeship. That type will work just fine and if the price is right I'd say go for it.
That said, I will give you the downside of them as a mill. They have no knee movement. To make a large move in the "Z" axis you have to move the quill locked position. You do the large movements like when drill big diameter holes when going from like less than 1/2" to over 1/2". But overall the jig bore has enough quill movement that it won't be a problem. The photos don't show any of the tool holders, do any come with it? Some of the old jig bores had kind of weird tool holders so get them with the machine if he has them.
Overall if the price is good and there aren't any broken and welded frame and table parts for what your doing now it would be good.
Here is a link to a place I have used a few times to learn about older machine tools. The link will open to the Knight page, but there is a lot of information about many tools in the site. And some owners manuals for some tools.
Wow Shortbus, tnat link is good to know about.
While I'd love to own something with milling capabilities, I just dont have the space.
There are no accessories that go with this machine being offered, other than a manual.
I could not find a model number on this unit, but after looking at the link site, I am ssuming it is the same or similar to the Knight Model 40.
He wants $800 for it and delivery included.
Being that I am not in the USA, there would probably only be a few of these in existence over here.
Most of our machinery was UK based in the early days...
I was thinking to offer it to a friend who lives close to me who would probably buy it and at least that way, I could have access if required.
That would be about the best I could hope for right now.
I've had the blessing(curse?) of working either full or part time for many different levels of machinery over my working years. Some with very low ,worn out machinery and some with high almost state of the art stuff. It's been my experience that working with what many in my trade would consider junk has made me a better machinist/ die/ mold maker. It takes more talent to get good results from the old or worn out stuff.
I just wanted to let you know about the problems with a jig bore as a mill. If it doesn't come with cutter holding tooling you may not be able to even find it today, at any price.
Glad you liked that website, through people sharing what they have it makes much of the old stuff survive and still get used.
Thanks for the heads up Shortbus, I'm not going for it, my needs are not that great and I figure I've lived this long without a Mill I'm sure I can survive with out it...
Anyway the juggernaut rolls on and I have done a little bush machinist stuff.
I need to put an 8mm internal keyway into the last bender sprocket.
I do own several broaches and guides but nothing that fits the hole size in this sprocket.
I got thinking that one of my broaches pretty much does a 3.2mm or 1/8" width, so I decided to make a broach guide to suit my hole size and the guide slot I made twice as wide to take my broach with a side spacer.
I figure that, I can cut half the keyway out and then switch the spacer and the broach and do the other side which kinders gets me close to the 8mm and I will just finish it off with a hand file.
I drilled and milled out the slot and filed it to a snug fit for the spacer and broach, welded a cap on it and knurled the cap.
The rear shim still fits and fingers crossed it will work as planned.
It looks the business and I guess we will all know how well it works in a couple of days when next I get time to attempt cutting this keyway...
Your inventive. I like the broach guides without the collar better. I did a similar thing years ago, but instead of like you did, which is I think better, I milled the broach slot off center. So with that I did the first pass and then turned the guide bar over and used it to do a second pass to get the wider keyway. Your way with the spacer is something I didn't think of, I like it.
Shortbus, ,my reasoning behind the way I made the broach guide was that I could if wanted, make to narrow spacers to go each side of my guide and still achieve a single keyway cut using either of the two broaches that I own.
The broaches are something that I can not easily reproduce, but the guides are...
Boy, am I glad that last keyway cutting project is behind me now.
I must say if anything it was character building to do this job without all the actual equipment, but its done now and appears that it will work out just fine.
I did strike a problem using side by side broach cuts as they tended to try and centralise or follow the line of least resistance.
Due to the size of the keyway and its depth, I also needed to make up several different thickness shims to aid my progress.
I've since seen a comment after doing this job, from a guy who recommends making shims from steel box strapping.
He is of the opinion that is tensile and lends itself to making up good shims, especially for larger keyways.
Just thought I'd pass that on since it seemed like a good idea for strapping that generally nobody wants once a box/crate is opened.
Finally, I measured an cut the key to fit the new keyway and it fits a treat, I could not have hoped for better.
What I did need to do with my internal keyway once I had achieved the correct depth and almost the correct width except for that centralising issue. I got a piece of 8mm square tool steel (which was my desired width) and set it up with my guide and a small piece, of lets call it square bar stock to my desired dimensions (as a shim) and used my press to force it thru and cut out the small pieces of metal on each edge to square up the keyway.
I did put about a 10 degree sloped face on the cutting end and it did a really good job in one cut of cleaning out the keyway to perfect dimensions.
Yes, I hear you.
Hardly a plan looking back at it, just an idea that was made to work.
The time consumed doing it was huge, but the result is just great IMHO...

 Facebook
 Google
 GitHub
 Linkedin