Convert 1.5V AA device (Braun Face) to 3.7V 18650 rechargeable

Thread Starter

conandrum

Joined Mar 10, 2024
108
What are the expectations by not connecting LED -ve ?
The issue I am trying to avoid is when I screw the flashlight (part#1) into the PVC tube (part#2).
Due to the number of rotations I have to turn the parts, the tension on the wires causes damage (usually on the LED driver, where the wires are soldered - that's the weakest link).
Therefore I decided from the last prototype to use :
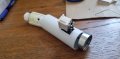
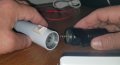
1. the body of the flashlight (part#1) to carry the battery -ve over to the PVC tube (part#2). This way there is no wire used and no damage can occur.
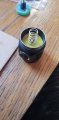
2. a spring on the body of the flashlight (part#1) can carry the LED +ve over to the PVC tube (part#2). This way there is no wire used and no damage can occur.
2025-03-21_01-12-25.jpg
BTW, I already connected it as I suggested above. I can say that I am 99% happy with it, all things considered.


Advantages:
1. Everything works fine.

Disadvantages:
1. Every 35 seconds power is reduced and keeps dropping. Easily fixed by restarting the flashlight (ie. has nothing to do with the battery!).
If I connect the motor straight onto the battery, there is no slowing down at the 35 second mark.
 
Last edited:
Thread Starter

conandrum

Joined Mar 10, 2024
108
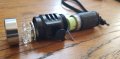
How I built this 2nd version:

1. I ordered 2 flashlights this time.
The 1st was the same as the previous flashlight (with a 18650 battery), whose driver got damaged.
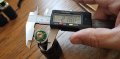
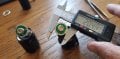
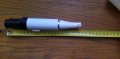
The 2nd one was a much smaller flashlight (with a 18350 battery). I chose this one because its head diameter was exactly the same as my PVC tube inner diameter. This would ensure a perfect fit/connection without having to heat/deform the pipe.
20250313_133957.jpg

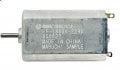
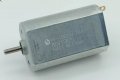
2. I also got 2 new 3.7V Mabuchi motors. As mentioned in previous posts, it would be much easier to replace the motor with a 3.7V version instead of trying to add electronics to convert DC from 3.7V down to 1.5V.
I ended up using the FF-180SV-2290 because the rotation speed sounded lower when used with a 3.7V battery.
Still it sounded faster and much stronger than the anaemic original motor at 1.5V. :)

2025-03-21_13-12-53.jpg2025-03-21_13-13-44.jpg

3. Unfortunately, the LED driver in this new flashlight would not turn either of the 2 new 3.7V Mabuchi motors I bought. So I went back to my first flashlight and tested them - the LED driver was able to run them just fine! So I now had to swap LED drivers between the 2 flashlights.
The size difference was small and I used my Dremel on the inside walls of the flashlight to get a nice fit.
I also had to shave off some silicone from the inside of the ON/OFF button (easily removable - just pop the ring out).
20250313_134425.jpg
20250313_134457.jpg

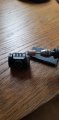
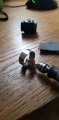
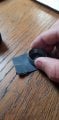
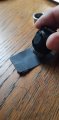
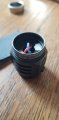
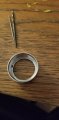
4. I now had to transfer the battery -VE to the top aluminum threaded head. To do this I had to remove the black paint from the threads on both parts so that there was actual contact between them.
20250319_161249.jpg 20250319_161333.jpg20250319_161345.jpg20250319_161357.jpg20250319_161408.jpg

Continued below...
 
Last edited:

Thread Starter

conandrum

Joined Mar 10, 2024
108
5. I had to create the actual contact points/surfaces that would connect the flashlight to the PVC/motor.
a) the flashlight head needed 2 output wires (-ve and +ve).
The -ve wire had to be connected to the aluminum head itself so that it would connect to the rest of the body and to the battery.
So I drilled a 1mm hole and soldered a wire (soldering on aluminum is not impossible - I used the mineral oil trick.)
b) The +ve had to be connected to a contact plate insulated from the rest of the head. The contact plate I took from the previous build and comprised of a metal washer with a soldered wire in the middle, all covered in hot glue except for its centre where contact will be made. The +ve contact plate in the head should contact the +ve of the battery when the head and body are screwed together.
c) The flashlight body needed a spring to be soldered to the +ve wire. The spring was fixed onto a plastic base (cut out from a milk carton cap) and set in place with hot glue. This made it very sturdy.
d) Screwing the 2 parts together is all that's required to connect the battery +ve and -ve to the 2 wires coming out of the back side of the head.

20250319_210216.jpg20250319_210237.jpg20250319_210313.jpg20250320_114443.jpg20250320_114601.jpg

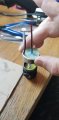
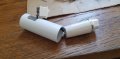
6. I then concentrated on the PVC part. I cut a new PVC piece and allowed enough space for the flashlight head before cutting a hole for the DPDT switch. I then made sure the tube was level on both sides (Makita & sanding disc). I then started soldering the 3 pieces together - motor, DPDT & flashlight head. I left enough wire on the motor so that it can be inserted last (wedged in).
I used epoxy to secure the flashlight head onto the edge of the PVC tube. I also used epoxy to secure the switch on the curved PVC tube surface. The motor was just wedged into the PVC tube.
20250320_141704.jpg20250320_141718.jpg20250320_142611.jpg20250320_142650.jpg

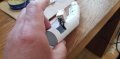
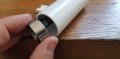
7. Lastly I just screwed the 2 pieces together and powered on.
20250320_180004.jpg

Very strong torque and speed! Much more powerful than the original!
Long lasting battery.
USB-C Rechargeable.
Smaller than the 18650 version! Very convenient size.
(one could leave out the DPDT switch for size savings, but I find it useful)
 
Last edited:

Top