Odd Question for an Odd Problem: Making an Old Scoreboard into a Clock

Jon Chandler

Joined Jun 12, 2008
1,608
I probably missed this back in the thread - what is the timebase for the original clock? What generated the timing signals to the rotary solenoids? Is there a synchronous motor and cam assembly in there somewhere?
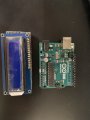
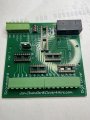
A separate control box controlled the count down timer digits which is not available. Because the Ledex switches are wired to count down (i.e., a pulse decrements the digit displayed), when used as a clock, the Ledex switch must pulse through 9 digits to increment a digit. Those things are LOUD, it would sound like a machine gun burst every time a digit changed.

My EE friend is fond of saying "There are many ways to skin the electronic cat." To which I have to add, there is no one "best" method. It's like debating whether Coke or Pepsi is best; I prefer RC. What's "best" depends on what works for the person doing it.
 

Jon Chandler

Joined Jun 12, 2008
1,608
A little cleanup and this board will be ready to send.

Do feel free to tell me all the things that aren't the way you would have done it and the thousands of ways it could have been accomplished better.

scoreboard digit driver pcb.jpg
 

Jon Chandler

Joined Jun 12, 2008
1,608
I guess I'm really good at stopping a conversation!

Looks like the parts for each board will be around $10, and the boards will cost $5 to make 10.
 

Thread Starter

r8f1k

Joined Oct 1, 2023
164
I guess I'm really good at stopping a conversation!

Looks like the parts for each board will be around $10, and the boards will cost $5 to make 10.
Boards look great! Sounds good and how would we proceed with a purchase to ? I assume these are strictly the drivers, have you decided what would interface would be best to control the remainder of the functions? Also, any way to incorporate fuses into this set up?
 

Jon Chandler

Joined Jun 12, 2008
1,608
I'll get the board finished up today or tomorrow – some of my own projects need some attention. I changed one of the parts to make it easier to get.

I'll send you the Gerber files that you can send to JLCPCB to get the boards fabricated, and a parts list of the parts you'll need to assemble the boards (with sources).

If you'd like, you can reuse the existing fuse board to fuse the 12v supply line, although honestly, switching power supplies are pretty good at self-preservation. If you try to draw too much current, they say nope and cut the voltage down.
 

Thread Starter

r8f1k

Joined Oct 1, 2023
164
I'll get the board finished up today or tomorrow – some of my own projects need some attention. I changed one of the parts to make it easier to get.

I'll send you the Gerber files that you can send to JLCPCB to get the boards fabricated, and a parts list of the parts you'll need to assemble the boards (with sources).

If you'd like, you can reuse the existing fuse board to fuse the 12v supply line, although honestly, switching power supplies are pretty good at self-preservation. If you try to draw too much current, they say nope and cut the voltage down.
Got it. I was able to find the same power supply part number on eBay for $15. Looked new. Thank you for your efforts!!! Keep me posted on the boards when you have time, no hurry. I'm going to be waiting for bulbs and sockets for a while.
 

MisterBill2

Joined Jan 23, 2018
27,651
Removable fuses provide a secondary benefit of being an easy way to disconnect power from some section of a system while providing protection against some excess current conditions. Two useful benefits. Locating a fault is simplified by the disconnection option.
 

Thread Starter

r8f1k

Joined Oct 1, 2023
164
I'll get the board finished up today or tomorrow – some of my own projects need some attention. I changed one of the parts to make it easier to get.

I'll send you the Gerber files that you can send to JLCPCB to get the boards fabricated, and a parts list of the parts you'll need to assemble the boards (with sources).

If you'd like, you can reuse the existing fuse board to fuse the 12v supply line, although honestly, switching power supplies are pretty good at self-preservation. If you try to draw too much current, they say nope and cut the voltage down.
Thinking about the displays and testing them. Is there a way that the boards could be set up with a dip switch to flash or keep the lights on? That way the bulbs could be checked for burned out units/faulty sockets. If I'm too late in the process, no sweat.
 

Jon Chandler

Joined Jun 12, 2008
1,608
That is best done in the software in the controller. It will be easy to write a routine to cycle through bulbs one at a time, or to light them all up.

I can guide you in developing that software, but I'm not going to do it for you. If you use an Arduino, there are many examples and modules to make it easy to implement.

Keep in mind – these digit boards CAN ONLY BE USED WITH THE LED LAMPS DRAWING 50mA or LESS. IF OPERATED WITH ANY INCANDESCENT BULBS THE BOARDS WILL BE FRIED.
 

Jon Chandler

Joined Jun 12, 2008
1,608
Here are all the files you need to have the (bare) circuit boards fabricated, parts lists for all components, a BOM showing what each part on the board should be, a board drawing and a schematic.

To order the boards, upload the Gerber.zip file to JLCPCB.com - upload the zip file as is. Don't unzip it. Choose quantity 10 for the boards; you'll need 8.

For the most part, the parts lists show the parts required for ONE board.

All ICs are mounted in sockets.
 

Attachments

MisterBill2

Joined Jan 23, 2018
27,651
The time counting can also be done without any processor programming, just a few digital IC devices. And since only one clock is needed, that should not be such a big deal.
 

Jon Chandler

Joined Jun 12, 2008
1,608
The time counting can also be done without any processor programming, just a few digital IC devices. And since only one clock is needed, that should not be such a big deal.
@MisterBill2 's suggestion is awesome, just completely incompatible with the digit boards I have designed. I won't be hurt if you choose to proceed that way. Perhaps he will share a schematic showing exactly how easy it is.
 

Thread Starter

r8f1k

Joined Oct 1, 2023
164
That is best done in the software in the controller. It will be easy to write a routine to cycle through bulbs one at a time, or to light them all up.

I can guide you in developing that software, but I'm not going to do it for you. If you use an Arduino, there are many examples and modules to make it easy to implement.

Keep in mind – these digit boards CAN ONLY BE USED WITH THE LED LAMPS DRAWING 50mA or LESS. IF OPERATED WITH ANY INCANDESCENT BULBS THE BOARDS WILL BE FRIED.
Understood on the incandescent bulbs. I have an Arduino Uno with a small digital display.
 

Jon Chandler

Joined Jun 12, 2008
1,608
Looks like that will do the trick. To make things easy, a 5 volt part will save some level shifting, and it looks like this is.

The first thing to look at is how to control the MCP23017 port expander chip. When you get that mastered, you can work on a lamp test routine. The I2C address of each board is set with DIP switches – each of the 8 boards in the scoreboard must be set to a different address....then it's merely setting bits in a 16 bit word to control which group of lights are illuminated.

Maybe the best next step is getting one of those MCP23017 modules you posted, and a DS3231 clock module. Work with those a little to be sure this will be doable for you before you order the boards and parts.
 

MisterBill2

Joined Jan 23, 2018
27,651
OK, I must have missed the description of the data format that the boards were designed to accept. Typical counters canprovide binary or decimal or BCD, with almost equal ease.
Or do those boards require segment drive? That is entirely possible as well.
 

Jon Chandler

Joined Jun 12, 2008
1,608
I've described it several times here so I feel no need to do so again.

The interface connector is clearly labeled "I2C Interface", the chip on the board as an MCP23017 I2C port expander", etc., etc., etc.
 
Top