Building my own spark plug tester. (And understanding ignition coils.)

Thread Starter

rebelrider.mike

Joined Feb 2, 2024
53
This is a learning project more than anything. It all started when I saw a You Tube video (this is how I usually get into trouble) featuring a vintage home-made spark plug sparking machine. I wondered if I could build one. I looked into buzz boxes, and autotransformers, and several schematics around the internet that look something like this:
Sparkplug Tester.jpg

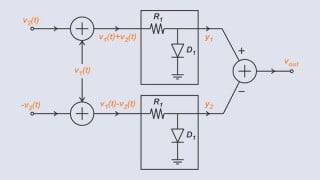
I suppose I could build one like this, but I don't have an ignition coil laying around, and I'd rather not buy one. I also don't really understand what the capacitor is for. I've read different reasons for having one, but I don't know if they're all correct, or none, or somewhere in between:
  • The capacitor is there to keep the points from arcing.
  • The capacitor is there to stop fly-back current.
  • The capacitor is there to make the spark "hotter".
Honestly, I really only know what the first one even means. I've also noted that in the above diagram, the capacitor is placed between the switch and the primary positive of the coil. If I remember right, in an older car or lawn mower, the capacitor is between the coil positive and ground.

I also read that air pressure makes a big difference in how much voltage is needed to make a spark. In several sources it has been said that 3kV are needed to make a spark jump 1mm through air at sea-level. But inside an engine, with compressed air and fuel, more than 20kV are needed. If this is true, a store-bought ignition coil would be overkill to make a spark plug tester.

I have wound my own AC transformers before, once I understood the math behind them. I use this formula:
T/V = 1 / (4.44 *0.0001 * ca * B * f)

  • T/V is turns per volt.
  • 4.44 is a constant derived from some kind of calculus I don't understand. Though it's meant to be used for low frequency transformers, like around 50-60 Hz. Transformers in the kHz range use a constant of 4 for some reason.
  • 0.0001 is a conversion factor to make all the units cancel out properly.
  • ca is the core area. That is, the cross-section of whatever the wire is actually wrapped around. This is measured in sq. cm.
  • B is the measurement of magnetic flux, or saturation. Something like that. From what I've read, it can be measured in Gauss, or Webbers per square meter. In the above equation it's W/sq m, and for iron with silicon in it, the measurement is usually around 1.2.
  • f is the AC frequency going through the transformer. Where I live, that's 60 Hz.

So right away, I see potential problems with a DIY ignition coil.
  • First, it's not operating on AC. Its running on switched DC. While AC has two points per cycle where the voltage is 0, a single DC cycle has only one 0v point. So would I double the frequency to compensate?
  • Second, I don't know the frequency of the on/off voltage. In a car that would be whenever a spark plug fires, which is variable with the RPMs of the engine, and how many plugs there are. In the diagram above, I have no idea how many times per second that relay is switching on and off.
  • Third, if the frequency is really high, I may need to use the constant 4 instead of 4.44. Not sure how big of a difference that would make.
  • Fourth, I've read in different places that a DC transformer doesn't use turn ratios to determine the output voltage. But everyone is quite vague as to what is used instead. How can that be true.

Anyway, what I'm getting at is that I'd like to make my own ignition coil with around 5kV output. Though I'm not entirely sure how to go about it. I'm not sure the equation I usually use applies here.

One thought I had was to replace the relay in the above diagram with a small motor with a lever that pushes on a momentary switch X number of times per second. Then I could fine-tune and predict the frequency for the transformer. I imagine such a contraption might look something like this:
Sparkplug Tester 2.jpg

I added a fuse because melting stuff is only fun when I do it on purpose.

To actually build this thing I'll need to source a core and some wire. I'll also need to figure out what type of capacitor to use, as well as it's capacitance and voltage rating. I'll need to know the Amps traveling through each wire so I can size them appropriately. I'll need a momentary switch robust enough to be switched on and off several times per second, at whatever Amps I'll need. I'll have to find a motor that can do the correct RPMs, and also find out what frequency I want to use. So I know what RPMs are correct.

I read somewhere that current from a 12V primary source could be between 2 and 10A, depending on who you ask. Though 12V is just a starting point because most engines run with 12V these days.

So what do you all think? I think if I do this I'll either learn a lot about ignition coils or else maybe set my hair on fire. (Or both.)
 

MaxHeadRoom

Joined Jul 18, 2013
30,559
I built a simple one, similar in appearance as @dendad , but for a electric fence ran on 12VDC.
I picked up a modern waste-spark coil version from a local auto wrecker.
Fires twice every 2 sec.
 

crutschow

Joined Mar 14, 2008
38,316
I also don't really understand what the capacitor is for.
The capacitor is there to prevent arcing across the point gap as they start to open, due to the otherwise very rapid rise in the voltage across the points caused by the energy stored in the coil inductance, which normally generates the high voltage for the spark plug. (For a typical 100:1 coil and a 20kV spark voltage, this gives a peak voltage across the points of 200V).
The capacitor absorbs the coil current initially as the points open, slowing down the voltage rise, so by the time the voltage increases to the sparking voltage, the points are too far open to create an arc.
Otherwise much of the coil inductive energy would be wasted in that arc, giving a weak or no spark.
Also the points would rapidly erode from that arc energy.

The capacitor is always connected directly across the points.

The capacitor is not needed, for example, if a transistor is used to switch the coil current, since the transistor switches much faster than the points do, and there is no gap for the arc to form.
 
Last edited:

Ian0

Joined Aug 7, 2020
13,097
I have wound my own AC transformers before, once I understood the math behind them. I use this formula:
T/V = 1 / (4.44 *0.0001 * ca * B * f)
You have wound transformers before, and you have the correct formula, but this is not a transformer, it is an inductor with two winding. Subtle, some would say pedantic, difference. A transformer transfers energy from primary to secondary: it stores (in theory) no energy. An inductor stores energy for one part of the cycle (points closed) then releases it through to the spark plug. The energy is stored in the air gap. In an ignition coil, it might not be obvious where the air gap actually is, but it goes all the way from one end of the core back to the other end.
First you need to know the permeance of the core, the inductance of s single turn, for which you need to measure the inductance of a winding with a known number of turns (n) divided by n^2
From that you can work out the inductance of the finished coil, the the rate of rise of the current, and then the amount of energy stored (I^L/2)
 

crutschow

Joined Mar 14, 2008
38,316
this is not a transformer
True, an ignition coil doesn't perform an AC power transfer function and is technically a coupled-inductor, but it's typically called a flyback transformer, and it acts like a transformer during the flyback time when the output voltage is reflected back to the input by the turns-ratio of the windings.
 
Last edited:

Ian0

Joined Aug 7, 2020
13,097
True, an ignition coil doesn't perform an AC power transfer function and is technically a coupled-inductor, but it's typically called a flyback transformer, and it acts like a transformer during the flyback time when the output voltage is reflected back to the input by the turns-ratio of the windings.
. . . And that, (the output voltage reflected to the input) not the input supply voltage is how you set the turns ratio.
 

Danko

Joined Nov 22, 2017
2,135
"Flyback transformer, or, line output transformers are a part of the power supplies in cathode ray tubes. The flyback transformer generates a high voltage, as needed by the CRT display or similar devices (e.g. plasma lamps). A flyback transformer generates a voltage between a few kilovolts to 50 kilovolts and uses high frequency switched currents between 17 kHz and 50 kHz.

The chief difference between a flyback transformer and main/audio transformer is that flybacks transfer as well as store energy, for a just a fraction of an entire switching period. The secret behind that is the coil winding on a ferrite core that has an air gap; it increases the magnetic circuit reluctance for storing the energy.

The reason it is called a flyback transformer is because the primary winding uses a relatively low-voltage saw-tooth wave. The wave gets strengthened first and then gets switched off abruptly; this causes the beam to fly back from right to left on the display."
https://www.act1.com/Flyback-Transformer.html
 

MisterBill2

Joined Jan 23, 2018
27,176
OK, a lot of comments made and not a single one asked just what the tester is supposed to prove about the plug under test. It will not measure leakage, it will not display breakdown voltage to arc and it certainly will not tell the condition of the series resistor in the core of the ceramic insulator.
A quite useful test of spark plugs can be done with the plugs still installed in the engine. The device to do the test may be as simple as a good VOM (Volts& Ohms Meter)You will need to disconnect the high voltage cable and clip the red meter lead to the connection on top of the spark plug. THEN you will need to connect the other meter lead to a solid connection to the engine block. Set the meter to the highest working resistance range, it should show an open circuit. A plug that is "bad" will show resistance, possibly several kilohms, maybe more. THAT tells you that it is not firing correctly. Now you need to check the resistance of the wire to the spark plug. For cars with distributors that is a two step check. With the ohm meter lead still connected to the engine block, check the resistance to the end of the lead that was on the spark plug. It should read open. If not, then there is a leakage path in the distributor cap. Then unplug the other end from the distributor cap, and connect the other meter clip to that end. The resistance should be just a few ohms if the wires are not resistor types, or several kilohms if they are resistor wires/
 

MaxHeadRoom

Joined Jul 18, 2013
30,559
I did not take away the idea the OP was refering to a plug tester , per-se?
I seemed more like a learning curve experiment for hi-voltage spark producing methods !
QUOTE:
" I think if I do this I'll either learn a lot about ignition coils "
 

MisterBill2

Joined Jan 23, 2018
27,176
OK, Max, that does make sense. But going to the effort of building a piece of equipment that is only marginally useful seems a waste to me. Better to design a transformer for a battery charger and produce an item that will b useful for many years, to many people, possibly.
 

LowQCab

Joined Nov 6, 2012
5,101
While it's true this may be a fine learning opportunity,
there really is no need to 'Test" any Spark-Plug.

If the Plug has anything darker than a light-Tan-color on the Porcelain-Insulator, it needs to be replaced.
There, You just "tested" the Plug.

And, it's usually a good idea to replace all of the other Plugs,
in a multi-Cylinder-Engine,
at the same time.

If You have an older-Engine that seems to foul Plugs too easily,
and You want to solve that problem,
that's an entirely different subject,
which, BTW, has only ~4 valid solutions.
Start a new Thread for the answers.

I can't recommend attempting to build your own Ignition-Coil.
It might be interesting, but it's completely useless otherwise.
.
.
.
 
Last edited:

Thread Starter

rebelrider.mike

Joined Feb 2, 2024
53
Thanks for all the responses!

For folks worried about me wasting my time, I'd rather waste it on a project than watching commercials on TV, LOL. I doubt I'd actually use it to test spark plugs in real life. I usually check the Ohms between the plug tip and the positive electrode. A resistor plug should be around 5 k-Ohms, and a non-resistor plug will be... I don't remember now. Somewhere between 5k and 0. And as was mentioned, resistance between the spark plug tip and the threads that go into the engine block should show open circuit. If that's all good, I clean and gap them and reinstall. That usually does the trick. The only time it didn't was when the plug wire was arcing to the engine. There was a big hole in the insulation, so that make it easy to figure out!

Anyway, this is a just for fun project where I might learn something. If I really don't like it, I can take it apart and use the bits for future projects. (I've done that before.)

So I should not be thinking of the coil as a power transformer, since they work continuously and the coil does not. That would also mean the frequency of on/off cycles doesn't matter. That makes sense as an engine could operate at lots of different RPMs.

First you need to know the permeance of the core, the inductance of s single turn, for which you need to measure the inductance of a winding with a known number of turns (n) divided by n^2
From that you can work out the inductance of the finished coil, the the rate of rise of the current, and then the amount of energy stored (I^L/2)
Inductance I should be able to measure. I have a gadget that does that.

Permeance, I found an equation, P= μA/ℓ where μ is the permeability, A is the cross sectional area, and ℓ is the length of the magnetic path. It took a lot of searching, but I finally found the units one is supposed to use (otherwise, the resulting number would be useless right?) Turns out it's whatever distance you want as long as it stays the same for each variable.
For example: Permeability H/m, Area m^2, length, m, and the resulting permeance will be in H. It seems that length is assumed to be continuous. That is, it's expected that the core will be a toroid or EI shaped with minimal air gap, if any. I'll be using come kind of rod. I guess that will make the calculation less accurate, but I haven't found a solution to that yet.

This took me to permeability (μ) measured in H/m. So far, I have only found tables describing permeability of various materials. Most vary widely depending on their specific composition. I found that 99.8% pure Iron is relatively cheap and available for sale. And it only has 1 ingredient, so the permeability should always be around 0.0063 H/m. If I used an iron rod 6"x0.47", after conversions and math, I would have a permeance of 0.000212 H/m.

How am I doing so far? Anything wrong?

So my next step would be figuring out how much inductance I need and how many turns I need to get it. Is that linear? like 10 turns is 10x the inductance of 1 turn?

I may look into how boost converters work. It sounds like that is very similar to what I'm trying to do here. I'm done for tonight though. My head noodle is as stuffed as a ravioli.
 

Ian0

Joined Aug 7, 2020
13,097
.

Permeance, I found an equation, P= μA/ℓ where μ is the permeability, A is the cross sectional area, and ℓ is the length of the magnetic path. It took a lot of searching, but I finally found the units one is supposed to use (otherwise, the resulting number would be useless right?) Turns out it's whatever distance you want as long as it stays the same for each variable.
For example: Permeability H/m, Area m^2, length, m, and the resulting permeance will be in H. It seems that length is assumed to be continuous. That is, it's expected that the core will be a toroid or EI shaped with minimal air gap, if any. I'll be using come kind of rod. I guess that will make the calculation less accurate, but I haven't found a solution to that yet.

This took me to permeability (μ) measured in H/m. So far, I have only found tables describing permeability of various materials. Most vary widely depending on their specific composition. I found that 99.8% pure Iron is relatively cheap and available for sale. And it only has 1 ingredient, so the permeability should always be around 0.0063 H/m. If I used an iron rod 6"x0.47", after conversions and math, I would have a permeance of 0.000212 H/m.

How am I doing so far? Anything wrong?

So my next step would be figuring out how much inductance I need and how many turns I need to get it. Is that linear? like 10 turns is 10x the inductance of 1 turn?

I may look into how boost converters work. It sounds like that is very similar to what I'm trying to do here. I'm done for tonight though. My head noodle is as stuffed as a ravioli.
Permeance =1/Reluctance, and the total reluctance is the sum of the reluctance of the core (very small) and the reluctance of the gap (large and unknown, because it is very difficult to measure the path length and cross sectional area between the two ends of the core) so you wind a test inductance and calculate Reluctance and Permeance as I said above.

Then you need to decide how much energy you want to store, and work out the inductance you need, and see if you can get that amount of energy stored in the time you have, given the supply voltage.
 

Thread Starter

rebelrider.mike

Joined Feb 2, 2024
53
Ok, I see it now. Reluctance = (Number of turns)^2 / Inductance. And 1/R is Permeance. So the test inductance will find the total permeance of the rod and the air gap, Yes?

And once the Permeance is known, the number of turns can be calculated based on the desired inductance.
 
Last edited:

LowQCab

Joined Nov 6, 2012
5,101
"" That would also mean the frequency of on/off cycles doesn't matter. ""

False ........

There is a definite correlation between
the Time it takes to reach the Maximum-Designed-Current, and the Inductance.

As the Frequency gets higher, the amount of Power that gets stored becomes less.

This is one reason why Modern-Car-Ignitions are hard to beat,
there's much more Time to build-up a strong-Magnetic-Field when You have
multiple-Ignition-Coils all working in sequence,
instead of a single-Ignition-Coil firing multiple Cylinders.
.
.
.
 

SamR

Joined Mar 19, 2019
5,470
I remember an old garage in Montevallo, AL back in the 70s. The elderly gentleman who owned the shop (it was a small one that held at best maybe 3 vehicles at a time) had what I assumed was a handmade spark plug cleaner and tester bolted to the side wall. It was very old and was probably made when cars had 4 cylinders and Babbit bearings. You put the spark end of the plug in a hole of the wooden box and threw a toggle switch and it was a sand blaster to clean the plug gap. Then you put it into the plug fixture and threw the other toggle switch and the spark was generated as long as the switch was flipped on. A relic from the days when cars used a lot of oil and plugs often gunked up and fouled from too much cylinder blow by and valve stem leakage oil and quit sparking much if any at all. I don't know what the high voltage source was but I assumed it was a junked high voltage neon sign transformer.
 

Reloadron

Joined Jan 15, 2015
7,855
I remember an old garage in Montevallo, AL back in the 70s. The elderly gentleman who owned the shop (it was a small one that held at best maybe 3 vehicles at a time) had what I assumed was a handmade spark plug cleaner and tester bolted to the side wall. It was very old and was probably made when cars had 4 cylinders and Babbit bearings. You put the spark end of the plug in a hole of the wooden box and threw a toggle switch and it was a sand blaster to clean the plug gap. Then you put it into the plug fixture and threw the other toggle switch and the spark was generated as long as the switch was flipped on. A relic from the days when cars used a lot of oil and plugs often gunked up and fouled from too much cylinder blow by and valve stem leakage oil and quit sparking much if any at all. I don't know what the high voltage source was but I assumed it was a junked high voltage neon sign transformer.
Good story. When I was a kid about 15 so maybe 1965 I worked at an Exon service station and we had a similar setup. The plugs were first sandblasted and cleaned. Then the plugs were screwed into a small tank with a window where the plug could be observed firing. The tank also had an air supply allowing tank pressure to increase duplicating the compression stroke inside an engine. Pretty cool older classic stuff. :)

Ron
 
Top