What did you repair today ?

MisterBill2

Joined Jan 23, 2018
27,905
I came up with a "quick fix" work-around for a microwave oven in a rental property.

The verified complaint was that after putting something in to heat, setting the time, and pressing start, the heating did not start, but the display demanded " Open and Close the Door". This indicated a failure of the door closed sense switch. Since this was a large, built in, rental property, appliance I was reluctant to go any farther, given that the landlord refused to replace or service the built-in.
I discovered that a slight lifting force on the door while closing it was enough to convince the controller that the door was correctly closed. (WHICH CERTAINLY IT WAS CORRECTLY AND FULLY CLOSED). SO, I demonstrated that to my client, who was able to duplicate the effort, allowing normal operation of the microwave oven.
It was a "PANASONIC" brand appliance, for those who may be interested.
Not an actual repair, but certainly a valid "Quick Fix"
 

MrChips

Joined Oct 2, 2009
34,987
I came up with a "quick fix" work-around for a microwave oven in a rental property.

The verified complaint was that after putting something in to heat, setting the time, and pressing start, the heating did not start, but the display demanded " Open and Close the Door". This indicated a failure of the door closed sense switch. Since this was a large, built in, rental property, appliance I was reluctant to go any farther, given that the landlord refused to replace or service the built-in.
I discovered that a slight lifting force on the door while closing it was enough to convince the controller that the door was correctly closed. (WHICH CERTAINLY IT WAS CORRECTLY AND FULLY CLOSED). SO, I demonstrated that to my client, who was able to duplicate the effort, allowing normal operation of the microwave oven.
It was a "PANASONIC" brand appliance, for those who may be interested.
Not an actual repair, but certainly a valid "Quick Fix"
Or you can apply two possible fixes.
1) Adjust the position of the door micro switches.
2) Fix the sag on the door.

I had one client with the same problem. The solution was number (2). Someone had replaced the door and bent the door hinge.
 

cmartinez

Joined Jan 17, 2007
8,814
Today's great accomplishment was replacing the batteries in the key fobs for my Tahoe. :) Better now that waiting for one to fail.

Ron
A friend of mine just told me a tip about the small "coin batteries" used in those fobs ... he said that the manufacturers apply a small amount of a substance that makes them taste bad in case a small child ever has the thought of popping one into their mouth. And that said substance can sometimes turn into a film that prevents the battery's surface from making proper contact with the electrodes. So it's good practice to rub and clean those new batteries with isopropyl alcohol prior to installing them.
 

joeyd999

Joined Jun 6, 2011
6,390
A friend of mine just told me a tip about the small "coin batteries" used in those fobs ... he said that the manufacturers apply a small amount of a substance that makes them taste bad in case a small child ever has the thought of popping one into their mouth. And that said substance can sometimes turn into a film that prevents the battery's surface from making proper contact with the electrodes. So it's good practice to rub and clean those new batteries with isopropyl alcohol prior to installing them.
Thanks! I did not know this!
 

Reloadron

Joined Jan 15, 2015
7,893
A friend of mine just told me a tip about the small "coin batteries" used in those fobs ... he said that the manufacturers apply a small amount of a substance that makes them taste bad in case a small child ever has the thought of popping one into their mouth. And that said substance can sometimes turn into a film that prevents the battery's surface from making proper contact with the electrodes. So it's good practice to rub and clean those new batteries with isopropyl alcohol prior to installing them.
Yep, I did that and the CR2032 batteries I used actually have a sticky tab that needs removed. :) Thanks for the heads up which may help others.

Ron
 

MisterBill2

Joined Jan 23, 2018
27,905
Or you can apply two possible fixes.
1) Adjust the position of the door micro switches.
2) Fix the sag on the door.

I had one client with the same problem. The solution was number (2). Someone had replaced the door and bent the door hinge.
Simply removing the wall mounted LARGE microwave oven would be a two person task. In addition, the property owner/landlord, is unwilling to pay for any repairs and very unwilling to do them. So until I can spot a serious code violation and blackmail them to make a repair, lifting up the door a speck is the fix.
There is also a non-functional built in dishwasher that they refuse to deal with.
 

AlbertHall

Joined Jun 4, 2014
12,638
"beer" fridge 'fixed'
I'm not sure if this counts as a fix, but it wasn't working and now it is!
It was powered by a switch mode supply which was faulty. Output read short circuit - output capacitor and rectifier both faulty but knowing SMPS that may not be all.
It has a socket for an external 12V supply so I found a suitable supply and the right socket to fit the fridge and it is off and running again.
 

SamR

Joined Mar 19, 2019
5,516
Was tuning up my antenna matcher to my XCVR last night and noticed that the XCVR was stuck on transmit. Turned the rig on and off a few times with it still stuck on transmit. Browsed through the service manual a few times with no real insights gained. So... I had a suspicion that it was a relay problem as sometimes I could hear relay chatter when I would try to tune and forgetting to dial the transmit power down below ~20W. Bunch of relays in the rig including a relay for each of the input/outputs for band switching each of the 10 bands the radio covers. No troubleshooting information in the service manual but pics and schematics of each of the boards so I knew what to look for. Removed the top cover and discovered a faraday plate sealing off the aluminum frame of the radio. Removed the bottom cover and found what I was looking for. This rig is almost entirely 4-6mm? surface mount components and tiny relays. Not much of chance in hell of easily removing boards and tracing shorts so I tapped sharply on the suspected relay cases of the tuning section and reconnected power and coax. Turned the rig on and it is out of transmit. I switched transmit and antenna tune on and off a few times at low power and it didn't "stick" so crossing fingers that the problem is solved for now!
 

MisterBill2

Joined Jan 23, 2018
27,905
Was tuning up my antenna matcher to my XCVR last night and noticed that the XCVR was stuck on transmit. Turned the rig on and off a few times with it still stuck on transmit. Browsed through the service manual a few times with no real insights gained. So... I had a suspicion that it was a relay problem as sometimes I could hear relay chatter when I would try to tune and forgetting to dial the transmit power down below ~20W. Bunch of relays in the rig including a relay for each of the input/outputs for band switching each of the 10 bands the radio covers. No troubleshooting information in the service manual but pics and schematics of each of the boards so I knew what to look for. Removed the top cover and discovered a faraday plate sealing off the aluminum frame of the radio. Removed the bottom cover and found what I was looking for. This rig is almost entirely 4-6mm? surface mount components and tiny relays. Not much of chance in hell of easily removing boards and tracing shorts so I tapped sharply on the suspected relay cases of the tuning section and reconnected power and coax. Turned the rig on and it is out of transmit. I switched transmit and antenna tune on and off a few times at low power and it didn't "stick" so crossing fingers that the problem is solved for now!
The very first thing to check when a radio sticks in transmit is the microphone push to talk switch.Next would be the cord connecting it to the radio.
Sometimes RF gets into the T/R circuit and can cause problems.
AND some times relays may fail to function correctly.

As for removing boards, prior to doing that you do need a suspect to look for.
 

nsaspook

Joined Aug 27, 2009
16,405
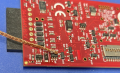
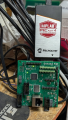
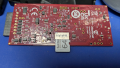
Released the Magic Smoke on a programmer.

D12 was smoked. A little flux and solder wick to get rid of excess solder before removing the device.
1755959214330.png

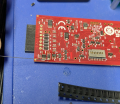
Out with the dead, in with the new.
1755959269882.png

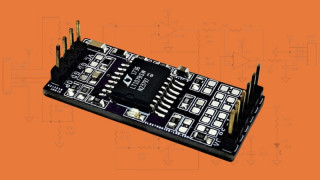
This is what's needed for the vast majority of PK4 repairs, with the Zener D12 being much more likely to be the issue.
1755959356498.png1755959372067.png
Back to work PK4.
 

SamR

Joined Mar 19, 2019
5,516
The bulb that lights the meter on my double needle Daiwa SWR/Watt meter was blown. Apparently a fairly common problem and not so easy to replace as it is soldered in on the face of the meter. So... Not too bad a disassembly and found the schematic. The bulb comes right off the 13.8V supply socket. No idea as to where the bulb comes from as no part numbers listed on the schematic and component is a very small axial wired incandescent bulb. But there is a good bit of space between the mounting terminals so I soldered 4 3mm LEDs together and seriesed a 100Ω resistor in and the circuit uses ~17mA and won't need replacing again. It was a real bear getting the front cover back on the meter with the adjusting screw cams of both needles in their respective slots in the adjusting mechanism of the meter. Must have tried more than a couple dozen times before I got it right!
 
Last edited:

MrChips

Joined Oct 2, 2009
34,987
The bulb that lights the meter on my double needle Diawa SWR/Watt meter was blown. Apparently a fairly common problem and not so easy to replace as it is soldered in on the face of the meter. So... Not too bad a disassembly and found the schematic. The bulb comes right off the 13.8V supply socket. No idea as to where the bulb comes from as no part numbers listed on the schematic and component is a very small axial wired incandescent bulb. But there is a good bit of space between the mounting terminals so I soldered 4 3mm LEDs together and seriesed a 100Ω resistor in and the circuit uses ~17mA and won't need replacing again. It was a real bear getting the front cover back on the meter with the adjusting screw cams of both needles in their respective slots in the adjusting mechanism of the meter. Must have tried more than a couple dozen times before I got it right!
A photo of the meter lit up would be nice to see.
 
Top