What did you repair today ?

wayneh

Joined Sep 9, 2010
18,181
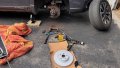
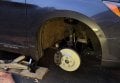
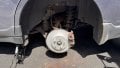
Completed a rear brake job on my 2017 Outback. It was the easiest brake job I've ever done but there was one wrinkle: The modern parking brake system ditches the old cable pulls for an electrical motor driving a worm gear to advance the caliper piston.
You need to have the computer retract the piston so that you don't destroy the mechanism when you squeeze the caliper open to make room for the new pads and rotor. So I had to buy a fancy scan tool to communicate to the car's computers. My old $10 OBD code reader device couldn't handle it.

The job was easier than back in the day mostly because of design. No more cable, no self-adjusting wheel, no springs to fight against. Inserting the new parts and holding them in place as you reassemble used to be awkward. Now it's easy - the parts are designed to ride together and hold themselves in place during assembly. Easy peasy.

By far the hardest part of the job was pounding the old rotor off. It got easier when I pre-treated the lug nut bolts with Liquid Wrench. The threads carried the penetrant to the inside surfaces of the rotor where it was 'frozen' to the hub face. Capillary action spread it all over nicely. Next time I'll do that much earlier in the process. Smarter not harder. I know some people just get a bigger hammer but I never feel comfortable doing that. The wheel bearings have to absorb some fraction of the impact and I'm not keen to add to their wear.

I always apply a thin film of anti-seize to the mating hub and rotor surfaces when I rebuild. But I've never had to re-do one of my brake jobs and so I don't know if that really makes any difference.
IMG_0153.jpeg
 

Thread Starter

Externet

Joined Nov 29, 2005
2,681
My own old smallest cheap 5000 BTU window air conditioner. Noisy. Selected 'fan only' = same noise. So it is not the compressor.

On a search for part numbers, vendors, videos or instructions to replace blower bearings, here comes the Artificial Imbecility result telling the cost to repair exceeds any reasonable figure, the bearings are not listed in the available parts nor meant to be replaced and that 'a window air conditioner is a disposable appliance'. Checked for replacement motor = Over $135. (no labor) Similar new, complete air conditioner with warranty is ~$140.
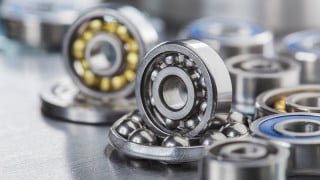
Well, ordered the bearings for the grand sum of $0.60 each delivered. Came in today. Almost an hour in surgery. Dismantled the blower motor and had some fun. Works as new. That is what A.I. awards to laziness, land fills and ripoffs to the next generation.

1789241968237.png
 

joeyd999

Joined Jun 6, 2011
6,485
Almost an hour in surgery.
That needs to be factored into the overall cost (as well as the time researching the solution).

Perhaps you enjoyed that hour, or perhaps you could have spent it more profitably. Your choice.

This is the fundamental nature of economics.
 

wayneh

Joined Sep 9, 2010
18,181
Today at a repair café, I fixed two house lamps, a blow dryer, an AM/FM radio, and a stained glass window panel.
Is part of that activity teaching the client to repair their own appliance in the future? I fear it is a disappearing "art". I'm just about the only person I know that fixes things anymore.
 

MrChips

Joined Oct 2, 2009
35,276
Is part of that activity teaching the client to repair their own appliance in the future?
Yes. In theory, we try to do that. In practice, here is what happened.

1) For one of the lamp repairs, the rotary switch in the socket was bad. I showed them how to replace the lamp socket.

2) On the second lamp, I showed them how to clean the center contact in the socket and how to bend it upwards to make better contact with the base of the bulb.

3) With the stained glass repair, the owner held the frame steady, another volunteer held the hanger ring with locking pliers, while I soldered the ring back on to the frame.

4) The problem with the blow dryer was the user not knowing which button was the ON/OFF switch. I took the time to explain the function of all switches.

All of them were seniors who were not too inclined to learn new skills. A standard rule across all repair cafés is that the owner has to be present during the repair. They cannot just drop off the item, take off, and return later. We make an effort to keep them entertained during the repair session.
 

atferrari

Joined Jan 6, 2004
5,031
That needs to be factored into the overall cost (as well as the time researching the solution).

Perhaps you enjoyed that hour, or perhaps you could have spent it more profitably. Your choice.

This is the fundamental nature of economics.
With due respect to all parts involved (AI, their trainers, and participants in the thread) ignorance also counts and should be factored somehow.
 

Thread Starter

Externet

Joined Nov 29, 2005
2,681
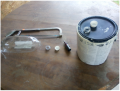
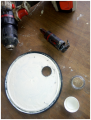
Every time that I needed to deal with paint; was the same unavoidable messy spills. Today I fixed the always nasty situation.

Cut-off 2 litre soda bottle necks; drilled 25 mm holes on lids and force inserted from inside. Made a couple.

1789753479072.png1789753584460.png
The lid can be transplanted to a next paint can when emptied. No need to make many. Simpler in plastic than metal lids. Am happy, this has to be a good thing. :D
 

panic mode

Joined Oct 10, 2011
5,420
nice idea. my wife does all the paintwork, she loves it as much as experimenting with colors. will do the same to make her life easier.
 

MrChips

Joined Oct 2, 2009
35,276
I'm in the middle of house painting and I noticed the lids are now made of plastic.
I will have to try this trick. I just have to start drinking soda pop in plastic bottles.
 

wayneh

Joined Sep 9, 2010
18,181
Started on the front brakes yesterday and discovered they're far trickier than the rears, mostly due to the use of shim clips. The rear pads went into place easily with little confusion of how they go in. The fronts are much different. I had to watch Youtube videos to see how they're all oriented. Each of 4 pads is unique: left and right, inside and outside. Integral springs that need to ride on the shim clips, etc. The clearances were such that they have to be coaxed/forced into place. What a pain.

Also, the rotor was harder to remove than the rear. It's also much larger, and so I had to break out the BFH, the Big EffingHammer. One trick I learned, in addition to getting Liquid Wrench into the space between the rotor and the hub, was to apply the hammer to the rotor "cap", perpendicularly to the axle. The goal of hammering is to break the bond that forms between the rotor and the hub, and I think the rotor is less able to absorb the hammer's energy when you hit the center cap than when you bang on the outer rim. More energy goes into breaking that bond.

I got one wheel done as planned but I had to pull out a work light to finish the job. Shorter days now.
IMG_0265.jpegIMG_0266.jpeg
 

wayneh

Joined Sep 9, 2010
18,181
My wife's friend has a Nespresso coffee maker that was making a horrendous noise. I didn't realize beforehand but discovered that these things use a centrifuge to drive the hot water through the coffee grounds, which are held in place, in the spinning cup, by the centrifugal force. No filter needed. Pretty clever. It puts a wonderful froth on the coffee.

Anyway, there is a bearing that holds the spinning assembly. That assembly houses a centrifugal pump to draw the water from its reservoir. The spikes that puncture the pre-loaded cups also spin. Thanks to the internet, it didn't take me long to focus in on that bearing as the likely noise source. The motor and whatever bearings it might have probably last "forever" but many, many user posts make it clear that the upper bearing is the likely culprit. There are several Youtube videos covering the exact model and procedure I needed to follow. One pet peeve: These videos often gloss over the really challenging steps.

The bad news is that these machines are designed to not just be challenging to open up. In my opinion they are specifically designed to make it almost impossible to take them apart. For instance, most of the screwheads are not T-10 torx like anyone has, but T-9. And to boot they have the anti-tamper peg in them. So right off the bat I had to buy a toolkit containing the T-9. The outer glossy plastic shell is held on by various hidden clips and there's almost no way to take it off without damaging some of that.

More bad news came when I realized I had ordered the wrong bearings. They fit a similar model but not mine. Had to reorder. In the course of all that, I learned about bearings. Nearly all you find on Amazon are the lowest quality level, ABEC 1. I finally found the size I needed at ABEC 5. A few dollars more but a trivial premium compared to the work involved to replace it. No way did I want to go cheap and find myself doing this job again in a few years when I'll have forgotten all the tricks I learned.

One interesting note, the smart electronics of this thing are all in the very top just under the big button the user hits to make coffee. Only the motor is below.

Long story short, the machine is quieter than it ever was and works fine. We'll see how it lasts but for now I'm a hero.
 
Top