High Current PCB Etching

Thread Starter

Guest3123

Joined Oct 28, 2014
404
I've never did anything with PCB Etching yet because I always thought that PCB etching was for low current applications.

I've build 4 Box Mods, the last one (MK 4) being built with a 430 Watt EVGA ATX PSU.

The Mosfet, is very difficult to work with in small enclosures like the 1590B. It took me 3 hours to get everything in the enclosure, and the mosfet was installed upside down, and the legs or leads on the mosfet were bent. It works. No problems.

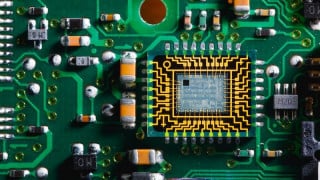
I want to try my hands at making a PCB using the Laser printer method. I've watched several videos on YouTube, and understand the process.

I want my PCB traces to handle currents as high as 60A. I understand that there's PCB trace calculators, but I had a hard time understanding them.

I'm also aware that my traces doesn't necessarily have to be wide, but think. But I'm not aware of how thick.


So.. I wanted to do something like this. The 30A fuse is inline with the cable going back to the psu.

Hunted000734.jpg Hunted000735.jpg


Connects to the 430 Watt EVGA ATX PSU via XT60 & stranded 14 awg.

P1080333.JPG
P1080334.JPG
P1080336.JPG

Better Resolution
IMGUr Link : http://imgur.com/a/dEbUg
 

cmartinez

Joined Jan 17, 2007
8,759
What I do for high current applications on a PCB, is I manually bridge two points (that are already connected through a trace anyway) using a thick enough insulated wire. I normally bend and route the wire on the PCB using wire looping pliers, to prevent it from making accidental contact to a protruding soldered pin from other components that could puncture through the insulation.
 

Thread Starter

Guest3123

Joined Oct 28, 2014
404
Take a look at this post, it will give you a clear idea of one of many methods out there to produce PCB's using the toner transfer technique.
Thanks. Bu
What I do for high current applications on a PCB, is I manually bridge two points (that are already connected through a trace anyway) using a thick enough insulated wire. I normally bend and route the wire on the PCB using wire looping pliers, to prevent it from making accidental contact to a protruding soldered pin from other components that could puncture through the insulation.
Thats a good idea. But there's no way to do it without wires? Because that's what I would like to do, eliminate the need for wires altogether.
 

cmartinez

Joined Jan 17, 2007
8,759
Thanks. Bu


Thats a good idea. But there's no way to do it without wires? Because that's what I would like to do, eliminate the need for wires altogether.
You'd need extremely thick traces in the parts of your circuit that are supposed to carry high current. Also, you'd have to use high thickness PCB blanks to make sure that there's enough copper to handle the load.

Doing the calculation is not that hard. Copper, even with it's very high degree of conductivity, has a resistivity value that can be used to calculate how much power your trace would have to dissipate, and would allow you to get an estimate of how much the temperature in that trace would raise... I'd give serious thought to adding auxiliary wire if the temp raises above 60°C
 

SLK001

Joined Nov 29, 2011
1,549
You are headed for failure with that PCB design. There is NO WAY those traces could carry anything close to 60 amps. 8 gauge wire will have difficulty carrying 60 amps.

You need to step back and re-evaluate what you want to do and how.
 

Thread Starter

Guest3123

Joined Oct 28, 2014
404
You'd need extremely thick traces in the parts of your circuit that are supposed to carry high current. Also, you'd have to use high thickness PCB blanks to make sure that there's enough copper to handle the load.

Doing the calculation is not that hard. Copper, even with it's very high degree of conductivity, has a resistivity value that can be used to calculate how much power your trace would have to dissipate, and would allow you to get an estimate of how much the temperature in that trace would raise... I'd give serious thought to adding auxiliary wire if the temp raises above 60°C
Seems like a pain in the &^#.. But it's doable.

Box Mod Wiring AWG.jpg

Hunted000737.jpg
 

Thread Starter

Guest3123

Joined Oct 28, 2014
404
You can solder buss wire on top of the traces to increase their current carrying capability.

View attachment 108075

View attachment 108076
Very Nice. :)


You are headed for failure with that PCB design. There is NO WAY those traces could carry anything close to 60 amps. 8 gauge wire will have difficulty carrying 60 amps.

You need to step back and re-evaluate what you want to do and how.
How is it that electronics like the Hobby King Watt Meter can handle high current.. Probably because they know what they're doing.. and I don't.

The only thing I know how to do, is pass high current threw a switch using a nice mosfet. But that's easy compaired to complicated electronics like the power watt meter from hobby king.

HK-010-1.jpg

Specification:
Working voltage range: 0-60V
Working current range: 0-100A
Power: 0-6000W
Cell count: 1-6S
Battery type: LiPo/LiFe/LiIon
Weight: 140g
Dimensions: 103x49.5x20mm
Working temperature range: -20~50°C

Seems like a lot more than 60 amps to me. :)

youtu.be/kfs4Bs3H7gw?t=2m10s
 

Thread Starter

Guest3123

Joined Oct 28, 2014
404
What is your circuit? Talk more about what you want to do.
It's a box mod. Extremely popular nowadays.

There's a thing called an RDA (Rebuildable Dripping Atomizer) that screws into the threaded 510 connection, that has coils that the user builds or creates with a specific resistance using Kanthal A1 Resistance Wire. My build right now is 1.44 Ohm's because I'm using an EVGA PSU as my power source (12vdc).

It vapes. It draws about 8.33 Amps, and dissipates at the coils roughly 100 watts, with a voltage of 12vdc.

Right now.

The EVGA PSU or whatever power source can be anything. Right now my power source is an EVGA ATX PSU 430 Watt. I have a 30 Amp in line fuse, so it can't go past 30 amps, or roughly 350 watts.

Here's an example.. That's an RDA with dual coils, with eJuice soaked into the organic cotton. When the coils heat up, it vaporizes the juice, and produces vapor that people inhale.

Hunted000737.jpg

That RDA is connected to the 510 connection.

People are "ALWAYS" trying to build bigger and better box mods.

I am sick and tired of gymnastics inside these boxes or enclosures. Trying to fit everything into smaller and smaller boxes, while still being able to make a powerful box mod at the same time.

That's why I'm interested in PCB.. Or at least would like to make my first one. My interest in building box mods provides me with the go ahead to do this, because I have nothing else i'm interested in making "yet" with PCB's. So I figured I'd try this.

It's a good start, because not only will I build my first PCB, but I'll also learn how to make a PCB that can handle high current. etc.
 

recklessrog

Joined May 23, 2013
985
I have used copper desoldering braid tinned and applied to the traces to carry up to 15 amps @ 12 Volts, and once used the braided screen removed from heavy coax cable to do the same job in a 30 amp 15 Volt power supply.
Because it is flexible, it is very easy to apply, and follows bends in the trace with ease. Where it has to cross other tracks, I just put a small piece of Mylar underneath.
 

Thread Starter

Guest3123

Joined Oct 28, 2014
404
I have used copper desoldering braid tinned and applied to the traces to carry up to 15 amps @ 12 Volts, and once used the braided screen removed from heavy coax cable to do the same job in a 30 amp 15 Volt power supply.
Because it is flexible, it is very easy to apply, and follows bends in the trace with ease. Where it has to cross other tracks, I just put a small piece of Mylar underneath.
Thanks. I'll just do it that way then.
 

recklessrog

Joined May 23, 2013
985
Thanks. I'll just do it that way then.[/QUOTE

Make sure that the braid is right up to and even wrapped round the leads of the high current carrying components. I let the leads of the power transistors in my psu protrude through the board and wrapped the braid round them before soldering.
 

Lestraveled

Joined May 19, 2014
1,946
@Guest3123

Here is a chart that will help you understand what you are up against, once you wade through all the numbers.

For example, if your board has 1/2 ounce copper, then a 500 mil (1/2") wide trace will have the same resistance as a 23 Gage wire. How long will a 23 Gage wire last with 60 amps flowing through it? Not long.


cmartinez

Joined Jan 17, 2007
8,759
@Guest3123

Here is a chart that will help you understand what you are up against, once you wade through all the numbers.

For example, if your board has 1/2 ounce copper, then a 500 mil (1/2") wide trace will have the same resistance as a 23 Gage wire. How long will a 23 Gage wire last with 60 amps flowing through it? Not long.

Excellent reference, Les... it's so good that I'm going to save it in my own library.
Thanks!
 
Top