Diecast LED Diagram Build

Thread Starter

Kevuiiaa

Joined Aug 29, 2024
4
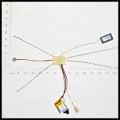
I have came across a video online where someone build a diecast police car with flashing led lights inside, with different police patterns and headlights coming on/ off, etc.
What is all used in that? Is this hard to do? I’m wanting to get into this, anywhere I can start ?
Please help me I would love to get into doing this
 

BobTPH

Joined Jun 5, 2013
11,480
Most likely a microcontroller. It would be very easy for many of us, how easy it would be for you depends on your experience. What experience do you have with electronics and / or programming?
 

Thread Starter

Kevuiiaa

Joined Aug 29, 2024
4
I have experience with electronics, I used to install custom leds and such on the Xbox consoles, but I’m sure it’s complete different .
 

boostbuck

Joined Oct 5, 2017
1,036
Seems like the kit has everything you need already assembled. Now all you need is a die-cast car to fit it into. Buy the car and you've got all you need to start.
 

Thread Starter

Kevuiiaa

Joined Aug 29, 2024
4
Yeah I planned to do that. But I wanna start building my own kits and my own stuff, I just don’t know where to start or anything like that. Nor how the different styles of lights are built and such .
 

Ya’akov

Joined Jan 27, 2019
10,226
Welcome to AAC.

While for anyone with the knowledge this is a simple project, it requires understanding of several different areas. If you want to design and build your own version of this you will need to learn these things first*”

Microcontrollers (also called an “MCU”, which means Microcontroller Unit)
In particular you will need to know:​
what an MCU is, and what it does;​
how to interface sensors and actuators to an MCU; and.,​
how to write programs to get information from the sensors and operate the actuators.​
LEDs
For LEDs, you will need to understand:​
how an LED behaves in a circuit and what that means about how to power them;​
what sort of LEDs are available and why you would choose one over another; and,​
how to use individually addressable RGB LEDs like the WS2812 with the MCU.​
Power Supplies
For a project like this you will be using secondary (rechargeable) cells for power, so:​
how a Lithium cell works, it’s limitations, and safety best practices;​
how to protect the cell (singular) or battery (plural) and your circuit from possible overcurrent damage;​
how to safely charge the cell or battery.​
Electronics Fundamentals
Along the way you will encounter the need to understand various aspects of electronics fundamentals. While traditionally instructors would insist you learn this first as a foundation (and this isn’t a bad idea in theory), unless you are an unusual person, or have a pre-existing interest in pursuing the material, it is likely to discourage you as the results of this will not be practical, or even put you off even starting to learn about electronics.​
Modern practice and the ready availability of modules that provide ready to use configurations of sensors, actuators, control circuits, chargers, power supplies, and many other items means you can get started on the practical almost immediately and learn the relevant theories as you need that information to understand what you are doing.​
In particular you will need to know at least:​
Ohm’s Law and how to use it to answer practical questions you have about your design;​
essential components (e.g. resistors, capacitors, & inductors), what they are, and how they operate in circuits, and;​
the fundamental units of resistance (Ω or Ohm), capacitance (F or Farad), and inductance (H or Henry).​
There are other things but the key is you can learn them as they are actually relevant to practical success. This will also help you to understand them better as you will apply them immediately to something real.​

First Steps
This may seem daunting, it is a lot of material! But, it needn’t be so long as you adopt a realistic view of how much time it will take to become sufficiently expert to think of a project, research it, and execute it. It’s all about taking it a little at a time. As you build up your knowledge it will accelerate further progress with a framework in which to place new things.

My advice to get started is with Microcontrollers—specifically to buy and spend time with an Arduino starter kit. The MCU will be the heart of your project and of many if not the majority of projects you do. The MCU is an amazing piece of technology and the Arduino ecosystem is revolutionary.

In the past, embedded processing—the application of MCUs to real world problems—was a dark art with a lot of lore-based information. You almost had to apprentice to an experienced person to learn it. The products had spotty documentation and you had to know about ”how things are done” to use it since they didn’t bother to provide explanations of the “normal” stuff, only—if you were lucky—the bits that worked differently.

In addition, embedded programming provided no conveniences to the programmer and the amount of housekeeping and the sensitivity to tiny errors made it arcane and twitchy. Arduino offers an alternative:

The Arduino IDE (Integrated Development Environment), that is, a code editor, a complier to make the programs runnable on the MCU, and debugging facilities (ways to look at where your program is failing to work as expected)

The Arduino Framework, that is, a set of standards that allow many different MCU architectures to be used with a common set of code libraries, and a single programming language. Most MCUs you will encounter have the necessary configuration files to operate in this framework. This means the range of MCUs and their related development boards you can use needing very little unique information, or even none at all, is amazing.

The Arduino foundation (who invented and developed the ecosystem) also offer MCU development boards of their own. But you are not limited to these and depending on your project you might or might not choose one. You will learn about that on the way.

By starting with an Arduino kit (official or not) you will learn things about MCUs, or course, but you will also immediately find you are learning about things like circuits and components, as this is needed for the projects, and sensors & actuators which are key to the heart of embedded computing.

So, buy an Arduino starter kit! You can buy an official one which will definitely cost more but also supports the foundation and their work creating the open source environment you can use cost free. If the price is too spicy, you can buy functional equivalents, often with more of the sensors and actuators thrown in for less—and these work just fine.

After a short time with such a kit you will be able to make practical things, which is incredibly fun and satisfying. You will also be able to start prototyping your lighting project. When designing and writing the program to control your lights, you can ignore the physical implementation and just hook things up and make them “work” the way you want. This is a big part of doing such a project.

And, you can get tons of expert help here on AAC. Many experienced people are here specifically to help with things like this so as questions arise, you can ask here and you will find excellent answers. If you are interested in doing this, I can provide specific suggestions concerning what to buy.

Because you have a specific practical outcome in mind you will find the learning part easier and I expect you will find it fun. Of course, it can be applied to all sorts of things and it’s up to you what you do with the knowledge beyond this project. Just keep in mind there are no effective shortcuts. Invest your time and attention on the front end and the value of that investment on the back end will be enormous.

Best of luck with whatever you choose, I hope you decide to take this approach.

*not at an expert level, but at a level of competence that allows you to understand what the parts are and why they are connected in a certain way.
 

wayneh

Joined Sep 9, 2010
18,092
Agreed. I used to resist all the suggestions to use a microprocessor but unless you want a very simple and not-easily-changed pattern, you'll be far ahead by embracing the micro. There's a learning curve, but you'll never look back.
 

MisterBill2

Joined Jan 23, 2018
27,258
Agreed. I used to resist all the suggestions to use a microprocessor but unless you want a very simple and not-easily-changed pattern, you'll be far ahead by embracing the micro. There's a learning curve, but you'll never look back.
Of course there is a rather large learning curve, and the need to have some sort of (not cheap) device to develop the control program, and, if you use an arduino module, the need to learn alternate names for much of what is involved in utilizing the processor.. So it is not a totally simple venture.
 

MaxHeadRoom

Joined Jul 18, 2013
30,585
Agreed. I used to resist all the suggestions to use a microprocessor but unless you want a very simple and not-easily-changed pattern, you'll be far ahead by embracing the micro. There's a learning curve, but you'll never look back.
Agreed!
My first turn-to now is a small micro, amazing what modules/features are packed into a 8pin-16 pin micro presently!
Reduces drastically all that bread-boarding in order to test etc.
I have some development boards covering just about all the versions I currently use, so most of the pain is taken out of testing.
I guess I was fortunate in a way to go through the different electronics stages as they emerged. Valves, transistors, IC's, & now micros.
BTW, I still prefer to program in Assembly !! :p :cool:
 

MisterBill2

Joined Jan 23, 2018
27,258
What would be handy would be if there were a compiler for ladder logic to run on he tiny modules. An easy to understand universal language!! And one that is logical and intuitive. I was a master at TBOSS, but that language is totally dead now. But ladder logic is totally intuitive. Just a bit limited in capabilities.
 
Top