Circuit design for Cerakote Oven Controller

Thread Starter

dlb1964

Joined Mar 7, 2019
21
New member here, and I'm hoping someone can help me.

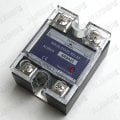
I'm working on a new oven controller. It is 120 volts, 1900 watts. I have a PID, (Auber 2362) an SSR, contactor and terminal blocks, and I'm using single pole breakers to turn on/off the element and a fan in my diagram. ,I also want to have the LED indicators come on when I have the breakers on.

I do have latched illuminated switches if its easier to go that route if it simplifies the wiring.

I have given a shot at wiring up the controller, but I have never wired anything with a contactor in it...but was told by Auber that I needed a contactor to provide a longer service life for the on/off switches.

I do not know where terminals 1 and 2 go, and I'm unsure about the contactor wiring.

I am obviously looking for the correct way to wire this controller box up, and any help is greatly appreciated!
 

Attachments

Thread Starter

dlb1964

Joined Mar 7, 2019
21
Sound like you a relatively new at control wiring, Do you have a suitable enclosure?
Here is a book of wiring diagrams and also search for the NFPA79 instructions out there.
Max.
I do have the enclosure.

I am new at figuring out circuits like this, but have worked with electricity for about 20 years, general wiring and circuits etc.
 

BR-549

Joined Sep 22, 2013
4,928
Wouldn't it be easier just to buy a second hand kitchen oven? You could power it with some propane.....or wire one up in the garage/back-porch. You can use it for surface mount boards too.
 

Thread Starter

dlb1964

Joined Mar 7, 2019
21
Wouldn't it be easier just to buy a second hand kitchen oven? You could power it with some propane.....or wire one up in the garage/back-porch. You can use it for surface mount boards too.
Honestly, yes. Unfortunately you cannot fit barrel length (24”+) objects in the size of an oven. I truly wish it was that easy. So I’m using a repurposed warming cabinet. Any help you could give me would be much appreciated. Thanks in advance.
 

BR-549

Joined Sep 22, 2013
4,928
I just measured my kitchen oven. On the horizontal plane.....I get 27 in. caddy corner.

I get 31 in. caddy corner in oven volume. Could get more by removing drip pan.

I thought cerakote for hi-temp parts was suppose to be air cured.

But I have only read about it.
 

Thread Starter

dlb1964

Joined Mar 7, 2019
21
I just measured my kitchen oven. On the horizontal plane.....I get 27 in. caddy corner.

I get 31 in. caddy corner in oven volume. Could get more by removing drip pan.

I thought cerakote for hi-temp parts was suppose to be air cured.

But I have only read about it.
Yes, you are correct in that respect. Problem is the parts like barrels must be hung vertically because Cerakote stays wet until cured by heat. And I also didn’t include the actions which are screwed to the barrels which adds another 9” and doesn’t include muzzle brakes.
The air dry cerakote is not as tough against abrasions. Heat cured cerakote is the industry standard.
 

BR-549

Joined Sep 22, 2013
4,928
10-4......ok, you will need a schematic of the oven. I would like to see some pictures too if possible.

The paperwork on your controller. Some of these units can control surprising amounts of power. This will also have the tuning procedure examples. And wiring diagrams.

And the specs on all the other components.

Lets see what you have to work with.
 

Thread Starter

dlb1964

Joined Mar 7, 2019
21
10-4......ok, you will need a schematic of the oven. I would like to see some pictures too if possible.

The paperwork on your controller. Some of these units can control surprising amounts of power. This will also have the tuning procedure examples. And wiring diagrams.

And the specs on all the other components.

Lets see what you have to work with.
Well let’s see. I bought everything from Auber Instruments. The PID is the SYL-2362. It did not come with any instructions but I’m sure I can dig around the site and DL it.
I’m using a 40 amp contactor, and a 30 amp SSR. The switches are also made by Auber.
I purchased DIN terminal blocks also.

The oven element is a single W shaped element. Spec’d at 1900 watts which I purchased from Heritage Parts.

I will upload a picture of the oven shortly. It’s actually really neat and fits my needs perfectly. I’m on my phone and the pictures are on my computer.

:edit: here is PID info

type TC: K, E, S, R, J, T, B, WRe3-WRe25 RTD: Pt100, Cu50
Input range K (-200~+1300ºC), S (-50~+1600ºC), WRe3-WRe25 (0~2300ºC ),
R (-50~+1600ºC), T (-200~400ºC),E (-200~900ºC), J (-200~1200ºC),
B (350~1800ºC), Pt100 (-99.9~600.0ºC) or (-200~+600ºC), Cu50 (-50~150ºC)
Display Two lines, Four digits. °F or °C.
Display Resolution 1°C, 1°F, or 0.1°C, 0. 1°F, with Pt100
Accuracy ±0.2% or ±1 unit of full input range
Control mode PID, On-Off, Manual, Limit
Output mode Relay contact: 3A at 240 VAC, SSR: 8VDC, short circuit 40 mA
Alarm Process high/low alarm
Power consumption <2 Watt
Power supply
voltage rating
85~260VAC/50~60Hz or 85-360 VDC
Dimension 48 x 48 x 75mm (1/16 DIN)
 
Last edited:

Thread Starter

dlb1964

Joined Mar 7, 2019
21
Contactor Info:
Product Description:

Description Definite Purpose Contactor
Coli Voltage, 120 V, 50/60 Hz
Full Load Inductive Amps 30A, 120-600VAC
Resistive SMPS Amps 40A, 120-600VAC
Number of Poles 2
Approval UL
Warranty 1 year


Dimensions (unit: inches)
 

Thread Starter

dlb1964

Joined Mar 7, 2019
21
And...the oven. The element sits in the bottom of the unit, in the metal box. I've already removed the switch, and the rotary knob.

The PID is needed to regulate the temp at 275 degrees for 2 hours so the Cerakote cures properly.
 

Attachments

BR-549

Joined Sep 22, 2013
4,928
If you don't need two alarm outputs......look at the next example in the instructions. Page 5 wiring a.

Edit: figure 11. excuse me.
 

Thread Starter

dlb1964

Joined Mar 7, 2019
21
If you don't need two alarm outputs......look at the next example in the instructions. Page 5 wiring a.

Edit: figure 11. excuse me.

Yep..I saw that when I first purchased the PID, but when I called Auber, they said I needed the SSR, the contactor, and single pole switches. Thats part of all my confusion.

Also, aren't those double pole switches shown in the instructions?

If it is indeed that simple, how would I wire the fan into that circuit on a seperate switch? Off the contactor?

Here are the switches they said I needed.


Mounting Cutout: 22.5 mm (7/8") diameter
Depth behind the surface of the mounting panel: 48 mm (1.88")
Illumination Voltage: 120 or 240 VAC
Operation Current Rating: 10A at 120 VAC or 240 VAC
Mechanical Life: 1,000,000 Cycles
Number of Contact: 1 Normally Open, 1 Normally Closed
Illumination Type: LED
Illumination Color: Red, Yellow, Green, and Blue

Again, thanks for your help.
 

Attachments

Last edited:

BR-549

Joined Sep 22, 2013
4,928
Are you putting these things into production? Do the good ol boys in GA think you're building a nuc plant?

How often is this oven going to be used? Let's say you use it every day for 10 years and the PID output relay contacts wear out. What is it going to cost you.....35 bucks. How much time and money now.....to save 35 bucks?

And the same with the switches.
 

Thread Starter

dlb1964

Joined Mar 7, 2019
21
Are you putting these things into production? Do the good ol boys in GA think you're building a nuc plant?

How often is this oven going to be used? Let's say you use it every day for 10 years and the PID output relay contacts wear out. What is it going to cost you.....35 bucks. How much time and money now.....to save 35 bucks?

And the same with the switches.
LOL..you are right....I don't understand either.

I'll probably do 50 barreled actions/year.

Can you help me, or tell me how to wire in the switches...I'm guessing you are going with the figure 11 schematic as the most practical.

But I still need to hook up the fan. I need help with that too...as now I'm REALLY confused.
 
Top