Battery measurement with Capacitor Voltage Divider & ADC

Thread Starter

Kevil

Joined Jun 28, 2020
179
I am working on a micro cat tracker tracker project (GPS / LoRa) with ATSAMR34 MCU with LoRa Transceiver and a u-Blox ZOE-MOQ GPS Receiver powered by three Energizer 675 Zinc Air batteries, which should last about three months when determining the position every hour. The MCU and GPS will be in a sleep mode awaken each hour for about one minute to get valid GPS coordinates. If there will be not GPS signal available within 60 second I will send "no GPS data" LoRa message to allow LoRa network to determine the approximate location.

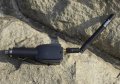
To achieve the longest battery life, I must use only the necessary components and avoid any current loss (even µA). The battery voltage is 4.4V and MCU and GPS is powered by 3.3V through TI LDO TPS7A0233PDQNR. The PCB size will be about 8 x 35 mm without batteries (sewn into cal collar).

I need to measure the battery voltage to alert the user in the Android application to replace the batteries. That's why I don't like to use the resistor voltage divider and I would like to use the capacitor voltage divider (CVD) with C1 = 5.6nF and C2 = 2.2nF, min. sampling time is 250 ns, 8-bit accuracy, Vref is set to Vcc = 3.3V, CSAMPLE = 2.8pF and RSAMPLE = 1,715 Ohm.

When I tried ADC measurement on the ATSAMR34 Xplained development board and unplug and plug the board to USB port before each measurement I got pretty same ADC results. When the board is still connected, the measured voltage values decrease.

Although I know to use the CVD with ADC is a tricky and I should possible use classic resistor voltage divider switch on by N-MOSFET PMH260UNEH I am not sure about the GPIO pins MCU voltage during sleep mode.

Maybe an Op Amp voltage follower could help me prevent the C2 voltage drop. MAX40023 has Rin 15G, 17µA, <1pA.

What's your thought and suggestion? I have also troubles to simulate it with LTspice.
 

Attachments

MrSalts

Joined Apr 2, 2020
2,767
Capacitive voltage divider only works with AC. A capacitor looks like (actually is) an open circuit to DC. DC does not flow through a capacitor.
 

MisterBill2

Joined Jan 23, 2018
18,064
For the battery report you do not need to read the actual voltage, only that the battery is above ur below some limit at a high load current time, such as when transmitting. So use a digital input that has an adequately defined resistance and threshold switch point. With a capacitor to stabilize the source impedance the voltage will decay at some rate when the transmitter is switched off, and at some point the input will change states. That time will depend on the battery voltage, if the transmitter is directly powered. So that time will tell the battery voltage, and that can trigger the warning announcement. No extra parts, No extra drain, and less power consumption.
I hope that this idea can be understood, some times I am confusing.
 

Ian0

Joined Aug 7, 2020
9,621
A couple of thoughts:
1) Does you micro have an inbuilt voltage reference (usually 0.9V or 1.2V)? If so, set the A/D to use the 3.3V supply as its reference and measure the voltage of the 0.9V/1.2V reference. From that you can work out the supply voltage.
You may really want to know the battery voltage, not the supply voltage, but this way at least you know when the battery voltage starts to drop below 3.3V. You can generally turn off the 0.9V/1.2V reference when it's not being used.

2) Use an RC timer like a monostable. Resistor to Vdd, Capacitor to 0V, junction of the two to a GPIO pin via a small resistor (1k or so)
Allow the capacitor to Vcc and leave it there most of the time, so it won't take any current.
When you want to know the battery voltage, use the GPIO pins to discharge the capacitor via the 1k resistor, then measure the time it takes to recharge to a threshold voltage. This will only work if the threshold voltage is independent of Vcc. If it tracks Vcc, you'll get the same answer every time!
 

crutschow

Joined Mar 14, 2008
34,201
powered by three Energizer 675 Zinc Air batteries
A zinc-air battery will not last long once it is activated, even with no load. That's why it has the tab seal to keep out air before it is activated.
I know, because I tried them in an HP calculator I had and they pooped out after a few weeks.

Suggest you go with a lithium coin cell instead.
One lithium coin cell has a nominal voltage of about 3V (3.3V when new) so you may be able to drive your circuit directly from that.
A CR2450 cell has about the same capacity (mAh) rating as the 675 zinc-air, while likely being not much different in weight from three 675 cells.
 

ronsimpson

Joined Oct 7, 2019
2,954
Assumption; We don't care the battery voltage. We care when it is too close to the 3.3V. "Drop out = .27V at 200mA"
Parts: Voltage compare that draws 0.6uA or less. If "OC" then it needs R3, If "push pull" then no R3.
Connection 1: "From Micro" is a pin that is normally pulled up to 3.3V.
___(No voltage across R3, no current)
___(voltage compare has no supply, little current)
___(R1 & R2 have very little voltage so little current)
Connection 2:To Micro, 1=battery is good, 0=battery is low.

Normally "From Micro" is high. When the battery is to be checked, pull "From Micro low" Test "To Micro"

R3=1meg really does not matter much.
Voltage divider R1, R2 set to, when the battery is at 3.6V the voltage out is 3.3V.
1630775412082.png
Many voltage comparitors do not function if the inputs are near the top supply voltage. This version shifts the input voltages down.
1630779401624.png
 
Last edited:

Thread Starter

Kevil

Joined Jun 28, 2020
179
Comparator MCP6548 looks interesting. But still there are relatively a lot of components, 4 resistors and 1 comparator which take space.

Would it be possible to use comparator in ATSAMR34?
 

ronsimpson

Joined Oct 7, 2019
2,954
Would it be possible to use comparator in ATSAMR34?
I can not dig through 1000s of pages to find the information. Many micros have a voltage comparator that has one input connected to an internal voltage reference. You will need to divide down the battery voltage to something under 3.3V.

This is about the same as using the internal ADC. BUT The voltage comparator probably pulls less power.
 

Thread Starter

Kevil

Joined Jun 28, 2020
179
In another project, remote car battery measurement (ATtiny202 and BRKWS01 SigFox Tranceiver) I used resistor divider with R1 = 1M, R2 = 270k to limit the output max. voltage 15/3.3 with about 10µA current. But that was 12V 80Ah car battery.
 

Attachments

MisterBill2

Joined Jan 23, 2018
18,064
It seems tat either nobody understood my suggestion about usinga capacitor discharge time and using a digital input as the level detector.. The benefit was no active devices and probably only one passive device.
 

Thread Starter

Kevil

Joined Jun 28, 2020
179
It seems tat either nobody understood my suggestion about usinga capacitor discharge time and using a digital input as the level detector.. The benefit was no active devices and probably only one passive device.
Please can you provide real circuit example?
 

MisterBill2

Joined Jan 23, 2018
18,064
To come up with anything like a detailed circuit I need to know how the transmit function is controlled. My presumption was that it is only enabled when sending out the data, and that it draws no power when not transmitting. Has that part even been designed yet? So some point in the transmit circuit is powered by the battery directly when the transmit is activated. The capacitor is connected to that point, along with the digital input. The control processor knows when the transmit function stops, and measures the time until the digital input changes state. The length of that time depends on the voltage it was charged up to, and that voltage is the battery under the transmit power load. So most of the circuit is the transmit output stage.
 

MrSalts

Joined Apr 2, 2020
2,767
Agree, with @MrBill2
The image attached is essentially telling same story as @MrBill2 suggestion.

In this Arduino example, digital Pin2 is set to an input and draws virtually zero current. 5Then set digital pin D2 to an output LOW to get the battery measurement. The only concern is whether the ADC pin can withstand the 4.2V(lithium ion) while the pin is set to input. But, as suggested by someone else, zinc-air is a bad choice and a straight 3.0V Lithium primary cell (non-rechargeable) is the best option and that gives zero worries about over voltage issues.

0F07E50F-B97F-46B9-AF1C-C4B983BF8A25.jpeg
 
Last edited:

Ian0

Joined Aug 7, 2020
9,621
Agree, with @MrBill2
The image attached is essentially telling same story as @MrBill2 suggestion.

In this Arduino example, digital Pin2 is set to an input and draws virtually zero current. 5Then set digital pin D2 to an output LOW to get the battery measurement. The only concern is whether the ADC pin can withstand the 4.2V(lithium ion) while the pin is set to input. But, as suggested by someone else, zinc-air is a bad choice and a straight 3.0V Lithium primary cell (non-rechargeable) is the best option and that gives zero worries about over voltage issues.

View attachment 247288
He did say that
I should possible use classic resistor voltage divider switch on by N-MOSFET PMH260UNEH I am not sure about the GPIO pins MCU voltage during sleep mode.
so my suggestion would be to find about about the state of GPIO pins during sleep mode, and whether the ADC pins are 5V tolerant, then perhaps this circuit would be usable.
 

MisterBill2

Joined Jan 23, 2018
18,064
My suggestion is based on the assumption that the transmit circuit only draws current when a transmit command is given. That way the bypass capacitor will stay charged for a while after the transmission. It is also based on the assumption that the battery voltage under the load of the transmitter will reflect the amount of charge remaining in the battery. Since the processor is powered by a regulated 3.3 volts, the assumption is that the digital input threshold is fairly stable. Thusthe time for that bypass capacitor to discharge would be set by the voltage during transmit. So the processor will need to stay awake long enough to measure tha time between switch-off and the digital input transition, and set a warning bit for the next transmission when the time is too short. So there is no analog input used, not much additional circuit, the big addition is a lower leakage bypass capacitor for the transmit power connection.
 

Thread Starter

Kevil

Joined Jun 28, 2020
179
Still I didn't throw away Capacitor Voltage Divider (CVD) with Op Amp as the Voltage voltage buffer to avoid C2 voltage decay during sampling time 250 ns.

I downloaded the MAX40023.lib from Maxim Integrated and modified AD8041.asy OpAmp in the LTspice to MAX40023.asy I am having troubles to run the simmulation:

ERROR: Node U1:98 is floating and connected to current source G:U1:70
ERROR: Node U1:1004 is floating and connected to current source G:U1:1001

Instance "m:u1:q2": Length shorter than recommended for a level 1 MOSFET.
Instance "m:u1:q1": Length shorter than recommended for a level 1 MOSFET.

How to fix it?
 

Attachments

Top