Analog multimeter needle "offset"

Thread Starter

Elerion

Joined Sep 11, 2017
125
Hi everyone.

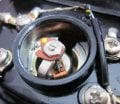
I have a several decades old analog multimeter, which works fine except that the needle stops at slightly different position if the movement goes up, than if it goes down.

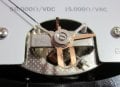
As an example. If I probe 10 volts DC (12 V scale), the meter stops at aprox 9 V.
If I change to 3 V scale, obviously the needle goes all the way up (input voltage is 10 V DC all the time).
If I quickly go back to 12 V scale, the needle now stops at 11 V.

If the needle moves up, it stops at a lower position.
If the needle moves down, it stops at a higher position.

Of course, I checked the circuit, voltage divider, etc. and all seems to be fine.
Is this a symptom of a defective panel? Anything I could test or do to solve it?

Thanks in advance for any tip.
 

KeithWalker

Joined Jul 10, 2017
3,063
You can clean the suspension points with alcohol but be careful not to touch the hairsprings or you will need to readjust the zero.
If that doesn't solve the problem, the meter may have been subject to physical abuse which has distorted the frame slightly, tightening up the suspension. If you are feeling very adventurous and dexterous, you can loosen the locknut at one end of the movement and adjust the position of the cone holding the suspension to relieve any tension.
Good luck.
Keith
 

Thread Starter

Elerion

Joined Sep 11, 2017
125
Sounds as though there is friction in the bearings of the needle
You can clean the suspension points with alcohol but be careful not to touch the hairsprings or you will need to readjust the zero.
Thank you for the tips.
Do you know of any resource on the Internet I can look at (e.g. pictures, etc.).
I've only found:
https://www.rfcafe.com/references/qst/rejuvenating-old-meters-feb-1943-qst.htm
But I would like to learn a little bit more before testing on this device.
It does seem like friction problem. Maybe the "tail weight" too?
 

KeithWalker

Joined Jul 10, 2017
3,063
I can't find much on the internet except some rudimentary diagrams that lack in detail. I have repaired and rebalanced many in the past so I can probably answer any specific questions you have. Don't touch the counter-balance arm unless you really have to.
Once you have freed the bearings, you can check the balance by two simple tests:
Longitutinal Balance:
Hold the meter so the pointer is horizontal and note the position of the pointer on the scale. Rotate the meter 180 degrees and check the position. I If the pointer moves down, it is pointer heavy. If it moves up, it is counter-balance heavy. It can be corrected by using the tip of a pin to apply a tiny spot of 5 min. epoxy to either the tip of the counter balance or under the pointer about the same distance from the center.
Lateral Balance:
Hold the meter with the pointer vertically down and check the position of the pointer. Rotate the meter 180 degrees and check the pointer position. If it is out of balance laterally, the pointer will move towards the heavy side.Gently bend the pointer very slightly away from the heavy side, close to the movement and re-check.
If you bend the pointer during the repair, make sure that it doesn't touch the scale or cover over its full range of movement before you re-assemble it.
Good luck,
Keith
 

Thread Starter

Elerion

Joined Sep 11, 2017
125
You can clean the suspension points with alcohol
Not sure about where those points are. And the bearings? Could you please point them out to me? I attached a few close-up images.

I know where the balance weights are, the coil, the magnet, joints and basically that's it.
I carefully inspected the mechanism, and it looks aesthetically fine.
 

Attachments

KeithWalker

Joined Jul 10, 2017
3,063
At each end of the rectangular coil there is a steel shaft with a sharp point on the end. The points sit in jeweled cone shaped bearings. That is where to clean and lubricate if necessary.
Keith
 

Thread Starter

Elerion

Joined Sep 11, 2017
125
At each end of the rectangular coil there is a steel shaft with a sharp point on the end. The points sit in jeweled cone shaped bearings. That is where to clean and lubricate if necessary.
Keith
Unfortunatelly, the pivot and jewel are not visible. There's a very tiny gap, where I tried to carefully clean with alcohol and a very fine tip. The problem persists. I realized that the sensitibity seems to be degraded. Trying to measure, let's say, 7 V, leads to about 6 V deflection.
The hairsprings seem perfect. The zero adjusment works. No particles that I have seen. The pivot does seem to be aligned with the (not visible) jewels.
What happends if I loosen a little bit the screw over the jewel?
 

Deleted member 115935

Joined Dec 31, 1969
0
just as a reference point, think of the working of the analog meter as a watch movement.
it always amazes me how they could make something so delicate and so low cost,

but its VERY delicate, or using the wrong lubricant can affect the movement ,
 

KeithWalker

Joined Jul 10, 2017
3,063
What happends if I loosen a little bit the screw over the jewel?
It's definitely worth a try. The meter isn't much use the way it is. The frame may have distorted if the meter had a hard bang. If loosening the bearing doesn't help, then either a jewel is cracked or a pivot point is blunted.
Good luck.
Keith
 

Thread Starter

Elerion

Joined Sep 11, 2017
125
Two turns of the bottom hairspring were twisted. After fixing, it works much better. Still, there's some friction, and balance is far from perfect. It works, but it is not good enough for regular use. About the screw on the front bearing, I just played a little bit (less than half a full turn) and didn't see any difference. The only thing I haven't done is lubricate.
Also, I'm having lots of trouble closing the case and making the zero adjust plastic piece fit in place. Is there any trick? I suspect the plastic tip is shorter than it should be. Maybe it partially broke.
 

jpanhalt

Joined Jan 18, 2008
11,087
How do you know it is "friction" and not a loose needle? Here's a simple test:
1) Put a set voltage to the meter.
2) See what the needle eventually goes too.
3) Let the needle reset to zero.
4) Apply some restraint on the needle and apply the same voltage.
5) Then remove the restraint, keeping the voltage constant, and see what the needle indicates.
 

KeithWalker

Joined Jul 10, 2017
3,063
The trick to aligning the zero set pin on the case with the adjust lever is:
First check that the set zero lever on the movement has not been pushed down from attempts to put the case on. If it has, gently bend it back level again. Set the adjust lever on the movement to the center position and do the same with the adjust pin on the case. That will align them so the case can be closed. Once you have the case in place, you can adjust the zero. If it will not adjust far enough, then you need to open it up again and adjust the offset on the bottom hairspring a little bit to bring the movement back into adjustment range.

You loosened the front nut on the top bearing. so you need to check that the bearing is not too loose. Place the meter horizontally. Gently tilt the pointer down a few degrees and note how far from the scale the tip of the pointer is. Then gradually tilt the meter to raise the pointer and see if it moves away from the scale. The movement should be minute or imperceptible.

Keith
 

Thread Starter

Elerion

Joined Sep 11, 2017
125
Apply some restraint on the needle and apply the same voltage.
What do you mean by "restraint"?

If it will not adjust far enough, then you need to open it up again and adjust the offset on the bottom hairspring a little bit to bring the movement back into adjustment range.
On the back there's a screw and nut too, but I see no adjustment control. The outer of the hairspring is attached to a small piece of metal. Should I try to move it?

Unfortunately, the counterbalance arm (the one opposite to the needle itself) is bent, and the balance is quite horrible. Maybe I bent it unknowingly (I don't remember if it was that bad before I opened it). It is hard to straight it. It would be much easier if I could take the needle out... doesn't seem easy. Maybe it is not even advisable.
 

KeithWalker

Joined Jul 10, 2017
3,063
On the back there's a screw and nut too, but I see no adjustment control. The outer of the hairspring is attached to a small piece of metal. Should I try to move it?
Yes, that will adjust the movement back to zero with the front adjustment set to the center.

[/QUOTE]
Unfortunately, the counterbalance arm (the one opposite to the needle itself) is bent, and the balance is quite horrible. Maybe I bent it unknowingly (I don't remember if it was that bad before I opened it). It is hard to straight it. It would be much easier if I could take the needle out... doesn't seem easy. Maybe it is not even advisable.
[/QUOTE]

Is the counterbalance bent, or is the needle bent? It's much more likely that the needle is bent and it is much easier to correct. That is probably why the zero is offset. Do that before you adjust the zero position because then you may not have to adjust it.

DON'T take the coil assembly out. You will never get it back without damaging it unless you are very experienced.

Keith
 

Thread Starter

Elerion

Joined Sep 11, 2017
125
Something to stop it from moving. One might use a finger. I would probably use a small wad of masking tape, sticky side out.
Got it.

DON'T take the coil assembly out. You will never get it back without damaging it unless you are very experienced.
Thanks.
Yes, it is the counterbalance arm (the segment where the little weight is), not the needle. The needle is perfectly straight. Indeed, the counterbalance arm is much harder to straighten. Very little space. I was not successful. I will try again, now that I know that I cannot remove the needle.

Appart from this, the main shunt resistor (I mean the smaller one, used in current measurement) seems burnt (it still works, just the outside seems a little bit burnt). Maybe another proof that the meter was subject to an overload, as previously stated in this post.
 
Top