What's the purpose of a joule thief?

Brownout

Joined Jan 10, 2012
2,390
This is incorrect. If you STARTED winding the secondary at the small end of the nail, you would have wound it CLOCKWISE, from the perspective of the small end to get the ends pointing in the direction you are showing. Imagine you are wrapping you right hand around each of the two leads, shown as (1) and (2) in you picture, wiht your thumb pointing in the direction of current (current would be point OUT of the leads) This is the right hand rule. Your fingers SHOULD NOT wrap the wires in the same direction.
 

Thread Starter

tjohnson

Joined Dec 23, 2014
611
This is incorrect. If you STARTED winding the secondary at the small end of the nail, you would have wound it CLOCKWISE, from the perspective of the small end to get the ends pointing in the direction you are showing. Imagine you are wrapping you right hand around each of the two leads, shown as (1) and (2) in you picture, wiht your thumb pointing in the direction of current (current would be point OUT of the leads) This is the right hand rule. Your fingers SHOULD NOT wrap the wires in the same direction.
So just to be sure that I understand correctly before I rewind my coil again:
  1. The primary coil should be wound clockwise around the nail (I always use the perspective of the nail point).
  2. The secondary coil should be wound in the opposite direction (counter-clockwise around the nail).
Is this correct?
 
Last edited:

Brownout

Joined Jan 10, 2012
2,390
So just to be sure that I understand correctly before I rewind my coil again:
  1. The primary coil should be wound clockwise around the nail (I always use the perspective of the nail point).
  2. The secondary coil should be wound in the opposite direction (counter-clockwise around the nail).
Is this correct?
OK, I've looked at it agian. Please be patient, I'm at work and working on your stuff on the side. What you need to do is wind both the primary and secondary in the same direction. What you did previously was to wind the primary CCW then reversed the direciton of the secondary, and wound it CW. Next time, when you get to the secondare, keep winding in the same direction AROUND the nail, and just reverse the direction ALONG THE LENGTH of the nail.
 

Thread Starter

tjohnson

Joined Dec 23, 2014
611
OK, I've looked at it agian. Please be patient, I'm at work and working on your stuff on the side.
Wow, I assumed you were retired. Please don't get in trouble at your work!
What you need to do is wind both the primary and secondary in the same direction. What you did previously was to wind the primary CCW then reversed the direciton of the secondary, and wound it CW. Next time, when you get to the secondare, keep winding in the same direction AROUND the nail, and just reverse the direction ALONG THE LENGTH of the nail.
Ah, now I think I get it. I'll try wiring it again. Thanks!
 

Thread Starter

tjohnson

Joined Dec 23, 2014
611
I edited my post, please read it agian.
Got it. Your clarity was much appreciated. But now I'm back to the same situation: :(
My multimeter showed that the output voltage (measured at the LED) is 0.7V less than the input voltage (measured at the battery). Might this have something to do with transistor biasing?
I'm pretty sure my coil was wound correctly in my last picture, since rewinding it hasn't changed anything.
 

Brownout

Joined Jan 10, 2012
2,390
I'm pretty sure my coil was wound correctly in my last picture, since rewinding it hasn't changed anything.
Not necessarily. Up to now, I'm pretty sure your coil was wound incorrectly. Not sure how it's wound now. Also, are you using a fresh battery? Though a JT will work with an old, almost spent batter, initial testing should be done wiht a new one.
 

Thread Starter

tjohnson

Joined Dec 23, 2014
611
Not necessarily. Up to now, I'm pretty sure your coil was wound incorrectly. Not sure how it's wound now. Also, are you using a fresh battery? Though a JT will work with an old, almost spent batter, initial testing should be done wiht a new one.
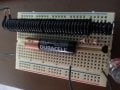
I've wound the coil exactly as you instructed, and replaced the battery with one that has an output >1.5V. Still no difference.
20150727_135101.jpg
 
Last edited:

ian field

Joined Oct 27, 2012
6,536
I've wound the coil exactly as you instructed, and replaced the battery with one that has an output >1.5V. Still no difference.
View attachment 89309
A single nail is pretty much one big mass shorted turn.

A bundle of nails goes some way toward approximating to a laminated core, but clean nails can short together and you still get a shorted turn - rusty nails would have some degree of isolation from each other.

Back in the pioneering days of wireless when radio frequencies extended well down into the audio range (sometimes as low as 12kHz). Many home constructors wound their receiving coils on a bundle of soft iron wire as used in flower arranging, the soft iron wire is annealed and has heat scale on the surface, so each one is insulated from the next, so no shorted turn.

Winding on a length of ferrite material would give you more cause to look for the fault elsewhere if it doesn't work.
 

Thread Starter

tjohnson

Joined Dec 23, 2014
611
By now, I'm sure that the only solution is to use a better inductor core and/or to use more turns of thinner wire with thinner insulation. So until I can obtain the materials to do that, I'm going to postpone this project. I truly appreciate everyone's help.
 

Brownout

Joined Jan 10, 2012
2,390
Well we've made many corrections we were going to need to make anyway. Before you go, what is the part number of the transistor you're using? Is it the same as the schematic?
 

ian field

Joined Oct 27, 2012
6,536
By now, I'm sure that the only solution is to use a better inductor core and/or to use more turns of thinner wire with thinner insulation. So until I can obtain the materials to do that, I'm going to postpone this project. I truly appreciate everyone's help.
Materials can't be that hard to obtain! - CRT TVs are full of ferrites, and people can't give them away.

Usually you can find a pre-wound inductor with enough room to add a base winding, then all you have to work out is getting the phasing right. And you have a 50:50 chance of getting it right first time.
 

Thread Starter

tjohnson

Joined Dec 23, 2014
611
Well we've made many corrections we were going to need to make anyway. Before you go, what is the part number of the transistor you're using? Is it the same as the schematic?
I'm using a 2N4401 now. I had used a 2N222A previously, but that was before I made the corrections, so I can try it again.

@Brownout: Any suggestions are certainly still welcome, although I'm doubtful that my circuit will work with this inductor.
 
Last edited:

ian field

Joined Oct 27, 2012
6,536
I'm using a 2N4401 now. I had used a 2N2222 previously, but that was before I made the corrections, so I can try it again.

@Brownout: Any suggestions are certainly still welcome, although I'm doubtful that my circuit will work with this inductor.
When I do a first build of an experimental blocking oscillator, I usually use at least a TO126 device so I can turn the wick up with less risk of burning it out. Once the inductor is just how I like it, I can see how cool the TO126 transistor is running and decide whether I can get away with a TO92.
 

Brownout

Joined Jan 10, 2012
2,390
Well darn. Think we've tried everything there is to try. Good news is you have your circuit wired up correctly, and you know how to correctly wrap the inductor now.
 
Top