What did you repair today ?

t_glover

Joined Mar 16, 2021
57
The negative pressure switch is normally open and closes at 2" of water vacuum after the combustion draft blower starts. The smart valve has to see the open switch when the thermostat calls for heat. The valve then needs to see the switch closed before it turns on the igniter.
 

cmartinez

Joined Jan 17, 2007
8,828
Way back I had a brilliant idea - feed the condensate water into the humidifier. Very little research effort convinced me that that fluid is highly corrosive. Plain white PVC works very well.

ak
Interesting ... here's what Google's AI has to say about that:

Condensate water is highly corrosive primarily because it is extremely pure and, upon cooling, absorbs gases like carbon dioxide (CO2) to form acidic, low-pH water (carbonic acid) that dissolves metal, particularly iron and copper. In heating systems, this acidity is intensified by combustion byproducts, leading to rapid degradation of pipes, boiler components, and concrete.

Here are the key reasons for the corrosivity of condensate water:
  • Formation of Carbonic Acid (C2CO3): As steam cools and condenses, it absorbs carbon dioxide (CO2) present in the system, forming carbonic acid. This acid lowers the pH of the water, creating a highly corrosive environment that causes "grooving" or localized thinning of metal pipes.
  • High Purity/Low Mineral Content: Unlike typical water, steam condensate is often highly purified, making it "hungry" to dissolve minerals from metal surfaces.
  • Dissolved Oxygen (O2): The presence of oxygen, often along with CO2, leads to pitting corrosion.
 

SamR

Joined Mar 19, 2019
5,522
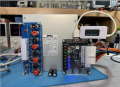
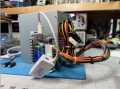
Ordered an expansion board for ATX PSU from AliX to supply basic 3.3,5,12 & -12VDC for some digital/analog testing. No voltage or current control but all voltages and 6 USB ports as well. Second fused board also has all voltages with terminal banana posts and each fused as well. Opened the ATX to blow out the accumulated dust and upon visual inspection found 2 10V 2200uF caps bulged and leaking. Only replaced the bulging caps (lots of small caps inside) and laced down all the unused wiring harness and connectors. Also had to add a jumper to the breakout board that tells the ATX that it is in use and fully turn on between the PSU ON and GND pins. Haven't tested under load but all voltages slightly above rated values. Since it was one of 4 scrap PSUs I had pulled from old computers it was basically free and the USB breakout board was 2.29USD and fused one 2.93USD.
1774361881893.png
1774361984367.png
 

SamR

Joined Mar 19, 2019
5,522
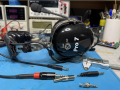
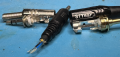
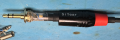
I bought a HEiL Pro 7 headset used off of eBay for less than half the price of new ones and was pleased with the results when I received them except for one small problem. When I plugged them into my new Icom XCVR I had to rotate the `1/8" stereo plug to get both sides to work. At first I thought the jack was defective on the new radio. But it was just a quirk and rotating the plug easily fixed it. Then I noticed when I took them off that there was this slimy substance left on my ears. The gel ear pads were leaking. So Amazon had them for a decent price for the pair with free Prime shipping. Problem fixed. Then the phase toggle switch broke. I had to call HEiL to find out just how to open the ear cup to get at the switch which wasn't too bad but I had to pry a lot harder than I originally did when I quit trying the first time. It's a DPDT switch with 2 bars slid across six fixed contact. When the toggle broke neither side worked as the 2 bars were broken from the toggle lever mechanism. So I soldered 4 of the contacts together and got them working and ordered the switch from HEiL but shipping was ~26USD for a 5USD switch! Easy fix. I eventually got tired of messing with the stereo jack and plugged another set of headphones in the jack and no problems at all. Hmmm. Looking at the HEiL plug it didn't look deformed, but I put the calipers on it and the base of the barrel was 135.5 thousandths of an inch but the mid barrel is only 134 thousandths of an inch. Hmmm, that doesn't seem bad. So I tried to find a replacement cordset and did find the only one available in the US at list price. But! Cable, shipping, and tax was almost 60USD. No way. So I cut the molded-on plug off leaving enough wire to check the colors against the bands on the plug. Grabbed a chinesium better quality plug out of the parts drawers and went to work. Dang! the wires in the cable are at least 30AWG or smaller at the jacket and at least half of the jacket is filled with filler! Even about half of the cable with the 3 wires was steel support strands and filler! The chinesium plug was pretty shoddy, flimsy, and lopsided so back to Amazon and in a couple of days came 2 Japanese very well-made and gold-plated plugs for 10USD w/ free shipping. Lots of tedious small wire soldering and stripping out filler but the new plug gripped the cable far better and screwed tight and not wobbly and a couple of pieces of shrink wrap and job done and now working properly!
1775008438446.png
1775008851408.png
1775009067676.png
 
Last edited:

MisterBill2

Joined Jan 23, 2018
27,969
Certainly hose very thin headphone wires are a challenge to strip and solder! And it seems like every brand of headphones is totally differet to open. AND I have several sets to work on now, because I helped with an "estate cleanout"last wekend. Rather depressing, actually. The guy was at least 20 years younger than me! Oh WOW!!
 

SamR

Joined Mar 19, 2019
5,522
The perforated plate of the ear cup over the speaker has some very sticky double-sided tape holding it together. There was a notch in the plate to put a tweaker screwdriver in and I expected it to just pop off. But when it didn't, I figured I'd better call HEiL before I ruined them. After talking to them, I was in the right place but really had to dig into it to even get it to start to budge. Didn't change the tape out and it still sticks like crazy even after putting back together. I am highly pleased with the durability and performance of the HEiL headsets and almost all of their parts are available from them, or they will service them for you for -80USD and up plus their exorbitant flat rate shipping price. The bad part is that it comes with both the coiled and a straight cable. But I can't remember where I put the straight cable I wasn't using and have searched everywhere I think it could be and can't find it or the hand switch for transmit that I replaced with a better design. Still looking...
 
Last edited:

SamR

Joined Mar 19, 2019
5,522
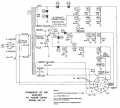
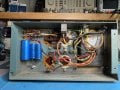
Heath Co. AC Power Supply HP-23C
This one (I have a couple of em) is a stand alone, the other is a bare chassis sitting inside a speaker enclosure. It had Nichicon capacitors (which I don't believe came from Heath) in it. No physical leakage detected but the carbon composite resistors show some pretty severe temperature cooking. Last time I used it ~40 years ago for CW on my HW-101 it was chirping badly (more like squalling) as the supply voltage for the 6146 final tubes sagged. Couldn't find the capacitors I wanted on DigiKey! High voltage caps for tube radios and amplifiers becoming scarce these days. But, found a nice rebuild kit on eBay with all the parts and some neat circuit boards to bolt into place where the old high voltage caps were for not too bad a price. Replaced all the caps, resistors and rectifier diodes with 1N4007s instead of the original 1N2071s. Everything but the cord set, breaker, transformers and chassis.
View attachment IMG_1590.JPG

There is NO adjustable bias control, AC switch, or pilot light in the C model! So have to match up schematic against what is actually there! R8, R9, & R10 replaced with a single 27kΩ same as in original build and came with kit.
1776969159083.png
IMG_1564.JPG

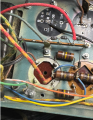
Note the severely cooked resistors! IMG_1569[1].JPG
Nichicons that came out versus new installed.
View attachment IMG_1588[1].JPG
All done and tested! No Magic Smoke escaped!
IMG_1591[1].JPG

Edit: Now that the PSU is ready, next up is the HW-101 XCVR. Hopefully, it will only need a cleaning and alignment. I also have a "parts" one that a TV Repairman gave me when he was closing up his shop along with a few other goodies. I did buy some spare tubes for the HW-101 years ago at a Ham Fest if I can find them. Both regular receive/transmit and finals as well. And I have my tube tester up and running as well.
 
Last edited:

SamR

Joined Mar 19, 2019
5,522
Better pic of the cooked resistors. Sure hope the guy who put the rebuild kit together specified high temp resistors! Of course, having them lying down on the chassis didn't help even if it is "neat" looking. I added a standoff and moved them up in the air a bit.
1777080000517.png
 

Thread Starter

Externet

Joined Nov 29, 2005
2,662
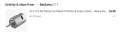
My Worx string trimmer died. The motor rotor spun out a collector foil section and the brushes lost where to contact.
Spare motors are made of unobtanium, not available any more, no equivalent replacement anywhere :mad: and last ones years ago were the cost of a new tool. (Normal crap from manufacturers)...

1777320382606.png
Bought one from Temu for $7 instead of $79.99999. Arrived today. A bit of shoehorn and works like new again, hope for another 10 years.

1777321012700.png

Am happy.
 

Attachments

Last edited:

MikeA

Joined Jan 20, 2013
449
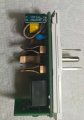
A Sonoff S31 smart plug, which is pretty popular in the DIY community because it can be flashed with custom open-source firmware (Tasmota) died on me. I have more than 10 of these, just a few years old.


Screenshot from 2026-05-04 21-12-22.png


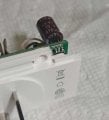
So I pop open the case, look around, and sure enough, the capacitor that's responsible for turning 120v AC to low voltage DC for running the ESP8266 chip is leaking.

The brand is "Chn Cap". :rolleyes:
These outlets run cool. It's not old. Not good.

chn_cap.jpg

s31_insides.jpg

Replaced it with a much larger Japanese cap that still fits in the case. Was very lucky the bad cap was on the edge of the circuit board, which is glue/welded to plastic case. Clipped a small piece of plastic, which is invisible once assembled, and was able to solder in the new cap. What a PITA.

new_cap.jpg
 
Last edited:

wayneh

Joined Sep 9, 2010
18,133
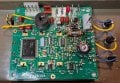
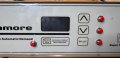
My water softener continues to present challenges. I recently re-bedded it with fresh ion exchange resin, and that project caused a few plumbing problems that had to be updated. Once that was all done, I thought it was good to go. But we were still seeing hard water.

Some years ago I had replaced 3 of the front panel membrane buttons with pushbuttons. A fourth switch was not reachable without freeing the PCB from the front frame. That required breaking a few things and I was reluctant to do that. But the switch eventually failed like the others and that meant I could not tell the softener to start its regeneration cycle. That means diagnosing my hard water problem would be almost impossible.

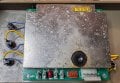
Here are some pics.

Back side of the front panel. You can see my 3 previous switches on the left side and the new one on the right.
The PCB is under that shield which I had to desolder to remove.
IMG_8812.jpeg

Each corner of the PCB had plastic post I had to break to get access to the other side of the PCB. That's where the original pushbuttons are, that face the front panel. Sorry I forgot to get a picture of that side. All the connectors along the bottom edge showed corrosion. I touched them up with a Dremel. Note how the coating on the big resistor on the right has flaked off!
IMG_8810.jpeg

The front panel and my 4 red pushbuttons.
IMG_8811.jpeg
 

MisterBill2

Joined Jan 23, 2018
27,969
My next repair will be the single door cooler at a friend's restaurant.. The cooler seems to have a refrigerant leak. (R134A). I will need to pull a vacuum on the cooler before feeding in the leak-sealer/freon mix. That will require a vacuum pump of some sort. I am guessing that a available refrigeration compressor with the correct fitting attacjed to the suction port should be adequate, but I have no information as to what level of vacuum I nned to pull.
Can others who know provide that information? Please!
 

wayneh

Joined Sep 9, 2010
18,133
My next repair will be the single door cooler at a friend's restaurant.. The cooler seems to have a refrigerant leak. (R134A). I will need to pull a vacuum on the cooler before feeding in the leak-sealer/freon mix. That will require a vacuum pump of some sort. I am guessing that a available refrigeration compressor with the correct fitting attacjed to the suction port should be adequate, but I have no information as to what level of vacuum I nned to pull.
Can others who know provide that information? Please!
More vacuum is better, but you can also pull the best vacuum you can and then let in a small amount of fresh coolant before pulling it back out again. This will greatly dilute any small amount of residual air. In other words, "the solution to pollution is dilution".
 

MisterBill2

Joined Jan 23, 2018
27,969
More vacuum is better, but you can also pull the best vacuum you can and then let in a small amount of fresh coolant before pulling it back out again. This will greatly dilute any small amount of residual air. In other words, "the solution to pollution is dilution".
THAT makes a great deal of sense. Thanks!!
 

MrChips

Joined Oct 2, 2009
35,015
Toaster

Toaster does not stay latched when you push the handle down.
This is the second time I have encountered this problem. The repair is so simple that it is worth sharing.

The problem is bread crumbs.
The solution is to clean out the bread crumbs.

The bread lift is held down and latched with an electro-mechanical device.
When you push the handle down, a pair of electrical contacts closes and power is sent to a solenoid (electromagnet). The purpose of the solenoid is to attract a mechanical latch that holds the lift in the down position.

Bread crumbs between the electromagnet head and the piece of iron it has to attract prevents the magnet from engaging the latch. Clean out the bread crumbs and it works again.
 
Top