Pulsing an eTec Outboard Fuel Injector

Thread Starter

InjectorService

Joined Apr 11, 2020
35
Do you also take them apart to manually scrape out the residue? Before a sonic cleaning.
The first process is testing for the spray pattern, as well as testing the flow rate (in cc). After that is done I disassemble them, clean out any visible debris. The injector is then placed in the ultrasonic tank, disassembled, and cycled for 10 minutes (sometimes more). Then put back together for re-testing. I have some pictures I snipped from my instagram account.

The spray pattern testing process is the 1st video here, the 2nd is the flow testing.
http://instagr.am/p/B4p53LaJmo0/
These are how the eTec injectors look fully assembled.


This is an example of some of the debris that can be found behind the pintle. This is scraped out, and then the injector and pintle are put in the ultrasonic tank for cleaning.


Somewhere I have more pictures and I think a video of the cleaning process, but I can't seem to locate them. Maybe they got lost when my phone crashed. I'll see what I can find.
 

wayneh

Joined Sep 9, 2010
18,133
As far as the electronics go, it doesn't really matter which way we go (micro-controller or CD40xx IC). I guess my question is does the microcontroller need to be programmed?
There's a learning curve to use a microcontroller for the first time. Probably great fun and it's a great tool once you know how to use it. You can tell because the people that have crossed that hurdle are quick to recommend a microprocessor for just about everything whether it's necessary or not.

Your project doesn't require a microprocessor. If you already knew how to use one, it might be a toss-up. But if you're not really into it and don't foresee future projects for microprocessors, I'd avoid going that route. You'll get done sooner.
 

Thread Starter

InjectorService

Joined Apr 11, 2020
35
There's a learning curve to use a microcontroller for the first time. Probably great fun and it's a great tool once you know how to use it. You can tell because the people that have crossed that hurdle are quick to recommend a microprocessor for just about everything whether it's necessary or not.

Your project doesn't require a microprocessor. If you already knew how to use one, it might be a toss-up. But if you're not really into it and don't foresee future projects for microprocessors, I'd avoid going that route. You'll get done sooner.
I was just reading on the microcontrollers, I don't think that is something I want to venture down right now, however if there is someone that would design the board and the program I think it should be attainable. I'm good either way, but I'm not super pumped on learning a new programing language.
 

Alec_t

Joined Sep 17, 2013
15,149
I'm no programmer, but I think anyone who is would find it pretty easy to program a MCU to generate the required pulse widths and sequencing. Since the pulse widths will be non-adjustable, there is no need for user input (other than on/off control) or any display, so the code would be minimal. Even the ubiquitous Arduino should be adequate as the MCU.
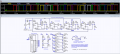
Here's the CD40xx-based circuit I mentioned, for pulsing 6 injectors, at 14Hz each, in sequence. It would need fleshing out to include +5V, +12V and +48V supplies, decoupling capacitors on the IC supply rails, 6 N-MOSFET H-bridges (one per injector), two half-bridge-driver ICs per injector, and snubber components. For the most part it could be built on stripboard, although a dedicated pcb would be preferable.
EtecInjectorPulser.png

I'm also attaching my LTspice asc file.
 

Attachments

Last edited:

Alec_t

Joined Sep 17, 2013
15,149
I just came across this document from Evinrude which explains the Etec operation and the reason for reverse pulses.
It appears in normal engine running three pulses are used: 1) forward drive, 2) brief reverse, 3) very brief braking of the coil bobbin. So the cleaning machine is not using the braking pulse.
 

wayneh

Joined Sep 9, 2010
18,133
I just came across this document from Evinrude which explains the Etec operation and the reason for reverse pulses.
It appears in normal engine running three pulses are used: 1) forward drive, 2) brief reverse, 3) very brief braking of the coil bobbin. So the cleaning machine is not using the braking pulse.
Gotta love what motivated engineers can come up with.
 

Thread Starter

InjectorService

Joined Apr 11, 2020
35
Thank you Alec for putting that all together! It looks so simple laid out on paper, but there's no way on earth I would have figured that out. Forsure not any time soon. So I guess this brings up a few questions.

1. The parts list looks like this, correct?
4 - CD4013B
1 - CD4017B
1 - CD4081B
Various resistors & diodes as listed

2. Is this good enough to send off to someone and have one made, or do I need to have a board actually designed and laid out? If so do you have a recommendation on who may build a 1 off of these for me?

3. R0-R5 & F0-F5 would be my outputs to the injector itself (in pairs obviously)

Again thank you, I'm not familiar with electronics almost at all, but I am definitely learning some stuff.

EDIT: I also realize I will need the H-Bridges, Inputs for 48, 12, and 5V. And I am assuming here, but the signal generated by LTSpice shows a positive signal on the short as well as long pulses, but the H-Bridges flip the 2nd (or short) pulse, correct?
 
Last edited:

Alec_t

Joined Sep 17, 2013
15,149
The parts list looks like this, correct?
Not quite. CD4013 has 2 latches per IC, CD4081 has 4 gates per IC, so you'd want 2 off CD4013, 1 off CD4017, 3 off CD4081.
R0-R5 and F0-F5 would be the 'Hin' and 'Lin' signals to FET gate driver ICs (such as MIC4606-1, IR2101 or LM5109), which in turn would each control an H-bridge made up of 4 N-channel MOSFETs to switch the coil current one way or the other. The IR2101 and LM5109 are only half-bridge drivers, so you'd need 2 off per injector, i.e 12 in all. But MIC4606-2 is a full-bridge driver, so only 6 of those needed. There'd be 24 FETs altogether.
As you can see, there's quite a lot wanted beyond the 'starting point' circuit that I posted! I'll draw up a second circuit showing how the F and R pulses would be applied.
Although you're reluctant to use one, an Arduino Nano (or clone) would completely replace my posted circuit . It would be cheaper and a lot more compact (and potentially more reliable with fewer components to lash together), but would still need bridge drivers and H-bridges to control the injectors. I'm sure there would be someone on this site (in the microcontroller forum) who could quickly knock up the necessary code.
Can your test machine tell us the inductance of the Etec injector? That has a bearing on what spike suppression components might be required to protect the H-bridge FETs.
 
Last edited:

Thread Starter

InjectorService

Joined Apr 11, 2020
35
Ok that makes more sense, I'm still not opposed to the microcontroller. I'm just not going to be able to program it myself.

Unfortunately my machine does not tell me the inductance of the injector. Is there any other measurement that could help you with this?

I also found this forum, which is going through some of the same scenarios with inductance on the eTec injectors.
https://www.etecownersgroup.com/post/voice-coils-6167780

EDIT: Alec, as my searches have been coming up, I can see that this definitely is not your first time dealing with someone trying to build an injector pulsing machine.
 

wayneh

Joined Sep 9, 2010
18,133
Although you're reluctant to use one, an Arduino Nano (or clone) would completely replace my posted circuit . It would be cheaper and a lot more compact (and potentially more reliable with fewer components to lash together), but would still need bridge drivers and H-bridges to control the injectors. I'm sure there would be someone on this site (in the microcontroller forum) who could quickly knock up the necessary code.
I'm wondering if there isn't such a thing prebuilt already available. I'm not sure what to search for. A set of µC-controlled H-bridges for controlling a robot would be very close if not perfect
 

Alec_t

Joined Sep 17, 2013
15,149
Here's the second suggested circuit as promised. Decoupling caps on the gate driver ICs might be needed.
It's for one injector (channel 0). You'd need to replicate it (apart from the power supplies) for the others, but if you plan to build it I suggest building just one channel first and testing it with a dummy load (electric kettle?).
An Arduino with 12 digital I/O pins could drive this circuit x 6.
I've assumed for simulation purposes that the injector inductance is 5mH. YMMV. I'm not seeing any nasty voltage spikes in the sim, even with an inductance of 100mH. The main effect of increased inductance is a reduction of the peak current through the injector.

EtecPulser2Add-on.png

Edit:
Be aware that a lot of ICs these days, including many bridge drivers, are not available in convenient PDIP packages, so can be challenging to solder. If PDIP is available it's invariably a good bit more expensive than the alternatives (SOIC etc).
 

Attachments

Last edited:

Thread Starter

InjectorService

Joined Apr 11, 2020
35
That looks great! So this is essentially everything that I would need to connect to the original circuit in order to get the whole system working? Asside from the decoupling caps? This is great! Now just to figure out how to get these components placed on a board and tested out!
 

Thread Starter

InjectorService

Joined Apr 11, 2020
35
So.... I've been contacting a few companies about having this board produced.... I've only got one price at the moment but they told me it would be a MINIMUM of $25k CAD. Can this be right? I understand 1 off stuff is expensive but WOW!
 

wayneh

Joined Sep 9, 2010
18,133
So.... I've been contacting a few companies about having this board produced.... I've only got one price at the moment but they told me it would be a MINIMUM of $25k CAD. Can this be right? I understand 1 off stuff is expensive but WOW!
Don't worry. I'm confident that you won't end up paying that much. Free might a challenge but for a modest fee I'm sure someone around here can cut that down.
 

Thread Starter

InjectorService

Joined Apr 11, 2020
35
Don't worry. I'm confident that you won't end up paying that much. Free might a challenge but for a modest fee I'm sure someone around here can cut that down.
This is a business thing for me. I make money with this board, or that's the goal. I have no issue paying for it at all, just not 25k... Trust me I don't do much for free if I don't have to.....

Although I do get on forums and help others in my respective areas. Haha!
 

wayneh

Joined Sep 9, 2010
18,133
Although I do get on forums and help others in my respective areas. Haha!
Yeah, pointing out the right path is valuable information that doesn't cost us to share. It's pretty easy to get free opinions. Actually doing the work is a different thing and harder (but not impossible) to get. Converting a schematic to an actual board layout and parts list is nothing too challenging but it does take time and if there's going to be a cost, that's where it will be. Getting it built is fairly cheap (<$100? I think) and there are threads here on the various places to get that done.
 

Alec_t

Joined Sep 17, 2013
15,149
So this is essentially everything that I would need to connect to the original circuit in order to get the whole system working?
I like your optimism. Since this is a prototype I'm sure there'll be something that's been overlooked or might need changing :). Resistor values may need to be tweaked to get the exact pulse timing you want, so it would be advisable to use trim-pots for the timing resistors (the ones I labelled "Setxxx" in the first circuit).
Also, there's the 'little' matter of power supplies. The CMOS logic ICs for the pulse generation will accept +5V or +12V supplies and draw only a few mA of current. The bridge-driver ICs should be happy with a +12V supply @ <1A. A scavenged ATX computer power supply would give you both the +5V and +12V with far more current capability than you actually need. Or a simple 12V 500mA wall-wart would do the job. The H-bridges will use a +48V supply rated for 20A at least.
You'll want rugged switches for the power supplies and a protective enclosure for everything.
Depending on the MOSFETs used, heatsinks for them may be required.
Have you got the ultrasonic cleaning bath part of the system sorted?
Will a pump to circulate the cleaning fluid be necessary to cool the injectors (they could each be dissipating up to ~100W)?
Can you source the correct connectors for the injectors?
 
Last edited:

Thread Starter

InjectorService

Joined Apr 11, 2020
35
I like your optimism. Since this is a prototype I'm sure there'll be something that's been overlooked or might need changing :). Resistor values may need to be tweaked to get the exact pulse timing you want, so it would be advisable to use trim-pots for the timing resistors (the ones I labelled "Setxxx" in the first circuit).
Also, there's the 'little' matter of power supplies. The CMOS logic ICs for the pulse generation will accept +5V or +12V supplies and draw only a few mA of current. The bridge-driver ICs should be happy with a +12V supply @ <1A. A scavenged ATX computer power supply would give you both the +5V and +12V with far more current capability than you actually need. Or a simple 12V 500mA wall-wart would do the job. The H-bridges will use a +48V supply rated for 20A at least.
You'll want rugged switches for the power supplies and a protective enclosure for everything.
Depending on the MOSFETs used, heatsinks for them may be required.
Have you got the ultrasonic cleaning bath part of the system sorted?
Will a pump to circulate the cleaning fluid be necessary to cool the injectors (they could each be dissipating up to ~100W)?
Can you source the correct connectors for the injectors?
Of course I'm optimistic! I like where this project is going. I can completely understand needing to make tweaks to the design once a prototype is built.

As far as the power supplies go, can we use the 48v supply into the board and use transformers for the +5V and +12V? If not I think the way to go would be the ATX supply.

The current 48V supply my box is using is a DRA240, capable of 5 amps. Would this not be suitable for this board seeing as each injector is triggered separately, or is there something I'm missing. A 2400 watt power supply is rather expensive.

I already have a larger ultrasonic ~30L, to which I have added a filtering and pump system, although I'm not worried about excess heat with that amount of liquid. Rugged waterproof switches are no problem, along with the connectors/harnesses and the box. Those are things that are WAY more in my wheelhouse.

https://www.corsa-technic.com/index.php - these guys have almost every automotive style connector on the market for very reasonable prices

https://connectorexperts.com/ - If those guys don't have it, these guys definitely will, although their pricing is INSANE.
 

Alec_t

Joined Sep 17, 2013
15,149
can we use the 48v supply into the board and use transformers for the +5V and +12V? If not I think the way to go would be the ATX supply.
The +5V isn't necessary if you don't intend to use a MCU. I'd go for a +12V wall-wart (500mA should be adequate, since the MOSFETs are being switched at a very low rate) rather than a bulky ATX, although the ATX would be fine for prototyping.
The current 48V supply my box is using is a DRA240, capable of 5 amps. Would this not be suitable for this board seeing as each injector is triggered separately
Yes, a DRA240 5A supply should be ok for this injector type.
 
Top