Facebook
 Google
 GitHub
 Linkedin
Sounds good. I would recommend that you test the complete 4x4 matrix as I described in #511 as a first step. Knowing that your hardware is functioning correctly can save lots of time debugging the software.I have tested keypad key 1. I have uploaded test code and its working for me. Now Next I am going to make useful project with LCD and Keypad using timer interrupt.
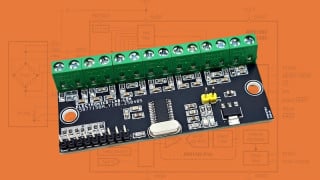
PIC Development Board with PK3
- Thread starter Djsarakar
- Start date
Scroll to continue with content
I am trying to test the complete 4x4 matrix. so far I have done tests for 1-4 keys but I am having trouble to test 5 keySounds good. I would recommend that you test the complete 4x4 matrix as I described in #511 as a first step. Knowing that your hardware is functioning correctly can save lots of time debugging the software.

C:
#define _XTAL_FREQ 8000000

#include <xc.h>
// PIC18F45K80 Configuration Bit Settings
// 'C' source line config statements
// CONFIG1L
#pragma config RETEN = OFF      // VREG Sleep Enable bit (Ultra low-power regulator is Disabled (Controlled by REGSLP bit))
#pragma config INTOSCSEL = HIGH // LF-INTOSC Low-power Enable bit (LF-INTOSC in High-power mode during Sleep)
#pragma config SOSCSEL = HIGH   // SOSC Power Selection and mode Configuration bits (High Power SOSC circuit selected)
#pragma config XINST = OFF       // Extended Instruction Set (Enabled)
// CONFIG1H
#pragma config FOSC = INTIO2    // Oscillator (Internal RC oscillator)
#pragma config PLLCFG = OFF     // PLL x4 Enable bit (Disabled)
#pragma config FCMEN = OFF      // Fail-Safe Clock Monitor (Disabled)
#pragma config IESO = OFF       // Internal External Oscillator Switch Over Mode (Disabled)
// CONFIG2L
#pragma config PWRTEN = OFF     // Power Up Timer (Disabled)
#pragma config BOREN = SBORDIS  // Brown Out Detect (Enabled in hardware, SBOREN disabled)
#pragma config BORV = 3         // Brown-out Reset Voltage bits (1.8V)
#pragma config BORPWR = ZPBORMV // BORMV Power level (ZPBORMV instead of BORMV is selected)
// CONFIG2H
#pragma config WDTEN = OFF      // Watchdog Timer (WDT disabled in hardware; SWDTEN bit disabled)
#pragma config WDTPS = 1048576  // Watchdog Postscaler (1:1048576)
// CONFIG3H
#pragma config CANMX = PORTB    // ECAN Mux bit (ECAN TX and RX pins are located on RB2 and RB3, respectively)
#pragma config MSSPMSK = MSK7   // MSSP address masking (7 Bit address masking mode)
#pragma config MCLRE = ON       // Master Clear Enable (MCLR Enabled, RE3 Disabled)
// CONFIG4L
#pragma config STVREN = ON      // Stack Overflow Reset (Enabled)
#pragma config BBSIZ = BB2K     // Boot Block Size (2K word Boot Block size)
// CONFIG5L
#pragma config CP0 = OFF        // Code Protect 00800-01FFF (Disabled)
#pragma config CP1 = OFF        // Code Protect 02000-03FFF (Disabled)
#pragma config CP2 = OFF        // Code Protect 04000-05FFF (Disabled)
#pragma config CP3 = OFF        // Code Protect 06000-07FFF (Disabled)
// CONFIG5H
#pragma config CPB = OFF        // Code Protect Boot (Disabled)
#pragma config CPD = OFF        // Data EE Read Protect (Disabled)
// CONFIG6L
#pragma config WRT0 = OFF       // Table Write Protect 00800-01FFF (Disabled)
#pragma config WRT1 = OFF       // Table Write Protect 02000-03FFF (Disabled)
#pragma config WRT2 = OFF       // Table Write Protect 04000-05FFF (Disabled)
#pragma config WRT3 = OFF       // Table Write Protect 06000-07FFF (Disabled)
// CONFIG6H
#pragma config WRTC = OFF       // Config. Write Protect (Disabled)
#pragma config WRTB = OFF       // Table Write Protect Boot (Disabled)
#pragma config WRTD = OFF       // Data EE Write Protect (Disabled)
// CONFIG7L
#pragma config EBTR0 = OFF      // Table Read Protect 00800-01FFF (Disabled)
#pragma config EBTR1 = OFF      // Table Read Protect 02000-03FFF (Disabled)
#pragma config EBTR2 = OFF      // Table Read Protect 04000-05FFF (Disabled)
#pragma config EBTR3 = OFF      // Table Read Protect 06000-07FFF (Disabled)
// CONFIG7H
#pragma config EBTRB = OFF      // Table Read Protect Boot (Disabled)


__bit Interrupt_Flag_1ms;

#define C1          PORTDbits.RD0
#define C2          PORTDbits.RD1
#define C3          PORTDbits.RD2
#define C4          PORTDbits.RD3

#define R1          LATDbits.LATD4
#define R2          LATDbits.LATD5
#define R3          LATDbits.LATD6
#define R4          LATDbits.LATD7

#define RS          LATAbits.LATA2
#define RW          LATAbits.LATA1
#define EN          LATAbits.LATA0

#define  LCDPORT          LATC
#define  LCDTRISC         LATC

#define DEBOUNCE_TIKS     10

void SW1 (void);
void SW2 (void);
void SW3 (void);
void SW4 (void);
void SW5 (void);

void Port_Initialized (void);
void Timer0_Initialized (void);


void WriteNibble(unsigned char command);
void WaitLCDBusy(void);
void WriteCommand(unsigned char command);
void __interrupt(high_priority) tcInt(void);

struct btn_debounce
{
    unsigned char counter;
    char status : 1 ; //one bit flags
    char lcd :1; // signal for LCD routine
} Button_x1, Button_x2, Button_x3, Button_x4, Button_x5, Button_x6, Button_x7, Button_x8, Button_x9, Button_x10,
        Button_x11, Button_x12, Button_x13, Button_x14, Button_x15, Button_x16;

unsigned char Data1[] = "1";
unsigned char Data2[] = "2";
unsigned char Data3[] = "3";
unsigned char Data4[] = "4";
unsigned char Data5[] = "5";
unsigned char Data6[] = "6";
unsigned char Data7[] = "7";
unsigned char Data8[] = "8";
unsigned char Data9[] = "9";
unsigned char Data10[] = "10";
unsigned char Data11[] = "11";
unsigned char Data12[] = "12";
unsigned char Data13[] = "13";
unsigned char Data14[] = "14";
unsigned char Data15[] = "15";
unsigned char Data16[] = "16";

void Port_Initialized (void)
{
    // LATx registers
    LATA =  0x00;
    LATB =  0x00;
    LATC =  0x00;
    LATD =  0xFF;
    LATE =  0x00;

//  TRISx registers
    TRISA = 0x00;      // All are output, Unused
    TRISB = 0x0F;      // Button connected to RB0-RB3
    TRISC = 0x00;      // all are output, Unused
    TRISD = 0x00;      // LED connected to RD2 pin
    TRISE = 0x00;      // All are output, Unused

    ANCON0 = 0x00;     // set to digital port
    ANCON1 = 0x00;     // Set to digital port
    CM1CON = 0x00;     // Comparator off
    CM2CON = 0x00;     // Comparator off
    ADCON0 = 0x00;     // A/D conversion Disabled
    ADCON1 = 0x00;     // A/D conversion Disabled
    ADCON2 = 0x00;     // A/D conversion Disabled
}

void Timer0_Initialized (void)
{
     TMR0L = 250;    //Timer0 Register Low Byte

    //T0CON: TIMER0 CONTROL REGISTER
     TMR0ON = 1; //Timer0 On
     T08BIT = 1; // Timer0 is configured as an 8-bit timer/counter0
     T0CS = 0;   // Internal instruction cycle clock (CLKO)
     T0SE = 1;    //Increments on high-to-low transition on T0CKI pin0
     PSA = 0; //Timer0 prescaler is assigned; Timer0 clock input comes from prescaler output
     //1:8 Prescale value
     T0PS2 = 1;
     T0PS1 = 1;
     T0PS0 = 1;
     //INTCON: INTERRUPT CONTROL

     PEIE = 0;   //Disables all peripheral interrupts
     TMR0IE = 1; //Enables the TMR0 overflow interrupt
     INT0IE = 0; //Disables the INT0 external interrupt
     RBIE = 0; //Disables the RB port change interrupt
     TMR0IF = 0;// cleared timer overflow flag
     INT0IF = 0; // disabled external interrupt
     RBIF = 0; //disabled Port Change Interrupt Flag bit
     GIE = 1;    // Enable Global Interrupt Enable bit
}

void Run_Debounce(void)
{
  SW1 ();
  SW2 ();
  SW3 ();
  SW4 ();
  SW5 ();

}

void SW1 (void)
{
  if (C1 == 1)
  {
      Button_x1.counter = 0;
      Button_x1.status = 0;

  }
  else
  {
     if( Button_x1.status == 0)
      {
         Button_x1.counter++;
         if(Button_x1.counter == DEBOUNCE_TIKS)
         {
            Button_x1.status = 1;    // fully debounced
             Button_x1.lcd = 1;
         }
       }
  }

}

void SW2 (void)
{
  if (C2 == 1)
  {
      Button_x2.counter = 0;
      Button_x2.status = 0;

  }
  else
  {
     if( Button_x2.status == 0)
      {
         Button_x2.counter++;
         if(Button_x2.counter == DEBOUNCE_TIKS)
         {
            Button_x2.status = 1;    // fully debounced
             Button_x2.lcd = 1;
         }
       }
  }

}

void SW3 (void)
{
  if (C3 == 1)
  {
      Button_x3.counter = 0;
      Button_x3.status = 0;

  }
  else
  {
     if( Button_x3.status == 0)
      {
         Button_x3.counter++;
         if(Button_x3.counter == DEBOUNCE_TIKS)
         {
            Button_x3.status = 1;    // fully debounced
             Button_x3.lcd = 1;
         }
       }
  }

}

void SW4 (void)
{
  if (C4 == 1)
  {
      Button_x4.counter = 0;
      Button_x4.status = 0;

  }
  else
  {
     if( Button_x4.status == 0)
      {
         Button_x4.counter++;
         if(Button_x4.counter == DEBOUNCE_TIKS)
         {
            Button_x4.status = 1;    // fully debounced
             Button_x4.lcd = 1;
         }
       }
  }

}


void SW5 (void)
{
  if (C1 == 1)
  {
      Button_x5.counter = 0;
      Button_x5.status = 0;

  }
  else
  {
     if( Button_x5.status == 0)
      {
         Button_x5.counter++;
         if(Button_x5.counter == DEBOUNCE_TIKS)
         {
            Button_x5.status = 1;    // fully debounced
             Button_x5.lcd = 1;
         }
       }
  }

}


void WaitLCDBusy(void)
{
    __delay_ms(5);
}

//Send a command to the LCD
void WriteCommand(unsigned char command)
{
    WaitLCDBusy();                               //wait until not busy
    RS = 0;                                      //setup to send command
    WriteNibble(command);                        //write the high nibble
    WriteNibble( (unsigned char)(command<<4) );  //then the low nibble
}

//Initialized  LCD
void LCD_Initialized()
{
    LCDTRISC &=0x0f;                //ensure data bits are output
    EN = 0;                         //clear enable
    RS = 0;                         //going to write command
    TRISAbits.TRISA2 = 0;
    TRISAbits.TRISA1 = 0;
    TRISAbits.TRISA0 = 0;
    RW=0;
    __delay_ms(30);                 //delay for LCD to initialise.
    WriteNibble(0x30);              //Required for initialisation
    __delay_ms(5);                  //required delay
    WriteNibble(0x30);              //Required for initialisation
    __delay_ms(1);                  //required delay
    WriteCommand(0x20);             //set to 4 bit interface
    WriteCommand(0x2c);             //set to 4 bit interface, 2 line and 5*10 font
    WriteCommand(0x0e);             //Cursor blinking, Display ON
    WriteCommand(0x81);
    WriteCommand(0x01);             //clear display
}

//Send a character to the LCD
void WriteChar(unsigned char chr)
{
    WaitLCDBusy();                         //wait until not busy
    RS=1;                              //Setup to send character
    WriteNibble(chr);                      //write the high nibble
    WriteNibble( (unsigned char)(chr<<4)); //then the low nibble
}

//Send any 4 bits to the LCD
void WriteNibble(unsigned char command)
{
    LCDPORT &= 0x0f;                        //clear the data bits
    LCDPORT|=((command & 0xf0));            //or in the new data
    EN = 1;                                 //enable the LCD interface
    NOP();                                  //change to delay of 1uS
    NOP();
    NOP();
    EN = 0;                                 //disable it
    NOP();
}

void LCD_Data( unsigned char *string)
{
    while (*string != '\0')
    {
      WriteChar(*string);
        string++;
    }
}


void main(void)
{

    Button_x1.counter = 0;
    Button_x1.status = 0;

    Button_x2.counter = 0;
    Button_x2.status = 0;

    Button_x3.counter = 0;
    Button_x3.status = 0;

    Button_x4.counter = 0;
    Button_x4.status = 0;

    Button_x5.counter = 0;
    Button_x5.status = 0;

    Port_Initialized ();
    Timer0_Initialized ();
    LCD_Initialized();
    PADCFG1 = 0x80;

    R1 = 1;  R2 = 1; R3 = 1; R4 = 1; //
    while (1)
    {

        if (Interrupt_Flag_1ms == 1)
           {
               Interrupt_Flag_1ms = 0;  // clear the flag for next time
               Run_Debounce();        // process switch

               R1 = 0;
               if ( Button_x1.lcd == 1)
               {
                  LCD_Data(Data1);
                  Button_x1.lcd = 0;
               }
              if ( Button_x2.lcd == 1)
               {
                  LCD_Data(Data2);
                  Button_x2.lcd = 0;
               }

               if ( Button_x3.lcd == 1)
               {
                  LCD_Data(Data3);
                  Button_x3.lcd = 0;
               }

               if ( Button_x4.lcd == 1)
               {
                  LCD_Data(Data4);
                  Button_x4.lcd = 0;
               }


    }
}
}
void __interrupt(high_priority) tcInt(void)
{
  if (TMR0IF == 1) // Timer0 overflow interrupt flag bit
  {
      TMR0IF = 0;
      TMR0L = 250;    //Timer0 Register Low Byte
      Interrupt_Flag_1ms = 1;

  }

}key 1 pressed - Nothing display
key 2 pressed - Nothing display
key 3 pressed - Nothing display
key 4 pressed - Nothing display
key 5 pressed - 15 display
key 6 pressed - 2 display
key 7 pressed - 3 display
key 8 pressed - 4 display
C:
#define _XTAL_FREQ 8000000

#include <xc.h>
// PIC18F45K80 Configuration Bit Settings
// 'C' source line config statements
// CONFIG1L
#pragma config RETEN = OFF      // VREG Sleep Enable bit (Ultra low-power regulator is Disabled (Controlled by REGSLP bit))
#pragma config INTOSCSEL = HIGH // LF-INTOSC Low-power Enable bit (LF-INTOSC in High-power mode during Sleep)
#pragma config SOSCSEL = HIGH   // SOSC Power Selection and mode Configuration bits (High Power SOSC circuit selected)
#pragma config XINST = OFF       // Extended Instruction Set (Enabled)
// CONFIG1H
#pragma config FOSC = INTIO2    // Oscillator (Internal RC oscillator)
#pragma config PLLCFG = OFF     // PLL x4 Enable bit (Disabled)
#pragma config FCMEN = OFF      // Fail-Safe Clock Monitor (Disabled)
#pragma config IESO = OFF       // Internal External Oscillator Switch Over Mode (Disabled)
// CONFIG2L
#pragma config PWRTEN = OFF     // Power Up Timer (Disabled)
#pragma config BOREN = SBORDIS  // Brown Out Detect (Enabled in hardware, SBOREN disabled)
#pragma config BORV = 3         // Brown-out Reset Voltage bits (1.8V)
#pragma config BORPWR = ZPBORMV // BORMV Power level (ZPBORMV instead of BORMV is selected)
// CONFIG2H
#pragma config WDTEN = OFF      // Watchdog Timer (WDT disabled in hardware; SWDTEN bit disabled)
#pragma config WDTPS = 1048576  // Watchdog Postscaler (1:1048576)
// CONFIG3H
#pragma config CANMX = PORTB    // ECAN Mux bit (ECAN TX and RX pins are located on RB2 and RB3, respectively)
#pragma config MSSPMSK = MSK7   // MSSP address masking (7 Bit address masking mode)
#pragma config MCLRE = ON       // Master Clear Enable (MCLR Enabled, RE3 Disabled)
// CONFIG4L
#pragma config STVREN = ON      // Stack Overflow Reset (Enabled)
#pragma config BBSIZ = BB2K     // Boot Block Size (2K word Boot Block size)
// CONFIG5L
#pragma config CP0 = OFF        // Code Protect 00800-01FFF (Disabled)
#pragma config CP1 = OFF        // Code Protect 02000-03FFF (Disabled)
#pragma config CP2 = OFF        // Code Protect 04000-05FFF (Disabled)
#pragma config CP3 = OFF        // Code Protect 06000-07FFF (Disabled)
// CONFIG5H
#pragma config CPB = OFF        // Code Protect Boot (Disabled)
#pragma config CPD = OFF        // Data EE Read Protect (Disabled)
// CONFIG6L
#pragma config WRT0 = OFF       // Table Write Protect 00800-01FFF (Disabled)
#pragma config WRT1 = OFF       // Table Write Protect 02000-03FFF (Disabled)
#pragma config WRT2 = OFF       // Table Write Protect 04000-05FFF (Disabled)
#pragma config WRT3 = OFF       // Table Write Protect 06000-07FFF (Disabled)
// CONFIG6H
#pragma config WRTC = OFF       // Config. Write Protect (Disabled)
#pragma config WRTB = OFF       // Table Write Protect Boot (Disabled)
#pragma config WRTD = OFF       // Data EE Write Protect (Disabled)
// CONFIG7L
#pragma config EBTR0 = OFF      // Table Read Protect 00800-01FFF (Disabled)
#pragma config EBTR1 = OFF      // Table Read Protect 02000-03FFF (Disabled)
#pragma config EBTR2 = OFF      // Table Read Protect 04000-05FFF (Disabled)
#pragma config EBTR3 = OFF      // Table Read Protect 06000-07FFF (Disabled)
// CONFIG7H
#pragma config EBTRB = OFF      // Table Read Protect Boot (Disabled)


__bit Interrupt_Flag_1ms;

#define C1          PORTDbits.RD0
#define C2          PORTDbits.RD1
#define C3          PORTDbits.RD2
#define C4          PORTDbits.RD3

#define R1          LATDbits.LATD4
#define R2          LATDbits.LATD5
#define R3          LATDbits.LATD6
#define R4          LATDbits.LATD7

#define RS          LATAbits.LATA2
#define RW          LATAbits.LATA1
#define EN          LATAbits.LATA0

#define  LCDPORT          LATC
#define  LCDTRISC         LATC

#define DEBOUNCE_TIKS     10

void SW1 (void);
void SW2 (void);
void SW3 (void);
void SW4 (void);
void SW5 (void);

void Port_Initialized (void);
void Timer0_Initialized (void);


void WriteNibble(unsigned char command);
void WaitLCDBusy(void);
void WriteCommand(unsigned char command);
void __interrupt(high_priority) tcInt(void);

struct btn_debounce
{
    unsigned char counter;
    char status : 1 ; //one bit flags
    char lcd :1; // signal for LCD routine
} Button_x1, Button_x2, Button_x3, Button_x4, Button_x5, Button_x6, Button_x7, Button_x8, Button_x9, Button_x10,
        Button_x11, Button_x12, Button_x13, Button_x14, Button_x15, Button_x16;

unsigned char Data1[] = "1";
unsigned char Data2[] = "2";
unsigned char Data3[] = "3";
unsigned char Data4[] = "4";
unsigned char Data5[] = "5";
unsigned char Data6[] = "6";
unsigned char Data7[] = "7";
unsigned char Data8[] = "8";
unsigned char Data9[] = "9";
unsigned char Data10[] = "10";
unsigned char Data11[] = "11";
unsigned char Data12[] = "12";
unsigned char Data13[] = "13";
unsigned char Data14[] = "14";
unsigned char Data15[] = "15";
unsigned char Data16[] = "16";

void Port_Initialized (void)
{
    // LATx registers
    LATA =  0x00;
    LATB =  0x00;
    LATC =  0x00;
    LATD =  0xFF;
    LATE =  0x00;

//  TRISx registers
    TRISA = 0x00;      // All are output, Unused
    TRISB = 0x0F;      // Button connected to RB0-RB3
    TRISC = 0x00;      // all are output, Unused
    TRISD = 0x00;      // LED connected to RD2 pin
    TRISE = 0x00;      // All are output, Unused

    ANCON0 = 0x00;     // set to digital port
    ANCON1 = 0x00;     // Set to digital port
    CM1CON = 0x00;     // Comparator off
    CM2CON = 0x00;     // Comparator off
    ADCON0 = 0x00;     // A/D conversion Disabled
    ADCON1 = 0x00;     // A/D conversion Disabled
    ADCON2 = 0x00;     // A/D conversion Disabled
}

void Timer0_Initialized (void)
{
     TMR0L = 250;    //Timer0 Register Low Byte

    //T0CON: TIMER0 CONTROL REGISTER
     TMR0ON = 1; //Timer0 On
     T08BIT = 1; // Timer0 is configured as an 8-bit timer/counter0
     T0CS = 0;   // Internal instruction cycle clock (CLKO)
     T0SE = 1;    //Increments on high-to-low transition on T0CKI pin0
     PSA = 0; //Timer0 prescaler is assigned; Timer0 clock input comes from prescaler output
     //1:8 Prescale value
     T0PS2 = 1;
     T0PS1 = 1;
     T0PS0 = 1;
     //INTCON: INTERRUPT CONTROL

     PEIE = 0;   //Disables all peripheral interrupts
     TMR0IE = 1; //Enables the TMR0 overflow interrupt
     INT0IE = 0; //Disables the INT0 external interrupt
     RBIE = 0; //Disables the RB port change interrupt
     TMR0IF = 0;// cleared timer overflow flag
     INT0IF = 0; // disabled external interrupt
     RBIF = 0; //disabled Port Change Interrupt Flag bit
     GIE = 1;    // Enable Global Interrupt Enable bit
}

void Run_Debounce(void)
{
  SW1 ();
  SW2 ();
  SW3 ();
  SW4 ();
  SW5 ();

}

void SW1 (void)
{
  if (C1 == 1)
  {
      Button_x1.counter = 0;
      Button_x1.status = 0;

  }
  else
  {
     if( Button_x1.status == 0)
      {
         Button_x1.counter++;
         if(Button_x1.counter == DEBOUNCE_TIKS)
         {
            Button_x1.status = 1;    // fully debounced
             Button_x1.lcd = 1;
         }
       }
  }

}

void SW2 (void)
{
  if (C2 == 1)
  {
      Button_x2.counter = 0;
      Button_x2.status = 0;

  }
  else
  {
     if( Button_x2.status == 0)
      {
         Button_x2.counter++;
         if(Button_x2.counter == DEBOUNCE_TIKS)
         {
            Button_x2.status = 1;    // fully debounced
             Button_x2.lcd = 1;
         }
       }
  }

}

void SW3 (void)
{
  if (C3 == 1)
  {
      Button_x3.counter = 0;
      Button_x3.status = 0;

  }
  else
  {
     if( Button_x3.status == 0)
      {
         Button_x3.counter++;
         if(Button_x3.counter == DEBOUNCE_TIKS)
         {
            Button_x3.status = 1;    // fully debounced
             Button_x3.lcd = 1;
         }
       }
  }

}

void SW4 (void)
{
  if (C4 == 1)
  {
      Button_x4.counter = 0;
      Button_x4.status = 0;

  }
  else
  {
     if( Button_x4.status == 0)
      {
         Button_x4.counter++;
         if(Button_x4.counter == DEBOUNCE_TIKS)
         {
            Button_x4.status = 1;    // fully debounced
             Button_x4.lcd = 1;
         }
       }
  }

}


void SW5 (void)
{
  if (C1 == 1)
  {
      Button_x5.counter = 0;
      Button_x5.status = 0;

  }
  else
  {
     if( Button_x5.status == 0)
      {
         Button_x5.counter++;
         if(Button_x5.counter == DEBOUNCE_TIKS)
         {
            Button_x5.status = 1;    // fully debounced
             Button_x5.lcd = 1;
         }
       }
  }

}


void WaitLCDBusy(void)
{
    __delay_ms(5);
}

//Send a command to the LCD
void WriteCommand(unsigned char command)
{
    WaitLCDBusy();                               //wait until not busy
    RS = 0;                                      //setup to send command
    WriteNibble(command);                        //write the high nibble
    WriteNibble( (unsigned char)(command<<4) );  //then the low nibble
}

//Initialized  LCD
void LCD_Initialized()
{
    LCDTRISC &=0x0f;                //ensure data bits are output
    EN = 0;                         //clear enable
    RS = 0;                         //going to write command
    TRISAbits.TRISA2 = 0;
    TRISAbits.TRISA1 = 0;
    TRISAbits.TRISA0 = 0;
    RW=0;
    __delay_ms(30);                 //delay for LCD to initialise.
    WriteNibble(0x30);              //Required for initialisation
    __delay_ms(5);                  //required delay
    WriteNibble(0x30);              //Required for initialisation
    __delay_ms(1);                  //required delay
    WriteCommand(0x20);             //set to 4 bit interface
    WriteCommand(0x2c);             //set to 4 bit interface, 2 line and 5*10 font
    WriteCommand(0x0e);             //Cursor blinking, Display ON
    WriteCommand(0x81);
    WriteCommand(0x01);             //clear display
}

//Send a character to the LCD
void WriteChar(unsigned char chr)
{
    WaitLCDBusy();                         //wait until not busy
    RS=1;                              //Setup to send character
    WriteNibble(chr);                      //write the high nibble
    WriteNibble( (unsigned char)(chr<<4)); //then the low nibble
}

//Send any 4 bits to the LCD
void WriteNibble(unsigned char command)
{
    LCDPORT &= 0x0f;                        //clear the data bits
    LCDPORT|=((command & 0xf0));            //or in the new data
    EN = 1;                                 //enable the LCD interface
    NOP();                                  //change to delay of 1uS
    NOP();
    NOP();
    EN = 0;                                 //disable it
    NOP();
}

void LCD_Data( unsigned char *string)
{
    while (*string != '\0')
    {
      WriteChar(*string);
        string++;
    }
}


void main(void)
{

    Button_x1.counter = 0;
    Button_x1.status = 0;

    Button_x2.counter = 0;
    Button_x2.status = 0;

    Button_x3.counter = 0;
    Button_x3.status = 0;

    Button_x4.counter = 0;
    Button_x4.status = 0;

    Button_x5.counter = 0;
    Button_x5.status = 0;

    Port_Initialized ();
    Timer0_Initialized ();
    LCD_Initialized();
    PADCFG1 = 0x80;

    R1 = 1;  R2 = 1; R3 = 1; R4 = 1; //
    while (1)
    {

        if (Interrupt_Flag_1ms == 1)
           {
               Interrupt_Flag_1ms = 0;  // clear the flag for next time
               Run_Debounce();        // process switch


                 R1 = 0;

               if ( Button_x1.lcd == 1)
               {
                  LCD_Data(Data1);
                  Button_x1.lcd = 0;
               }
              if ( Button_x2.lcd == 1)
               {
                  LCD_Data(Data2);
                  Button_x2.lcd = 0;
               }

               if ( Button_x3.lcd == 1)
               {
                  LCD_Data(Data3);
                  Button_x3.lcd = 0;
               }

               if ( Button_x4.lcd == 1)
               {
                  LCD_Data(Data4);
                  Button_x4.lcd = 0;
               }

              R1 = 1;
              R2 = 0;

               if ( Button_x5.lcd == 1)
               {
                  LCD_Data(Data5);
                  Button_x5.lcd = 0;
               }

    }
}
}
void __interrupt(high_priority) tcInt(void)
{
  if (TMR0IF == 1) // Timer0 overflow interrupt flag bit
  {
      TMR0IF = 0;
      TMR0L = 250;    //Timer0 Register Low Byte
      Interrupt_Flag_1ms = 1;

  }

}
Last edited:
It's a good first effort and it's nice to see you are using the debugger more and more.key 5 pressed - 15 display
key 6 pressed - 2 display
key 7 pressed - 3 display
key 8 pressed - 4 display
The reason you get 1-5 is the debounce routines are only detecting the 'C' inputs without regard to which 'R' is active. Note that buttons 1 and 5 share C1 so SW1() and SW5() functions both think that their switch is pressed. An easy way out would be to just have one set of SW1()-SW4() debouncers and call them for each different 'R' selected. When one returns with the flag set, you can combine that with the current 'R' selected to get a unique key code.
If you think about it, only one of the C bits should be 0 at any time - one key pressed. You could debounce the whole 4 'C' bits with one routine. When that is stable, figure out which 'C' bit is 0 and return that as the 'C' value. Combine that with the current 'R' selected for a unique key code.
That leads to the usual way to read a 4x4 matrix:
- Output 0 to the 'R's one at a time, on each 1 ms interrupt, and look for a 0 on one of the 4 'C' inputs. If all 'C' are 1 then output the next 'R' on the next interrupt. Do this 'scanning' until one of the 'C' inputs is 0. That indicates a button at the R x C intersection is pushed.
- Leave the 'R' where it is and debounce the button by counting 1ms intervals while the 'C' lines stay the same.
- When the button at the R x C intersection is debounced, convert the R and C pair to a switch value and output that value with a flag that indicates a new button pushed. The tables you generated earlier can help with this.
- Continue monitoring the 'C' lines until the button is released.
- Now the matrix is ready for the next key. Resume scanning and repeat the process.
- Invalid operation like pressing multiple keys at one time should be considered.
What to you think?
Last edited:
I think in following way, This is not what we want but it show logic for row and column without debouncingWhat to you think?
C:
void Keypad_scan()
{
  C1=1;
  C2=1;
  C3=1;
  C4=1;
  R1=0;
  R2=1;
  R3=1;
  R4=1;

  if(C1==0)
      1;
  if(C2==0)
      2
  if(C3==0)
      3
  if(C4==0)
      4
  R1=1;
  R2=0;
  R3=1;
  R4=1;
  if(C1==0)
      5
  if(C2==0)
      6
  if(C3==0)
      7
  if(C4==0)
      8
  R1=1;
  R2=1;
  R3=0;
  R4=1;
  if(C1==0)
      9
  if(C2==0)
      10
  if(C3==0)
      11
  if(C4==0)
      12
  R1=1;
  R2=1;
  R3=1;
  R4=0;
  if(C1==0)
      13
  if(C2==0)
      14
  if(C3==0)
      15
  if(C4==0)
      16

}This code scan all 4 'C' inputs for R1 = 0 , Next I am trying to understand how to scan all 4 'C' inputs for R2 = 0That leads to the usual way to read a 4x4 matrix:
- Output 0 to the 'R's one at a time, on each 1 ms interrupt, and look for a 0 on one of the 4 'C' inputs. If all 'C' are 1 then output the next 'R' on the next interrupt. Do this 'scanning' until one of the 'C' inputs is 0. That indicates a button at the R x C intersection is pushed.
C:
    while (1)
    {

        if (Interrupt_Flag_1ms == 1)
           {
               Interrupt_Flag_1ms = 0;  // clear the flag for next time
               Run_Debounce();        // process switch

               R1 = 0;

               if ( Button_x1.lcd == 1)
               {
                  LCD_Data(Data1);
                  Button_x1.lcd = 0;
               }
              if ( Button_x2.lcd == 1)
               {
                  LCD_Data(Data2);
                  Button_x2.lcd = 0;
               }

               if ( Button_x3.lcd == 1)
               {
                  LCD_Data(Data3);
                  Button_x3.lcd = 0;
               }

               if ( Button_x4.lcd == 1)
               {
                  LCD_Data(Data4);
                  Button_x4.lcd = 0;
               }


    }
}
}You will find that to be clumsy because you have mixed the button scan / debounce with LCD messages. It would be better to arrange the software so that the keypad routine just scans the matrix, debounces a key and posts a key code with a single flag that indicates a new key (only one will be pressed at a time usually). Main can then detect the flag, read the code and write the selected message to the LCD.Next I am trying to understand how to scan all 4 'C' inputs for R2 = 0
Last edited:
i'm stuck here i don't understand how to do it. can you give sudo-code.You will find that to be clumsy because you have mixed the button scan / debounce with LCD messages. It would be better to arrange the software so that the keypad routine just scans the matrix, debounces a key and posts a key code with a single flag that indicates a new key (only one will be pressed at a time usually). Main can then detect the flag, read the code and write the selected message to the LCD.
I can’t right now and have a busy weekend. #523 has a list of steps to scan a 4x4 matrix and some thoughts on how to think about it. For example you only need one debouncer, key value and ‘new’ flag because you only process one of the 16 buttons at a time After denouncing and outputting the key, you wait until the button is released then look for the next one.
A quick way see if all buttons are released is to set all 4 ‘R’s to 0 and wait until the 4 ‘C’ bits are all 1.
Give that some thought. I’ll check in when I can or maybe one of the others can jump in.
Good luck!
A quick way see if all buttons are released is to set all 4 ‘R’s to 0 and wait until the 4 ‘C’ bits are all 1.
Give that some thought. I’ll check in when I can or maybe one of the others can jump in.
Good luck!
Post #522 has a routine that only debounced one button.A quick way see if all buttons are released is to set all 4 ‘R’s to 0 and wait until the 4 ‘C’ bits are all 1.
Give that some thought. I’ll check in when I can or maybe one of the others can jump in.
Good luck!
What should be the in debounced routine for the matrix keypad. Do I have to set any one of R to zero and scan all C in the debounce routine?
Not sure what you mean by that.. #522 will debounce 4 buttons in R1 correctly.Post #522 has a routine that only debounced one button.
The logic you show in the first listing of #524 is essentially correct as far as detecting ONE key pressed and converting it to a key code. It shows that you are selecting one R at a time and looking for a C line pulled low. That is the basic idea for scanning a matrix. Yours is somewhat brute force. That's OK but there are probably better ways to do it.What should be the in debounced routine for the matrix keypad. Do I have to set any one of R to zero and scan all C in the debounce routine?
There are as many ways to do this as there are programmers but I generally prefer something like I outlined in # 523 so let's proceed using that as a starting point. Before that though, let's agree on the basic operation:
- The keypad scanner is called at 1ms intervals.
- There are no blocking delays
- The keypad firmware module emits debounced keys one at a time as they are pressed
- A flag is set to indicate a new key. The flag is cleared by the main routine that consumes the key.
- Only 1 key at a time is processed. After that, the keypad is scanned until there are no keys pressed.
- On each interval, it selects one R then looks for a 0 in one of the C inputs. When all 4 R have been output with no C input, it resets the R selection and continues i.e. R1-R2-R3-R4-R1-R2-R3-R4-...
- When the C bits are no longer 1111, PORTD is read to get the current value of both the R bit and the C bit(s) in one byte. We will call this value the 'scan code'. Save the scan code.
- The row is not changed during debounce
- A counter is set to count the number of 1ms intervals needed to debounce the key
- The counter is decremented on each 1ms interval
- When the counter is 0, PORTD is read again and compared to the saved scan code.
- If the scan codes match, the key is debounced and valid.
- Convert the scan code to a usable key value i.e. '1', '2', '+', '=' etc for use by main or let main do it.
- Set the same counter to the debounce time
- Set all R=0 to enable all C lines
- On each 1ms interval inspect the C lines:
- If the C lines are 1111 decrement the counter
- Else, reset the counter to the debounce time (don't start counting until the keypad is clear)
- When the counter == 0, the C lines have been clear for the debounce time, proceed to Find A Key and begin looking for the next key.
There are 3 distinct states that the keypad can be in - highlighted in bold above. You have to keep track of which state the keypad is in because you do not wait in the keypad routine between 1ms intervals. You could make a little state machine using a switch(KeyPad_state) statement. I like state machines because they're usually easier to use and understand than a lot of flags.
The tables you show above like this: (NOTE: the R values are inverted)

would be a great way to not only convert the scan codes to key values, but also to detect Wait For No Keys (you have it labeled Not Pressed) and with a few more entries it could also look for Find A Key and Invalid Key (more than one button pressed at a time) if you're interested in that.
This table could also be implemented by a switch statement:
C:
  switch(scan_code){
     case 0b00001111: // no key in R1-R4 // looks for button release
     case 0b11101111: // no key in R1    // these look for no button in one of the 4 rows
     case 0b11011111: // no key in R2
     case 0b10111111: // no key in R3
     case 0b01111111: // no key in R4
        Key=No_Key;
        break;
    case 0b11101110:  // this scan code corresponds to the button at R1 x C1 is closed
       Key=SW12;        //  assign a useful key value.  Could be 0x01 or ASCII '1' or whatever.
       break;
     case 0b11101101: // R1 x C2 is closed
       Key=SW8;
     break;
    // and so on for all the RxC combinations in your table then
    default:  // no valid keys
     Key = INVALID_KEY;
}That is a lot to unpack for one post. Read through each section a few times then post any questions. Keep in mind that this is only one of many ways to do keypad scanning but we might as well start somewhere. Don't ttry to do it all at once. Figure out one part at a time.
Have fun!
Attachments
-
74.9 KB Views: 4
Last edited:
I think debouncer, key value and ‘new’ flag will be in one keypad routine. I have read # 529 I understand how to find key but having a trouble to debounce 16 key's.Debounce the key:
Wait for no keys pressed (good key found or debounce failed)
- The row is not changed during debounce
- A counter is set to count the number of 1ms intervals needed to debounce the key
- The counter is decremented on each 1ms interval
- When the counter is 0, PORTD is read again and compared to the saved scan code.
- If the scan codes match, the key is debounced and valid.
- Convert the scan code to a usable key value i.e. '1', '2', '+', '=' etc for use by main or let main do it.
- Set the same counter to the debounce time
- Set all R=0 to enable all C lines
- On each 1ms interval inspect the C lines:
- If the C lines are 1111 decrement the counter
- Else, reset the counter to the debounce time (don't start counting until the keypad is clear)
- When the counter == 0, the C lines have been clear for the debounce time, proceed to Find A Key and begin looking for the next key.
C:
  void keypad (void)
  {
   switch(scan_code)
   {
    case 0x0F:      // no key in R1-R4 // looks for button release
    case 0xEF:      // no key in R1    // these look for no button in one of the 4 rows
    case 0xDF:      // no key in R2
    case 0xBF:      // no key in R3
    case 0x7F:      // no key in R4
        Key=No_Key;
        break;
    case 0xEE:       // R1 x C1 is closed
       Key= '1';
    case 0xED:       // R1 x C2 is closed
       Key= '5';
       break;
    case 0xEB:       // R1 x C3 is closed
       Key= '9';
       break;
    case 0xE7:       // R1 x C4 is closed
       Key= '13';
       break;
     case 0xDE:      // R2 x C1 is closed
       Key= '2';
       break;
    case 0xDD:       // R2 x C2 is closed
       Key= '6';
       break;
    case 0xDB:       // R2 x C3 is closed
       Key='10';
       break;
    case 0xD7:       // R2 x C4 is closed
       Key= '14';
       break;
    case 0xBE:       // R3 x C1 is closed
       Key= '3';
       break;
    case 0xBD:      // R3 x C2 is closed
       Key= '7';
       break;
    case 0xBB :      // R3 x C3 is closed
       Key= '11';
       break;
    case 0xB7:       // R3 x C4 is closed
       Key= '15';
       break;
    case 0x7E:     // R4 x C1 is closed
       Key='4';
       break;
    case 0x7D:     // R4 x C2 is closed
       Key='8';
       break;
    case 0x7B:     //  R4 x C3 is closed
       Key='12';
       break;
    case 0x77:      // R4 x C4 is closed
       Key='16';
       break;

    default:  // and so on for all the RxC combinations in your table then, no valid keys,
     Key = "INVALID_KEY";
   }
}You don't debounce 16 keys. You debounce only the current scan code as described above and repeated here:I have read # 529 I understand how to find key but having a trouble to debounce 16 key's.
Note that the debounce routine is different than the one you used on the individual buttons. You need to write a new one that does the steps listed here.Debounce the key:
- When the C bits are no longer 1111, PORTD is read to get the current value of both the R bit and the C bit(s) in one byte. We will call this value the 'scan code'. Save the scan code.
- The row is not changed during debounce
- A counter is set to count the number of 1ms intervals needed to debounce the key
- The counter is decremented on each 1ms interval
- When the counter is 0, PORTD is read again and compared to the saved scan code.
- If the scan codes match, the key is debounced and valid.
- Convert the scan code to a usable key value i.e. '1', '2', '+', '=' etc for use by main or let main do it.
After that, you set up to look for No Keys (current key is released). Then look for the next one.
How many routines are required to find key, to debnounce key in matrix keypad? Should they all be in separate or in the same routine?Note that the debounce routine is different than the one you used on the individual buttons. You need to write a new one that does the steps listed here.
Why is the counter being decremented now? Previously the button was debounce only when the button was pressed.The counter is decremented on each 1ms interval
Whether the button has to be debounce both times i.e. when the button is pressed and when the button is released.
One routine to find a key and store the scan codeHow many routines are required to find key, to debnounce key in matrix keypad? Should they all be in separate or in the same routine?
One routine to debounce the key and output the scan code or decoded key value
One routine to wait until the key has been released - set all R to 0000 and wait until all C are 1111.
It doesn't matter. A count is a count. Start at 0 and count up to DEBOUNCE_TIKS or start at DEBOUNCE_TIKS and count down to 0. Remember this is a NEW debounce routine.Why is the counter being decremented now?
You want to debounce the button when it is closed like always. I added another debounce of the 'No Key' scan code in the Wait For No Key for consistency and to avoid issues with more than one key pressed at a time. This example supports only one of the 16 keys at a time. In between, No Keys must be detected to 'reset' the sequence.Whether the button has to be debounce both times i.e. when the button is pressed and when the button is released.
Don't get confused trying to make the previous debounce of a single key work here. The principle is the same but the details are different.
You will have 3 routines that are really the state of the keypad program. Consider using a switch statement to call the appropriate routine depending on which state you are in i.e. Wait For Key, Debounce and Emit New Key, Wait for No Keys Pressed. 3 states, 3 routines to call.
@JohnInTX I need three functions find key value, debouncer an new flag. I am only thinking of single function that detect 16 key's
In this function we are just scanning code but we have not set any rows.
To find any key we need to set any R to 0 and then need to check C. How to write function that finds a key out of 16 keys. once I will find the key then I would think about debouncer function
In this function we are just scanning code but we have not set any rows.
C:
  void keypad (void)
  {
   switch(scan_code)
   {
    case 0x0F:      // no key in R1-R4 // looks for button release
    case 0xEF:      // no key in R1    // these look for no button in one of the 4 rows
    case 0xDF:      // no key in R2
    case 0xBF:      // no key in R3
    case 0x7F:      // no key in R4
        Key=No_Key;
        break;
    case 0xEE:       // R1 x C1 is closed
       Key= '1';
    case 0xED:       // R1 x C2 is closed
       Key= '5';
       break;
    case 0xEB:       // R1 x C3 is closed
       Key= '9';
       break;
    case 0xE7:       // R1 x C4 is closed
       Key= '13';
       break;
     case 0xDE:      // R2 x C1 is closed
       Key= '2';
       break;
    case 0xDD:       // R2 x C2 is closed
       Key= '6';
       break;
    case 0xDB:       // R2 x C3 is closed
       Key='10';
       break;
    case 0xD7:       // R2 x C4 is closed
       Key= '14';
       break;
    case 0xBE:       // R3 x C1 is closed
       Key= '3';
       break;
    case 0xBD:      // R3 x C2 is closed
       Key= '7';
       break;
    case 0xBB :      // R3 x C3 is closed
       Key= '11';
       break;
    case 0xB7:       // R3 x C4 is closed
       Key= '15';
       break;
    case 0x7E:     // R4 x C1 is closed
       Key='4';
       break;
    case 0x7D:     // R4 x C2 is closed
       Key='8';
       break;
    case 0x7B:     //  R4 x C3 is closed
       Key='12';
       break;
    case 0x77:      // R4 x C4 is closed
       Key='16';
       break;
   }
}In this function we are just scanning code but we have not set any rows.
The switch function in #534 is the function that finds a key out of 16 keys. It does no scanning.How to write function that finds a key out of 16 keys.
Let me think about this a bit..
@Djsarakar
By 'scanning' I mean the actual writing '0' to one of the 'R' bits on PORTD each time the function is called by the 1ms interval. On each call, the NEXT R is output. When it has outputted the last R, it resets to the first R and repeats the pattern. 1 R per 1ms interval. Start with that. Don't worry about reading anything, just output the 4 R in sequence.
EDIT: you don't need anything to test this, just set a breakpoint after calling and inspect PORTD. You should see the R bit shift through RD7-RD4 then RD7 again. That's what you need right now.
Last edited:
Take a look at this. It is a simple scanner that converts a scan code to a key number using the table method we've been talking about.
Set a breakpoint on line #276 (the NOP) to monitor the key code output.
This does no debouncing or any other fancy stuff. It just illustrates how to select a R, read a C, compute a scan code and look up a key. A simple 1 bit state indicator toggles between looking for a key and waiting for the key to release.
Let's understand ALL of this before going further.
It should run on your hardware. If not, debug it.
Have fun!
C:
// JohnInTX 9/25/21

#if 0
A basic keypad scanner.
Uses the 1ms interrupt interval to invoke the keypad scanner and uses
a simple flag to indicate the STATE of the keypad scanner.
Later we will implement a real state machine for debouncing etc.
The code is very basic and intended to be easy to follow.  Many of the
functions shown could be simplified and/or combined but good enough for now.
Runs on MPSIMX
#endif


#define _XTAL_FREQ 8000000  // This bounces from 8 to 20 MHz.. why?

// PIC18F45K80 Configuration Bit Settings
// 'C' source line config statements
// CONFIG1L
#pragma config RETEN = OFF      // VREG Sleep Enable bit (Ultra low-power regulator is Disabled (Controlled by REGSLP bit))
#pragma config INTOSCSEL = HIGH // LF-INTOSC Low-power Enable bit (LF-INTOSC in High-power mode during Sleep)
#pragma config SOSCSEL = HIGH   // SOSC Power Selection and mode Configuration bits (High Power SOSC circuit selected)
#pragma config XINST = OFF       // Extended Instruction Set (Enabled)
// CONFIG1H
#pragma config FOSC = INTIO2    // Oscillator (Internal RC oscillator)
#pragma config PLLCFG = OFF     // PLL x4 Enable bit (Disabled)
#pragma config FCMEN = OFF      // Fail-Safe Clock Monitor (Disabled)
#pragma config IESO = OFF       // Internal External Oscillator Switch Over Mode (Disabled)
// CONFIG2L
#pragma config PWRTEN = OFF     // Power Up Timer (Disabled)
#pragma config BOREN = SBORDIS  // Brown Out Detect (Enabled in hardware, SBOREN disabled)
#pragma config BORV = 3         // Brown-out Reset Voltage bits (1.8V)
#pragma config BORPWR = ZPBORMV // BORMV Power level (ZPBORMV instead of BORMV is selected)
// CONFIG2H
#pragma config WDTEN = OFF      // Watchdog Timer (WDT disabled in hardware; SWDTEN bit disabled)
#pragma config WDTPS = 1048576  // Watchdog Postscaler (1:1048576)
// CONFIG3H
#pragma config CANMX = PORTB    // ECAN Mux bit (ECAN TX and RX pins are located on RB2 and RB3, respectively)
#pragma config MSSPMSK = MSK7   // MSSP address masking (7 Bit address masking mode)
#pragma config MCLRE = ON       // Master Clear Enable (MCLR Enabled, RE3 Disabled)
// CONFIG4L
#pragma config STVREN = ON      // Stack Overflow Reset (Enabled)
#pragma config BBSIZ = BB2K     // Boot Block Size (2K word Boot Block size)
// CONFIG5L
#pragma config CP0 = OFF        // Code Protect 00800-01FFF (Disabled)
#pragma config CP1 = OFF        // Code Protect 02000-03FFF (Disabled)
#pragma config CP2 = OFF        // Code Protect 04000-05FFF (Disabled)
#pragma config CP3 = OFF        // Code Protect 06000-07FFF (Disabled)
// CONFIG5H
#pragma config CPB = OFF        // Code Protect Boot (Disabled)
#pragma config CPD = OFF        // Data EE Read Protect (Disabled)
// CONFIG6L
#pragma config WRT0 = OFF       // Table Write Protect 00800-01FFF (Disabled)
#pragma config WRT1 = OFF       // Table Write Protect 02000-03FFF (Disabled)
#pragma config WRT2 = OFF       // Table Write Protect 04000-05FFF (Disabled)
#pragma config WRT3 = OFF       // Table Write Protect 06000-07FFF (Disabled)
// CONFIG6H
#pragma config WRTC = OFF       // Config. Write Protect (Disabled)
#pragma config WRTB = OFF       // Table Write Protect Boot (Disabled)
#pragma config WRTD = OFF       // Data EE Write Protect (Disabled)
// CONFIG7L
#pragma config EBTR0 = OFF      // Table Read Protect 00800-01FFF (Disabled)
#pragma config EBTR1 = OFF      // Table Read Protect 02000-03FFF (Disabled)
#pragma config EBTR2 = OFF      // Table Read Protect 04000-05FFF (Disabled)
#pragma config EBTR3 = OFF      // Table Read Protect 06000-07FFF (Disabled)
// CONFIG7H
#pragma config EBTRB = OFF      // Table Read Protect Boot (Disabled)

#include <xc.h>
#include <stdint.h>

__bit Interrupt_Flag_1ms;

#define DEBOUNCE_TIKS     10

//----------------- INTERRUPT SERVICE  ---------------------------
void __interrupt(high_priority) tcInt(void)
{
  if (TMR0IF == 1) // Timer0 overflow interrupt flag bit
  {
      TMR0IF = 0;
      TMR0L = 250;    //Timer0 Register Low Byte
      Interrupt_Flag_1ms = 1;

  }
}

void Port_Initialized (void)
{
    // LATx registers
    LATA =  0x00;
    LATB =  0x00;
    LATC =  0x00;
    LATD =  0xFF;
    LATE =  0x00;

//  TRISx registers
    TRISA = 0x00;      // All are output, Unused
    TRISB = 0x0F;      // Button connected to RB0-RB3
    TRISC = 0x00;      // all are output, Unused
    TRISD = 0x0F;      // R is out, C is in
    TRISE = 0x00;      // All are output, Unused

    ANCON0 = 0x00;     // set to digital port
    ANCON1 = 0x00;     // Set to digital port
    CM1CON = 0x00;     // Comparator off
    CM2CON = 0x00;     // Comparator off
    ADCON0 = 0x00;     // A/D conversion Disabled
    ADCON1 = 0x00;     // A/D conversion Disabled
    ADCON2 = 0x00;     // A/D conversion Disabled
}

void Timer0_Initialized (void)
{
     TMR0L = 250;    //Timer0 Register Low Byte

    //T0CON: TIMER0 CONTROL REGISTER
     TMR0ON = 1; //Timer0 On
     T08BIT = 1; // Timer0 is configured as an 8-bit timer/counter0
     T0CS = 0;   // Internal instruction cycle clock (CLKO)
     T0SE = 1;    //Increments on high-to-low transition on T0CKI pin0
     PSA = 0; //Timer0 prescaler is assigned; Timer0 clock input comes from prescaler output
     //1:8 Prescale value
     T0PS2 = 1;
     T0PS1 = 1;
     T0PS0 = 1;
     //INTCON: INTERRUPT CONTROL

     PEIE = 0;   //Disables all peripheral interrupts
     TMR0IE = 1; //Enables the TMR0 overflow interrupt
     INT0IE = 0; //Disables the INT0 external interrupt
     RBIE = 0; //Disables the RB port change interrupt
     TMR0IF = 0;// cleared timer overflow flag
     INT0IF = 0; // disabled external interrupt
     RBIF = 0; //disabled Port Change Interrupt Flag bit
     GIE = 1;    // Enable Global Interrupt Enable bit
}

//==================== KEYPAD =======================================

#define No_Key 0xff     // key code for no key or invalid key

uint8_t Rout, Cin;      // current R and C bit images
uint8_t scan_code;      // combined R + C into one byte
uint8_t KBDkey;         // valid key looked up from scan code
uint8_t KBDout;         // test value for final output
__bit NewKey;           // set to indicate a new key


// ---------------- OUTPUT THE NEXT ROW WITH WRAP AROUND  --------
// Outputs the next row.  Returns rrrr0000

uint8_t nextRout(uint8_t out){
#pragma warning push                // tell XC8 to STFU
#pragma warning disable 373
    out |= 0x08;                    // ensure a 1 gets shifted to bit 4
    out = out << 1;                 // shift the 0 to the next R output bit
    out &= 0xf0;                    // normalize the 4 LSBs for tests
    if (out == 0b11110000)          // if bit 7 got shifted out..
        out =  0b11100000;          // .. re-init the R image
    LATD = (out |0x0f);             // output to LATD with C bits set to 1
    return (out);                   // return current R as rrrr0000
#pragma warning pop                 // restore normal warnings
}

// --------------  READ THE C INPUTS  --------------------------
// Returns the value of the 4 C inputs as 0000cccc
uint8_t KBD_readC(void)
{
#pragma warning push
#pragma warning disable 373
    return (PORTD & 0x0f);
#pragma warning pop
}

//-------------  COMPUTE THE SCAN CODE FROM R and C  --------------
// Combines R and C images to one 8 bit scan code as rrrrcccc
uint8_t MakeScanCode(uint8_t R, uint8_t C)
{
#pragma warning push
#pragma warning disable 373     // tell XC8 to STFU
    return R | C;
#pragma warning pop
}

//-------------  CONVERT SCAN CODE TO KEY VALUE  ---------------------
// Looks up the key value corresponding to scan code.  Returns key value
// or No_Key if no valid scan code - no key pressed or invalid key(s)
// Key value corresponds to what is printed on the PCB 1-16

uint8_t KBD_lookupScanCode (uint8_t scan_code)
  {
   uint8_t Key;
   switch(scan_code)
   {
    case 0x0F:      // no key in R1-R4 // looks for button release
    case 0xEF:      // no key in R1    // these look for no button in one of the 4 rows
    case 0xDF:      // no key in R2
    case 0xBF:      // no key in R3
    case 0x7F:      // no key in R4
        Key=No_Key;
        break;
    case 0xEE:       // R1 x C1 is closed
       Key= 1;
       break;
    case 0xED:       // R1 x C2 is closed
       Key= 5;
       break;
    case 0xEB:       // R1 x C3 is closed
       Key= 9;
       break;
    case 0xE7:       // R1 x C4 is closed
       Key= 13;
       break;
     case 0xDE:      // R2 x C1 is closed
       Key= 2;
       break;
    case 0xDD:       // R2 x C2 is closed
       Key= 6;
       break;
    case 0xDB:       // R2 x C3 is closed
       Key=10;
       break;
    case 0xD7:       // R2 x C4 is closed
       Key= 14;
       break;
    case 0xBE:       // R3 x C1 is closed
       Key= 3;
       break;
    case 0xBD:      // R3 x C2 is closed
       Key= 7;
       break;
    case 0xBB :      // R3 x C3 is closed
       Key= 11;
       break;
    case 0xB7:       // R3 x C4 is closed
       Key= 15;
       break;
    case 0x7E:     // R4 x C1 is closed
       Key=4;
       break;
    case 0x7D:     // R4 x C2 is closed
       Key=8;
       break;
    case 0x7B:     //  R4 x C3 is closed
       Key=12;
       break;
    case 0x77:      // R4 x C4 is closed
       Key=16;
       break;
    default:
       Key= No_Key;
   }
   return Key;
  }

//-------------------- SCAN KEY PAD  --------------------------------
// Test routine that scans the keypad to get ONE key and monitors
// for release

void scanKeyPad(void)
{
    Rout = nextRout(Rout);              // output the next R
    Cin = KBD_readC();                  // read the C inputs
    scan_code = MakeScanCode(Rout,Cin); // combine R and C to get scan code
    KBDkey = KBD_lookupScanCode(scan_code); // look up key value

// There are only 2 STATES in this demo code controlled by the value of NewKey
// A proper scanner will need more than 2 and we will use a state machine
// built from a switch statement later...

    if (NewKey == 0){                   // if good key and flag not set, its a new one
      if(KBDkey != No_Key){
         NewKey = 1;      // set break point here, examine values

         // BREAKPOINT
         asm("nop");     // BREAKPOINT HERE examine KBDkey
         // BREAKPOINT
      }
    }
    else
        if(KBDkey == No_Key){            // if flag is set wait until no key then repeat
            NewKey = 0;
        }

}

// -------------- INITIALIZE THE KEYPAD SCANNER  ----------------
void KBDinit(void){
    Rout = 0xf0;        // no R out
    Cin = 0x0f;         // assume no C in
    scan_code = MakeScanCode(Rout,Cin);
    NewKey = 0;
    KBDout = KBDkey = No_Key;
}


//====================== MAIN PROGRAM  ============================
void main(void)
{
    Port_Initialized ();
    Timer0_Initialized ();
    KBDinit();

    PADCFG1 = 0x80;

    while (1)
    {
        if (Interrupt_Flag_1ms == 1){
               Interrupt_Flag_1ms = 0;  // clear the flag for next time
                                        // and run all of the 1ms tasks
               scanKeyPad();            // run the keypad scanner

        }
    }
}
Last edited:
I ran code on my development board. I checked every single button by debugging the code. I am getting correct key code for each buttonSet a breakpoint on line #276 (the NOP) to monitor the key code output.
Good news!I ran code on my development board. I checked every single button by debugging the code. I am getting correct key code for each button
Do you have any questions about any of the routines I posted? You need to understand them before proceeding.
I have mentioned using a state machine implemented with another switch statement to coordinate the various steps necessary. What do you think?
If you like the idea, try drawing out a state diagram to implement:
- Init
- Wait for No_Key
- Debounce No_Key
- Wait for a valid key
- Debounce valid key
- Emit valid key
Your diagram must show what happens in each state for any possible user action and respond properly. You have indicated that you are moving towards your senior project. Design, implement, test, modify will be important.
EDIT: If you don't want to use a state machine, you probably can use a combination of flags and debounce counter values to figure out where you are in the sequence - like we did in the button debounce.
Good luck!
Last edited:
I'll probably be busy for three to four days. I am going to relatives house with the family to attend the marriage function.Good news!
Do you have any questions about any of the routines I posted? You need to understand them before proceeding.
Yes, as we talked about earlier, I had to make the project using CAN protocol and that's why you suggested me PIC18F45K80.The CAN protocol is in high demand in the automotive industry. I want to show the employer that I have experience with the CAN protocol, I can write code for automotive project.You have indicated that you are moving towards your senior project. Design, implement, test, modify will be important.
Good luck!
Give the happy couple our congratulation! Have fun and stay safe.I'll probably be busy for three to four days. I am going to relatives house with the family to attend the marriage function.