Flash LED in sync with sound module. Best way?

Thread Starter

OzTinker

Joined Jun 6, 2021
12
Hi guys,

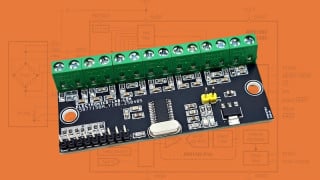
For a project I am wanting to flash a LED in sync with the speaker output of the BY8301-16P sound module. https://www.aliexpress.com/item/1005001831389901.html
https://usermanual.wiki/Document/edmp320manual20V12.1195164350

I have tried connecting an LED directly across the speaker terminals of the small 56mm speaker I am using and that works but I want the light to be brighter. The voltage at the speaker is +/- 3V

I then tried using a BC557 transistor as I had one lying around. I connected 5V to a resistor (tried 56 and 10 ohm) then LED to the emitter. Collector to ground. Base to one of the speaker pins on the sound module. It worked again but didn’t seem much brighter. I used my small oscilloscope (PokitMeter) and it only showed about 15mA.

The LED I am using has a typical forward current of 30mA. https://www.jaycar.com.au/white-3mm...os=1&queryId=f0f1e577dfcaf8d40bb40eaf51cba14b

Am I approaching this the right way? I could use multiple LEDs if I need to.

Thanks in advance for any help!
 

Audioguru again

Joined Oct 21, 2019
6,707
The LED directly across the speaker lights the LED for only the loudest peaks and for only half the waveforms since the outputs to the speaker are AC but the LED uses only DC.

You used the transistor as an emitter-follower that has a 0.7V voltage loss.

Even the opamp circuit rectifies the output signal which lights the LED only for half the time that dims it.

I think you need a low-loss peak detector on each output wire and then mix them together to drive the LED.
 

Audioguru again

Joined Oct 21, 2019
6,707
The sound module is recommended to use a 4.2V supply which is probably a Li-PO battery that has a voltage that drops to 3.2V.
Assuming the battery is half-discharged at 3.7V then each speaker output swings to +3.5V and to +0.2V. There is no negative supply so the outputs are never negative, but half the time the outputs have reversed polarity. The maximum output across the speaker is 3.3V peak. If the battery is fully charged at 4.2V then the maximum across the speaker is 3.8V peak.

A white LED needs 3.2V for some or 3.6V for others so there is barely enough voltage to brightly light an LED when the amplifier is playing at full blast and has horrible clipping distortion.
 

Thread Starter

OzTinker

Joined Jun 6, 2021
12
Thanks @Audioguru again for the explanations. I have been happy with the effect with only half of the signal flashing the LED.

Thanks @Ian0 for the link. I should have searched a bit harder. Your circuit is a bit too complex for what I am trying to do.

@LowQCab thanks I think your circuit is just what I am after. Looking at this https://circuitdigest.com/electronic-circuits/voltage-controlled-current-source-circuit-using-op-amp I assume I can use the same LM358 and IRF540N. My question is why have you added the capacitor and 10K pot?

edit: Just found a μA741CP OPAMP in my parts drawer. Will that do?
 
Last edited:

LowQCab

Joined Nov 6, 2012
4,075
The Capacitor was added because I have no idea whether or not
your Amp may have a DC Bias on its Output, it might be a Bridge-Amp for all I know,
a Capacitor eliminates any problems from that sort of thing.

The Pot is there because the input is extremely sensitive.
The Op-Amp is going to try to apply
what ever the Input-Voltage is, across the Current Sense Resistor, and there's only
around 1 to 1.5V across that Resistor at full brilliance, with the value I provided.
So You might say that that type of Circuit has a lot of apparent Gain.

Normally, the Current-Sense-Resistor would have a much lower Resistance,
down around 0.01-Ohms,
which would mean that just a few milliVolts on the Input
would cause the full Power-Supply-Voltage to be put across the LED,
which could easily smoke your LED,
so I just guessed at a "sorta-safe" Value.
Since the site you linked to didn't provide the Forward-Voltage-Specs for your LED,
it makes it really difficult to hit a exact Current figure, at a given Voltage.
You have to "back-calculate" from the goofy Resistor "recommendations" they provide
and then hope that they were shooting for the advertised ~30-ma. with those Values.
I guess they sell more LEDs that way.

The very low-Voltage setup that you have makes things particularly difficult to do easily.
What it really needs is another Op-Amp set up as a Full-Wave "Precision-Rectifier",
so that everything going into the Current-Sink-Circuit is just a
varying DC-Voltage, instead of an AC-Voltage, then You could eliminate the Capacitor.

Any Op-Amp with Inputs that can properly operate at Ground potential will probably work.
But, of course, most Op-Amps can't deal with Sinking 50-ma. of Current.
They start getting expensive really quick.
One way around this is to use an Audio-Amplifier instead of a proper Op-Amp,
but generally,
the Audio-Amps won't operate very well when the Inputs are anywhere near the Supply-Rails.
I got so tired of this that I simply refuse to use any Op-Amp that doesn't have
"Rail-to-Rail" Inputs and Outputs, and at least ~30-ma. of comfortable Output-Current.
It just reduces the aggravation factor so much that I'm willing to pay ~$5.oo, or more,
for a quality Op-Amp like this one ..........
https://www.digikey.com/en/products...90569?s=N4IgTCBcDaIDIBUCMA2AzABgMIDkAcIAugL5A
.
.
.
 
Last edited:

Ian0

Joined Aug 7, 2020
9,844
Thanks @Ian0 for the link. Your circuit is a bit too complex for what I am trying to do.
That's OK, but it does have auto-level. Without auto-level you will need to adjust the pot every time the level of the music changes. . .
 

Thread Starter

OzTinker

Joined Jun 6, 2021
12
Without auto-level you will need to adjust the pot every time the level of the music changes
This isn't for music. It is just for sound bites in a model. I am recreating this:
The flashing lights at the top is what I am trying to sort out. The guy in the video used something he purchased.
 
Last edited:
Top