Facebook
 Google
 GitHub
 Linkedin
Hi,
I'm looking for bit of advise here.
Many moons ago I bought this PU81. It has served me well for a long time.
Lately it has begun to heat up slower and slower.
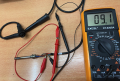
Now I always have to set the manual dial to 450V to make it useful
(the unit has no real temperature meter)
Could anyone please advise on what the most common causes for this issue could be ?
(I'm still using the same tip as when I bought it)
- heating element?
- temperature sensor?
- switching transistor, triac or whatever they use?
I have used the unit once outdoors in the cold and I seem to have the feeling it is then when the issue started (and slowly got worse day by day)
Thank you for your time for reading this and sharing your valued advise
chrisV
I'm looking for bit of advise here.
Many moons ago I bought this PU81. It has served me well for a long time.
Lately it has begun to heat up slower and slower.
Now I always have to set the manual dial to 450V to make it useful
(the unit has no real temperature meter)
Could anyone please advise on what the most common causes for this issue could be ?
(I'm still using the same tip as when I bought it)
- heating element?
- temperature sensor?
- switching transistor, triac or whatever they use?
I have used the unit once outdoors in the cold and I seem to have the feeling it is then when the issue started (and slowly got worse day by day)
Thank you for your time for reading this and sharing your valued advise
chrisV