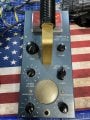
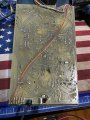
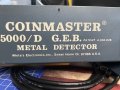
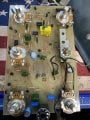
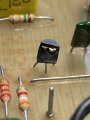
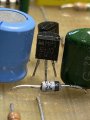
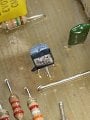
You should be checking against ground of the chip, that's the actual voltage the chip is seeing. I would check the caps. Caps don't age well and this is old equipment.
... Sometimes there is a layer of oxidation that builds up on the surface of soldered connections. The only thing to do is press firmly with the point of the probe tip in order to get to the actual metal underneath. As suggested above, using the ground pin on the chip itself should be sufficient to obtain an accurate reading.
... Not completely sure on the best way to check out zener diodes. With ordinary diodes, there will be high resistance with one polarity, and conductivity with reverse polarity. Zener diodes are different, and are used for a different purpose, like regulating the bias voltage at the base of a transistor, and they come in different voltage grades and power ratings. ... Need to do some research on that topic.
To check Zener diodes, use a voltmeter across the diode and check it's working voltage.
As a check for chip supplies, ideally go across the chip voltage pins,,
Also to check for supply voltage drops, go across the Battery Negative and chip Negative also Battery Positive and chip Positive and see how much is lost.
I'd hate to scrap this because I've heard nothing but good things about these old reliable detectors but I've got the patience of... Well, something that's very impatient lol.
It may be that the supply voltage from the batteries is low, not 100%, and is a reason for lack of performance. One thing that might cause this, mentioned previously, is aging electrolytic capacitors. After so many years since being manufactured, it may be that one or two of these parts have deteriorated and are causing problems. It may be worthwhile to identify these components on the circuit board and at least give them an inspection. Typical defects are slightly bulging tops or occasionally there will be a discoloration ( leaking electrolyte fluid ) on or around one of them. One option is to de-solder the electrolytic capacitors and replace them with new ones. Given the reported age of the device this would not be unreasonable.
... Do you think that you can identify electrolytic capacitors? Typically the have a 'can' shape and have two soldered leads. They are polarity sensitive, which means that the + and - mark printed on the capacitor body must necessarily be oriented to its original circuit board holes ... so mark + and - on the board somehow before de-solderind ... or maybe take a few pictures first so you will have a reference.
I had a similar issue with my Bounty Hunter Discovery 2200, the positive battery lead got shorted to an exposed trace wire on the pcb so it stopped working. I took it apart and by replacing the LM317 (voltage regulator) I got it to turn back on but the sound had stopped working, after much trial and error, removing and testing capacitors, resistors and even replacing the NE5534A (Low noise operational audio amplifier) I was at a loss until I traced the ground back to the audio connectors and found the circuit to be broken by jumping the ground straight from the audio connection for the speaker to the ground of the battery and instantly it started working.
So I knew something in the ground circuit had broken the signal to ground, so I removed, checked and replaced the zener diode (which was fine) and then found further down the line found a perfect looking 10 ohm resistor, but when I went to desolder it - it was cracked in the middle. So I replaced it and was back in business. Hope this helps!

 Facebook
 Google
 GitHub
 Linkedin