Best and most efficient way to route power to hundreds of magnets?

Thread Starter

fablau

Joined May 14, 2020
167
Hello everyone.

I am an electronic newbie, and I hope to post this on the right forum. My apologies if this is not the right place.

I am playing with a project that would use a huge number of magnets to move objects on a sort of "magnetic table." The number of magnets I'd like to be able to control is over 500. But they don't need to be powered up simultaneously. I could get away with just firing them up one at a time. What I am trying to accomplish is to find the best way to do that. I am just using a simple Arduino Uno as a controller, 74HC595 shift registers and L293D motor chips plus some capacitors and resistors to stabilize the currents. Each magnet may take from 20 to 32v with a max current of 500ma each.

Starting with the basic concept that I can drive 4 magnets with a single 74HC595 and two L293D, as described from the graphic idea below:

BasicSchematicMOD.jpg

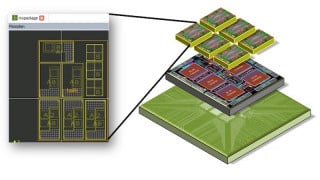
I am wondering what's the best way to drive over 500 magnets with a single L293D by just "re-routing" dynamically the power to the single magnet I need to power up, as shown in this other graphic idea below:

SimplifiedMOD.jpg

I am exploring the possibility to use analog switches to re-route the power to the single magnet I need to drive, but I have no idea which ones to use and how to "chain" them together to connect so many magnets without having too many ICs. In other words, is there a way to connect so many magnets with the less number of components and electronics? As I said, I don't need to power more than 1 single magnet at a time.

Any thoughts and suggestions are very welcome.

Thanks in advance to anyone!

All the best,

Fab.
 

Analog Ground

Joined Apr 24, 2019
460
A different topology, if you only need to power one at a time, how about wiring them in a matrix of 23 rows and 22 columns? Switch one row to power and one column to ground to turn on one magnet. So, only 45 switching elements are required. 23 "high side" switches and 22 "low side" switches.The wiring of the magnet array and outside connections is also simplified. Be sure to use "break before make" switching.

Edit: As I think about this, this scheme may need some steering diodes in series with each magnet.
 
Last edited:

Thread Starter

fablau

Joined May 14, 2020
167
A different topology, if you only need to power one at a time, how about wiring them in a matrix of 23 rows and 22 columns? Switch one row to power and one column to ground to turn on one magnet. So, only 45 switching elements are required. 23 "high side" switches and 22 "low side" switches.The wiring of the magnet array and outside connections is also simplified. Be sure to use "break before make" switching.

Thank you for your reply Analog Ground!

Ok, that sounds like a great suggestion, but I'd still need to have some tips on selecting the "switching elements" you have mentioned. No idea how to go on that. Also, what do you mean with "break before make" switching?

Thank you again very much.
 

ElectricSpidey

Joined Dec 2, 2017
2,758
Do you need to reverse the power to the magnets, if not why the motor drivers?

UDN2981A Driver Chip is high side
ULN2804A Driver Chip is low side

Check them out to use Analog Ground's idea.

Make before break would probably be in the programming.
 

Irving

Joined Jan 30, 2016
3,843
That was my immediate response too, an N by M matrix. I don't think routing diodes are necessary, but each coil needs a back-emf supression diode.

High side drivers are P-channel MOSFETs and a small signal npn, while low-side are N-channel MOSFETs. If it's, say, a 24 x 24 matrix you only need 5-bit addressing for X & Y. So any micro-controller with 10 GPIO ports will do the job. To decode 5-bit address to one of 24 drivers requires 4 8-bit addressable latches such as 74HC259.

So total count is:

8 x 74HC259
24 logic N-channel MOSFETs
24 P-channel MOSFETs
4 x ULN2803A 8-transistor arrays
An Arduino
 

ElectricSpidey

Joined Dec 2, 2017
2,758
Driver chips make life easier, no suppression diodes needed (included) and both can be directly connected to any CMOS output.

3 low side (8 channel)
3 high side (8 channel)
 

Analog Ground

Joined Apr 24, 2019
460
About the series diodes. Draw up a 2x2 matrix. Turn on a magnet. There is an extra path through the other 3 magnets in series. The series diode breaks this chain at the middle magnet.
 

Thread Starter

fablau

Joined May 14, 2020
167
Do you need to reverse the power to the magnets, if not why the motor drivers?

UDN2981A Driver Chip is high side
ULN2804A Driver Chip is low side

Check them out to use Analog Ground's idea.

Make before break would probably be in the programming.
Yes, I need to reverse because I may need to either attract or repel with each magnet.
 

Thread Starter

fablau

Joined May 14, 2020
167
That was my immediate response too, an N by M matrix. I don't think routing diodes are necessary, but each coil needs a back-emf supression diode.

High side drivers are P-channel MOSFETs and a small signal npn, while low-side are N-channel MOSFETs. If it's, say, a 24 x 24 matrix you only need 5-bit addressing for X & Y. So any micro-controller with 10 GPIO ports will do the job. To decode 5-bit address to one of 24 drivers requires 4 8-bit addressable latches such as 74HC259.

So total count is:

8 x 74HC259
24 logic N-channel MOSFETs
24 P-channel MOSFETs
4 x ULN2803A 8-transistor arrays
An Arduino
Wow, that's a lot of detail, thank you so much! I'll check those components out. Appreciated! Just wondering if the fact I need to be able to reverse polarity (to either attract or repel) may be a problem there... thoughts?
 

Analog Ground

Joined Apr 24, 2019
460
If bidirectional switches are used and the overall power to the magnet array can be switched in polarity, I think having two steering diodes going to one end of each magnet and doubling the number of column switches allows for a matrix topology. The switches would be some sort of CMOS type to get bidirectional. Four of the same switches could be used to switch polarity of the overall power to the matrix if they are configured as two SPDT (single pole, double throw) switches. I can't say if this is simpler than another scheme.
 

MrChips

Joined Oct 2, 2009
30,708
To help us understand your configuration, is this a 1-dimensional linear track or is it a 2-dimensional x-y array?
 

Analog Ground

Joined Apr 24, 2019
460
Actually... wouldn't the same matrix work anyway even if the power is reversed?
The problem is getting rid of the extra paths through multiple magnets using diodes. With the first scheme with one diode per magnet, simply reversing the overall power does not work. My comment #13 adds another set of diodes and set of column switches to allow reversing the overall power supply. Integrated analog switches are a problem at 500 mA. Even the high current ones have maximum currents of 200 or 300 mA. Maybe there is one up to 500 mA but it would take a search.
 

Thread Starter

fablau

Joined May 14, 2020
167
The problem is getting rid of the extra paths through multiple magnets using diodes. With the first scheme with one diode per magnet, simply reversing the overall power does not work. My comment #13 adds another set of diodes and set of column switches to allow reversing the overall power supply. Integrated analog switches are a problem at 500 mA. Even the high current ones have maximum currents of 200 or 300 mA. Maybe there is one up to 500 mA but it would take a search.
I see your points... About possible analog switches, it looks like there are some that could support up to 3A, if I am not mistaken. Look at this, even though it is quite expensive, it supports up to 16 channels:

https://datasheets.maximintegrated.com/en/ds/MAX14805-MAX14806.pdf

Thoughts?
 

Thread Starter

fablau

Joined May 14, 2020
167
Which is the 3A switch? The link goes to a HV switch with smaller currents.
If you look on page 3, you'll find the "Switch Output Peak Current" parameter which 3A specified... or am I completely off? It could be, as I said, I am newbie!

Thanks :)

Fab.
 

Irving

Joined Jan 30, 2016
3,843
If you look on page 3, you'll find the "Switch Output Peak Current" parameter which 3A specified... or am I completely off? It could be, as I said, I am newbie!

Thanks :)

Fab.
Look at the test conditions not just the result.

3A for 100nS. At 0.1% duty cycle...
That's 100nS in every 100,000nS...

Not a snowballs chance of being useful...
 
Top