Facebook
 Google
 GitHub
 Linkedin
In this project, we will create an automatic temperature and humidity control system using an Arduino Uno, a DHT-11 sensor, an OLED display, and a relay module. This system will automatically turn on or off based on the detected temperature and humidity, ensuring a comfortable environment.
Components Required:
The DHT-11 sensor continuously measures the temperature and humidity of the room. These readings are displayed on the OLED screen. When the temperature or humidity exceeds the predefined set points, the relay module activates to control the connected system (like a fan or a dehumidifier). This automation helps maintain the desired environmental conditions without manual intervention.
Setting Up the Project:
Code:
#include <SPI.h> //install all the libraries
#include <DHT.h>
#include <Wire.h>
#include <Adafruit_GFX.h>
#include <Adafruit_SH110X.h>
/* Uncomment the initialize the I2C address, uncomment only one, If you get a totally blank screen try the other */
#define i2c_Address 0x3c // initialize with the I2C addr 0x3C Typically eBay OLED's
//#define i2c_Address 0x3d // initialize with the I2C addr 0x3D Typically Adafruit OLED's
#define SCREEN_WIDTH 128 // OLED display width, in pixels
#define SCREEN_HEIGHT 64 // OLED display height, in pixels
#define OLED_RESET -1 // QT-PY / XIAO
// Constants
#define DHTPIN 8 // Digital pin connected to the DHT sensor
#define DHTTYPE DHT11 // DHT 11
#define RELAY 9 // Relay connected to digital pin 9
Adafruit_SH1106G display = Adafruit_SH1106G(SCREEN_WIDTH, SCREEN_HEIGHT, &Wire, OLED_RESET); // Initialize oled.
DHT dht(DHTPIN, DHTTYPE); // Initialize DHT sensor.
void setup() {
Serial.begin(9600);
delay(250); // wait for the OLED to power up
display.begin(i2c_Address, true); // Address 0x3C default // when address is match then initialization start
dht.begin(); //dht sensor start
pinMode(RELAY, OUTPUT); //assign digital pin 9 is output pin
digitalWrite(RELAY, LOW); // Ensure the relay is off at the start
display.clearDisplay();
display.setTextSize(1); // Smaller text size // adjust text size by adjusting number
display.setTextColor(SH110X_WHITE); // Draw white text
display.setCursor(0, 0);
display.println(F("Initializing..."));
display.display();
delay(2000); // Reduced delay after splash screen
Serial.println(F("Setup complete"));
}
void loop() {
// Wait a few seconds between measurements.
delay(2000);
// Reading temperature or humidity takes about 250 milliseconds!
float humidity = dht.readHumidity();
float temperature = dht.readTemperature();
// Check if any reads failed and exit early (to try again).
if (isnan(humidity) || isnan(temperature)) {
display.clearDisplay();
display.setCursor(0, 0); // frist line of oled
display.println(F("Failed to read from DHT sensor!")); //show sensor was not connect to system
display.display();
return;
} else {
display.clearDisplay();
display.setTextSize(1); // Smaller text size
display.setTextColor(SH110X_WHITE); // Draw white text
display.setCursor(0, 0); // set cursor frist zero for horizontal and second zero for vertical
display.print(F("Temp: ")); // print temp on display
display.print(temperature); // print temp actual value form sensor
display.println(F(" *C"));
display.setCursor(0, 20);
display.print(F("Humidity: "));
display.print(humidity);
display.println(F(" %"));
//display.setCursor(0, 40);
//display.print(F("System: "));
//display.println(F("OK")); // Placeholder for actual system status
display.display();
}
// Control the relay based on humidity and temperature
if (humidity >= 50 && temperature >= 35) //adjust temperature and humidity here....
{
digitalWrite(RELAY, HIGH); // Turn the relay on
display.setCursor(0, 40);
display.print(F("systemis ON "));
display.display();
} else {
digitalWrite(RELAY, LOW); // Turn the relay off
display.setCursor(0, 40);
display.print(F("system is OFF "));
display.display();
}
}
Code Explanation:
Feel free to adjust the set points and improve the system according to your needs. Happy tinkering!
Components Required:
- Arduino Uno: The brain of the project.
- DHT-11 Sensor: Used to measure temperature and humidity.
- 1.3 inch OLED Display (128x64): To display the current temperature and humidity.
- Relay Module: To control the electrical appliances based on the sensor readings.
- Connecting Wires: For connections between the components.
- DHT-11 Sensor:
- VCC to Arduino 5V
- GND to Arduino GND
- Data to Arduino Digital Pin 8
- OLED Display:
- VCC to Arduino 5V
- GND to Arduino GND
- SDA to Arduino Analog Pin A4
- SCL to Arduino Analog Pin A5
- Relay Module:
- VCC to Arduino 5V
- GND to Arduino GND
- IN to Arduino Digital Pin 9
- DHT-11 Sensor to Digital Pin: The DHT-11 sensor sends data in a digital format. Therefore, it is connected to a digital pin on the Arduino.
- OLED Display to Analog Pins (A4 and A5): Although these are analog pins, they can be used as digital pins in the Arduino Uno for I2C communication, which is required for the OLED display.
- Relay Module to Digital Pin: The relay module needs a digital signal to switch on or off, so it is connected to a digital pin.
The DHT-11 sensor continuously measures the temperature and humidity of the room. These readings are displayed on the OLED screen. When the temperature or humidity exceeds the predefined set points, the relay module activates to control the connected system (like a fan or a dehumidifier). This automation helps maintain the desired environmental conditions without manual intervention.
Setting Up the Project:
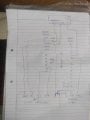
- Connect the Components: Follow the circuit diagram to connect the DHT-11 sensor, OLED display, and relay module to the Arduino Uno.
- Upload the Code: Use the Arduino IDE to upload the provided code to your Arduino Uno. The code will handle reading data from the DHT-11 sensor, displaying it on the OLED, and controlling the relay based on the set points.
- Adjust Set Points: In the code, you can set your desired temperature and humidity thresholds. For example, you might set the temperature threshold to 30°C and the humidity threshold to 60%.
Code:
#include <SPI.h> //install all the libraries
#include <DHT.h>
#include <Wire.h>
#include <Adafruit_GFX.h>
#include <Adafruit_SH110X.h>
/* Uncomment the initialize the I2C address, uncomment only one, If you get a totally blank screen try the other */
#define i2c_Address 0x3c // initialize with the I2C addr 0x3C Typically eBay OLED's
//#define i2c_Address 0x3d // initialize with the I2C addr 0x3D Typically Adafruit OLED's
#define SCREEN_WIDTH 128 // OLED display width, in pixels
#define SCREEN_HEIGHT 64 // OLED display height, in pixels
#define OLED_RESET -1 // QT-PY / XIAO
// Constants
#define DHTPIN 8 // Digital pin connected to the DHT sensor
#define DHTTYPE DHT11 // DHT 11
#define RELAY 9 // Relay connected to digital pin 9
Adafruit_SH1106G display = Adafruit_SH1106G(SCREEN_WIDTH, SCREEN_HEIGHT, &Wire, OLED_RESET); // Initialize oled.
DHT dht(DHTPIN, DHTTYPE); // Initialize DHT sensor.
void setup() {
Serial.begin(9600);
delay(250); // wait for the OLED to power up
display.begin(i2c_Address, true); // Address 0x3C default // when address is match then initialization start
dht.begin(); //dht sensor start
pinMode(RELAY, OUTPUT); //assign digital pin 9 is output pin
digitalWrite(RELAY, LOW); // Ensure the relay is off at the start
display.clearDisplay();
display.setTextSize(1); // Smaller text size // adjust text size by adjusting number
display.setTextColor(SH110X_WHITE); // Draw white text
display.setCursor(0, 0);
display.println(F("Initializing..."));
display.display();
delay(2000); // Reduced delay after splash screen
Serial.println(F("Setup complete"));
}
void loop() {
// Wait a few seconds between measurements.
delay(2000);
// Reading temperature or humidity takes about 250 milliseconds!
float humidity = dht.readHumidity();
float temperature = dht.readTemperature();
// Check if any reads failed and exit early (to try again).
if (isnan(humidity) || isnan(temperature)) {
display.clearDisplay();
display.setCursor(0, 0); // frist line of oled
display.println(F("Failed to read from DHT sensor!")); //show sensor was not connect to system
display.display();
return;
} else {
display.clearDisplay();
display.setTextSize(1); // Smaller text size
display.setTextColor(SH110X_WHITE); // Draw white text
display.setCursor(0, 0); // set cursor frist zero for horizontal and second zero for vertical
display.print(F("Temp: ")); // print temp on display
display.print(temperature); // print temp actual value form sensor
display.println(F(" *C"));
display.setCursor(0, 20);
display.print(F("Humidity: "));
display.print(humidity);
display.println(F(" %"));
//display.setCursor(0, 40);
//display.print(F("System: "));
//display.println(F("OK")); // Placeholder for actual system status
display.display();
}
// Control the relay based on humidity and temperature
if (humidity >= 50 && temperature >= 35) //adjust temperature and humidity here....
{
digitalWrite(RELAY, HIGH); // Turn the relay on
display.setCursor(0, 40);
display.print(F("systemis ON "));
display.display();
} else {
digitalWrite(RELAY, LOW); // Turn the relay off
display.setCursor(0, 40);
display.print(F("system is OFF "));
display.display();
}
}
Code Explanation:
- Libraries and Definitions:
#include <SPI.h>
#include <DHT.h>
#include <Wire.h>
#include <Adafruit_GFX.h>
#include <Adafruit_SH110X.h>- SPI.h and Wire.h: Used for communication with the OLED display.
- DHT.h: Library for the DHT-11 sensor.
- Adafruit_GFX.h and Adafruit_SH110X.h: Libraries for handling graphics and display functions on the OLED.
- Constants:
#define i2c_Address 0x3c
#define SCREEN_WIDTH 128
#define SCREEN_HEIGHT 64
#define OLED_RESET -1
#define DHTPIN 8
#define DHTTYPE DHT11
#define RELAY 9- Defines for I2C address, screen dimensions, pin assignments, and relay control.
- Object Initialization:
Adafruit_SH1106G display = Adafruit_SH1106G(SCREEN_WIDTH, SCREEN_HEIGHT, &Wire, OLED_RESET);
DHT dht(DHTPIN, DHTTYPE);- Initializes the OLED display and DHT-11 sensor objects.
- Setup Function:
void setup() {
Serial.begin(9600);
delay(250);
display.begin(i2c_Address, true);
dht.begin();
pinMode(RELAY, OUTPUT);
digitalWrite(RELAY, LOW);
display.clearDisplay();
display.setTextSize(1);
display.setTextColor(SH110X_WHITE);
display.setCursor(0, 0);
display.println(F("Initializing..."));
display.display();
delay(2000);
Serial.println(F("Setup complete"));
}- Initializes serial communication, display, and DHT sensor.
- Sets the relay pin as an output and ensures it starts off.
- Displays an initialization message on the OLED.
- Loop Function:
void loop() {
delay(2000);
float humidity = dht.readHumidity();
float temperature = dht.readTemperature();
if (isnan(humidity) || isnan(temperature)) {
display.clearDisplay();
display.setCursor(0, 0);
display.println(F("Failed to read from DHT sensor!"));
display.display();
return;
} else {
display.clearDisplay();
display.setTextSize(1);
display.setTextColor(SH110X_WHITE);
display.setCursor(0, 0);
display.print(F("Temp: "));
display.print(temperature);
display.println(F(" *C"));
display.setCursor(0, 20);
display.print(F("Humidity: "));
display.print(humidity);
display.println(F(" %"));
display.display();
}
if (humidity >= 50 && temperature >= 35) {
digitalWrite(RELAY, HIGH);
display.setCursor(0, 40);
display.print(F("System is ON "));
display.display();
} else {
digitalWrite(RELAY, LOW);
display.setCursor(0, 40);
display.print(F("System is OFF "));
display.display();
}
}- Reading Sensor Data: Every 2 seconds, reads the humidity and temperature from the DHT-11 sensor.
- Error Handling: If reading fails, displays an error message.
- Displaying Data: Clears the display and shows the current temperature and humidity.
- Relay Control: Turns the relay on if the humidity is >= 50% and temperature is >= 35°C; otherwise, turns it off. Displays the system status accordingly.
Feel free to adjust the set points and improve the system according to your needs. Happy tinkering!