Mux506 Fail

Thread Starter

dbpryor

Joined Jul 23, 2020
5
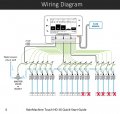
Hi, I am using a TI mux506ipwr (16 channel, datasheet) as a demux to light some LEDs and can't get it to work. I have the mux on a breakout board and the rest of the circuit on a breadboard as I'm testing how it works before implementation.

I'm using a single 12v battery power source for the Vdd, enable, and selectors (which are manually switched).
I have the following connected:
LEDs(+) to S1-S16,
12v(+) to Vdd, EN, and A0-A3,
12v(-) to Vss and LEDs(-)
Drain is open
Ground is open

The LEDs are good, I can test them at power source. I have tried connecting the ground to ground, I have also tried connecting the drain to 12v(-) and then tried to ground, none of which work. This all seems simple enough but I can't figure out what I'm missing. Can anyone clue me in on what's going on or maybe provide a link to point me in the right direction.

Google yields no results for help with this particular mux and if I knew more about what I was doing then maybe I would know better keywords to help me filter out the 8 million general results, so I decided to ask a human instead.
 

OBW0549

Joined Mar 2, 2015
3,566
Your MUX506 isn't failing-- you're just using it wrong.

The MUX506 is an analog mux, not a digital mux; it works by connecting the D terminal to one of the 16 Sx terminals, as selected by the address inputs A0-A3. It does NOT apply any voltage to any of the analog pins all by itself, so leaving the D input unconnected will ensure that none of your LEDs will ever get turned on. D must be connected to a positive voltage appropriate for operating your LEDs.

The GND terminal must be connected to Vss; otherwise the device will not operate properly.

If you're connecting the LED anodes directly to the Sx terminals of the MUX506, you need to include an appropriate current-limiting resistor between the D terminal and whatever voltage supply you plan to use to power the LEDs. Observe the Absolute Maximum Ratings of the MUX506, which specify a maximum of 30 mA for switch current, and choose the resistor value to stay well within that limit. DO NOT rely on the MUX506's internal switch resistance, or the LEDs themselves, to limit LED current.
 

Irving

Joined Jan 30, 2016
3,885
Its not just that you're using it wrong, its arguably the wrong device for your needs...

As @OBW0549 says, its limit is 30mA, but that's not operational, that's absolute maximum. Although operational current is 25mA, your biggest issue is channel on-resistance which ,when used with a single 12v supply, is 235 typical, 340 max ohms.

For a LED with Vf of 1.5v and If of, say, 5mA, on a 12v supply, you need a resistor value of :

R = (Vs - Vf)/If = (12 - 1.5)/.005 = 2100 ohms, less 235 = 1865, or less 340 = 1760. A 1.8k is the standard value in between those.

So you should connect D to +12 via a 1.8k resistor, giving approx 5mA for the LED.

Obviously you can reduce that resistor to increase LED current, up to a maximum of 25mA, but then the internal resistance becomes critical.

A better solution is to connect D to +Vdd via a constant current source that gives you precise control of the current. See circuit below as one solution to this (ignore mux type, I don't have one for MUX507). Alternatively, connect D to Vdd+ and put the constant current generator on the ground side of the LEDs.

1595507263095.png
 

Thread Starter

dbpryor

Joined Jul 23, 2020
5
Thank you both for responding and for being kind, if you have ever been to a coder forum, you'll know what I'm talking about, those guys are vicious.

Connecting the drain to Vdd via a resistor got it working, that's what I was missing. I will now have to do some refining to ensure correct voltage and current values.

I'm a CA State Certified Electrician of 16yrs and I like to dabble in electronics and coding as a hobby, soooooo while I'm not a complete idiot when it comes to electricity, there are a lot of things that elude me when it comes to electronics. Because of that, I was certain the failure was on my part and not the mux.

My failure was that I was looking at the mux as a single component in a single device and thinking that Vdd was the input power for everything. After both of your explanations and diagram, it clicked that the decoder is a separate component (the controlleR) from the switches (the controlleD) requiring it's own power which comes from the Vdd and that the D and S(x) pins get "internally" connected. Going back and looking at the block diagram on p24 of the datasheet, it now makes sense. I looked at it before but completely misinterpreted it. Some other mental disconnects of mine was that in all the tutorials about how a mux works, that drain is actually referred to as Q. The word drain, for me anyway, refers to sending a voltage to ground as with shielded cabling. If I had slowed down and studied this datasheet a bit more and took an inventory of the pin functionalities while keeping in mind that the switches where "analog", I'm sure it would have eventually connected in my head.

As far as it being the wrong device, you may be correct. Bear in mind that this was a test-bed situation to help me understand how the mux works, and that the leds were just indicators, the actual implementation will not be controlling leds. However, that comment did make me rethink my approach to the solution of the problem and I may be doing something different in the future, but for now I'm moving forward with this.
 

Thread Starter

dbpryor

Joined Jul 23, 2020
5
I do have one more question though.

This mux has the same basic functionality of a relay, however in a relay, the coil and switch provide a physical seperation between the controller circuit and the controlled circuit. In an IC, this isn't the case, the pn junctions provide an "effective" disconnect not a "physical" one, if it did there wouldn't be any leakage of any type.

So can the controller circuit and controlled circuits use different voltages and of different types? For instance, let's say 12VDC for the controller circuit and 24VAC for the controlled circuit(s).
 

OBW0549

Joined Mar 2, 2015
3,566
So can the controller circuit and controlled circuits use different voltages and of different types? For instance, let's say 12VDC for the controller circuit and 24VAC for the controlled circuit(s).
That won't work, because it violates the Absolute Maximum Ratings on signal voltages relative to supply voltage(s):

MUX506.png
Note that the voltage on the analog pins must never go below Vss-2 volts, nor above Vdd+2 volts. EVER.

With any semiconductor device (or any other device, for that matter), always always ALWAYS observe the limits listed under Absolute Maximum Ratings. Beyond those limits lies destruction-- whether immediate or delayed.

ALL of the limits must be satisfied ALL of the time, under ALL conditions.
 

Irving

Joined Jan 30, 2016
3,885
Following on from the above, there are analog muxes that can handle large voltages, but they need a large supply voltage. For example I have a series of muxes that connect the + and - side of each cell in a stack of 8 to a single measurement point. That works because the mux's Vdd is the full battery volts (~28v) and they are rated for 36v max.

But you should avoid thinking of an analog mux being like a relay; other than both being a switch of sorts they perform very different jobs. These devices are mainly aimed at switching low-level signals, typically audio, from many sources into, say, an amplifier. The series resistance in such situations is of little consequence because these are generally high-impedance circuits. And the signals are low-level, <1v peak-to-peak. They replace what would have been called 'signal relays' in the past, offering better reliability, considerably lower noise, and reduced real-estate. But don't have the switching capacity or isolation that a relay affords.

Is switching on one of 16 LED your final purpose, or is there a wider game plan? Give more detail and maybe we an advise on a better way to skin this cat!
 

Thread Starter

dbpryor

Joined Jul 23, 2020
5
Sprinkler valves (24VAC). Guess I could add a voltage regulator on D and some transistors on S(x). It's a weird situation where the controller is on one side of the house and the valves are on the other and of the cable being direct burial and running under concrete. Expanding the sprinkler system becomes problematic. Moving the controller is my last resort, that would put it outside and this controller was quite expensive on top of adding power to the location. I was considering a wireless solution with a couple of arduinos next, even if I do cringe at the idea of having yet one more wireless signal bouncing around my house.

I was hoping to at least refine this one to something that works before moving on, that way I had some options to choose from. Because 1 option = 0 options, anytime there is only one option then the choice was made for me and I'm not a fan of that.
 

Irving

Joined Jan 30, 2016
3,885
Well if they are AC you wont be using transistors, that's a DC only option.

Small relays or triacs would work. But some more info would help.

Is there any power where the valves are, or are they only driven via 2 wires each from the controller?

How many valves do you have hard-wired now and how many more do you plan to add.

How does the controller decide which valves to turn on?

Can you sketch the current and future setup....
 

Thread Starter

dbpryor

Joined Jul 23, 2020
5
Objective:
  1. Expand sprinkler system from 6 zones to 10 zones (includes master valve).
  2. Implement water flow meter with remote reading
  3. Possibly implement rain sensor in the future
  4. All solutions (including controller) must be cloud-independent.
  5. Network (LAN/Wifi/BLE) requisite is OK, Internet requisite is Not OK.

Valves:
There are currently 8 valves across 6 zones. I would like to get 10 valves, each with it's own zone. (1 to be master valve)​
The valves themselves are simple mechanical devices operating much like a relay consisting of a plunger and a coil resting in a normally closed position and powering the coil actuates the plunger. The plunger assembly consists of a spring, and a needle like thing to plug a water channel. The coil is powered by 2 wires (1 hot, 1 common) connected directly to the controller.​
I have tested (momentarily) that the valves will work with DC (if needed). Theoretically, AC/DC shouldn't matter as this is not a digital component and it does not require a continuously changing magnetic field. The only limiting factors should be max voltage and current, although I suspect that the constant current of DC may need to be lower than the momentary current of AC.​

Cable:
Existing cable is 7 conductor, 16awg, direct burial. (6 hot - 1 common). Cabling runs underneath concrete and not in conduit and therefore can not be replaced. New cabling could be run in alternate route, however all routes would result in visible unsightly cabling ran on exposed surfaces.​
As a Journeyman Wireman, I'm usually pretty good at selecting a hidden route, but not this time. However, being a construction builder, I tend to think that the words "no" and "can't" are reserved for those who are unable to think outside the box. Therefore, I'm not inclined to surrender to a small cabling issue.​

Controller:
Existing controller is a very old Rainbird ESP-6TM. Future controller will be a Rainmachine HD-16. I don't need 16 zones but I thought why not, I might find something else to auto-actuate, like the garage door or something. (haha unconventional does not equal incorrect)​
I have the new controller but haven't installed it yet as I will be using it to test out all solutions. Quite an expensive and popular little bugger as it was on back-order for 6 weeks. And Yes there are other controllers on the market but this is the only one I found that is completely cloud-free.​
The valves are connected by wire to outputs (zones) of the sprinkler controller. The software makes use of timers, schedulers, and zones (wire/output) to create a program that gets run at specified times. The hardware on the old one makes use of at least one relay (it can be heard), and if the new controller uses a relay, it is very quiet. Both controllers output ~30VAC @ 560mA. I am aware that these values are out of range for this mux, but again, the mux was just a learning experience to start establishing possibilities.​

Additional Situations:
  1. Water flow meter requires 2 wires for remote reading and therefore brings the total available wires in existing cable to 4 hot and 1 common

Solutions (so far):
1.) Install the new controller in a weatherproof enclosure just above where the valves are located, and
  1. utilize the existing 7C cable to power the controller, or
  2. provide stand alone solar/battery power to the controller

2.) Install the new controller in place of old one, and
  1. design/build a home/field multiplexer pair to actuate the valves utilizing existing 7C cable (2C for flow meter, 4C for selectors, 1C for common), or
  2. design/build/program/purchase a home/field pair-of-somethings (arduino's maybe) to wirelessly actuate the valves utilizing the existing 7C cable to power the field device, valves, and to remote read the flow meter. 2C for flow meter, 2C for power (1 hot, 1 common) which would have to be switched by field device, leaving 3C for the field device or maybe the field device can utilize the same power as the valves.
 

Attachments

Irving

Joined Jan 30, 2016
3,885
I got you. The mux idea is probably on the right track, just not the right technology.

Running those valves on DC might not be good for them long term, however I don't that matters for now.

What is the amp/watt/VA rating of the valves?

how long is the cable?
 
Top