Facebook
 Google
 GitHub
 Linkedin

Hi everyone,
I want to explain how I find out this forum and why I decided to post here with a shot story.
I got in possession of a broken Yamaha P-95 keyboard that was in the street, brought it to home with me, bought a power supplier.
Gladly, it was working, but it wasn't producing any sound.
So with an online research I came across this community, changed the broken electrolytic capacitor as suggested as in this thread and the piano started to sound again!
Now, I am not practical with electronics (I am reading an electronics for dummies as recommended by someone). Soldering the cap it has been my first experience with this world, so I decided to subscribe here to asking you if your expertise could help me.
I got a 3 pedal unit with a 5 Pin DIN that is incompatible with my keyboard. The seller didn't want it back and just decided to refund me.
The P-95 uses a 6 Pin DIN (it looks like a PS/2 connector to be honest).
I was wondering if there is any way to convert the circuit into a compatible version for my piano like an LP-5A pedal unit (which it looks like it doesn't use any potentiometer, even if is not specified in the schematic below which model of pedal unit is).
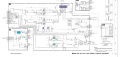
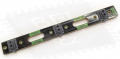
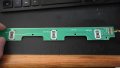
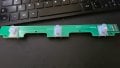
The circuit, called CB-JT1 has three switches (SOFT, SOSTENUTO and SUSTAIN) that are sharing what I believe to be the GND (D).
SOFT belongs to pin Z, SOSTENUTO to pin H and SUSTAIN to L.
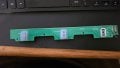
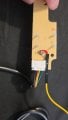
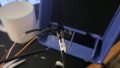
At the beginning I tested the board with a teensy 4.0 (here you can see the video https://streamable.com/d86wtc) and used a potentiometer to emulate the Sustain Pedal FC3A, a pedal that connects to the piano through the jack input (here there is a teardown on reddit).
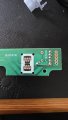
I was convinced of using a pot for the SUSTAIN switch because of what I saw on Reddit, so I proceeded to interrupt the copper trace of the SUSTAIN switch to avoid interferences with the pot. And added some soldering in case I had to solder the wiper, ground and VCC to the board.
However, according to the service manual of the P-85 (it looks like the P-95 and the P-85 are sharing a lot in common inside), the 3 Pedal Unit uses 3 switches and zero pots. So the test with the teensy has been a waste of time.
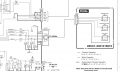
I believe the pedal unit I got uses a Normally Open switch that needs to be closed to send signals to a keyboard (or at least it how it was working with the teensy).
Now I am not sure if it has to be Normally Closed, and it has to be open when I want to send an input for the P-95.
Is there a way to convert this circuit like above in something that could work for my keyboard?
I want to explain how I find out this forum and why I decided to post here with a shot story.
I got in possession of a broken Yamaha P-95 keyboard that was in the street, brought it to home with me, bought a power supplier.
Gladly, it was working, but it wasn't producing any sound.
So with an online research I came across this community, changed the broken electrolytic capacitor as suggested as in this thread and the piano started to sound again!
Now, I am not practical with electronics (I am reading an electronics for dummies as recommended by someone). Soldering the cap it has been my first experience with this world, so I decided to subscribe here to asking you if your expertise could help me.
I got a 3 pedal unit with a 5 Pin DIN that is incompatible with my keyboard. The seller didn't want it back and just decided to refund me.
The P-95 uses a 6 Pin DIN (it looks like a PS/2 connector to be honest).
I was wondering if there is any way to convert the circuit into a compatible version for my piano like an LP-5A pedal unit (which it looks like it doesn't use any potentiometer, even if is not specified in the schematic below which model of pedal unit is).
The circuit, called CB-JT1 has three switches (SOFT, SOSTENUTO and SUSTAIN) that are sharing what I believe to be the GND (D).
SOFT belongs to pin Z, SOSTENUTO to pin H and SUSTAIN to L.
At the beginning I tested the board with a teensy 4.0 (here you can see the video https://streamable.com/d86wtc) and used a potentiometer to emulate the Sustain Pedal FC3A, a pedal that connects to the piano through the jack input (here there is a teardown on reddit).
I was convinced of using a pot for the SUSTAIN switch because of what I saw on Reddit, so I proceeded to interrupt the copper trace of the SUSTAIN switch to avoid interferences with the pot. And added some soldering in case I had to solder the wiper, ground and VCC to the board.
However, according to the service manual of the P-85 (it looks like the P-95 and the P-85 are sharing a lot in common inside), the 3 Pedal Unit uses 3 switches and zero pots. So the test with the teensy has been a waste of time.
I believe the pedal unit I got uses a Normally Open switch that needs to be closed to send signals to a keyboard (or at least it how it was working with the teensy).
Now I am not sure if it has to be Normally Closed, and it has to be open when I want to send an input for the P-95.
Is there a way to convert this circuit like above in something that could work for my keyboard?