Project: How to make PCBs

Thread Starter

Wendy

Joined Mar 24, 2008
23,798
Didn't I see a laminator in your bag of tricks? I have a GBC Heatseal H212 and I am having good luck with it. All I needed to do was to remove some guides from inside the device to keep the pcb from getting caught on them.
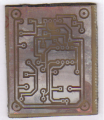
I do have a laminator, but what I am doing is a form of abuse for it. I am up to new methods.
 

kbyrne

Joined Dec 10, 2011
93
Bill I have been following your thread and have a improvement if you will for you to try over wax paper and your toner. Purchase a vinyl called Oracle 631 off of E-Bay. Set up apiece of paper in your printer and print only dimensions at first in the center of your paper. Cut a piece of vinyl 1/8 to 1/4 bigger in all 4 directions. Peel of protective plastic and place sticky vinyl over square. Put paper back in printer and copy traces and pads. They will be right on top of vinyl. Iron on or laminate with GPC type laminator. There is no paper to mess with with left on traces or top of board. I have a HP LasarJet 4 and it does not get hung up in the fuser at all. This advise I found on a yahoo web sit for PCB's at home and it works first time even with house hold iron. Best Kevin
 

spinnaker

Joined Oct 29, 2009
7,830
So the vinyl only sticks to the copper where it was printed? I assume you put the vinyl on the the copper "printed" side down?

If this works sounds like it would eliminate toner transfer compatibility issues.

Ah or is it the toner that is still sticking to the copper?

I just did a search on Ebay for " Oracle 631" and came up with nothing.

That is because it is oracal 631.

Any colors work better than others?
 

SPQR

Joined Nov 4, 2011
379
I just ordered some from Amazon. Apparently it's used as colored plastic for large posters.
http://www.amazon.com/gp/product/B009WS0M4K/ref=oh_details_o00_s00_i00

I think what kbyrne is saying that the vinyl is smooth on one side and sticky on the other.
You print out your circuit on paper, cover the circuit with the sticky side of the vinyl (big advantage), and run it through again.
The toner sticks to the slick side, then the toner is heat transferred to the PCB with an iron.

The advantages, to me, are that you can just use a small piece to run through to printer.
I wonder if the "slick" side allows easier transfer of the toner to the PCB.
I'll try it as soon as it gets here.
 

kbyrne

Joined Dec 10, 2011
93
Put the sticky side of light color any down over dimension of board. Clean off all
finger oil with gloves and your cleaner knoledge. Be sure to do this in center of paper as it may bind near the outside corners or sides. Put back into laser printer and print dimensions, pads and traces. take out of printer your work and place shiny vinyl
over board and secure with scotch tape. Either iron on with high temp. iron or
laminate with GPC brand laminator. I bought a Creative version that is cheeper
than other versions but according to yahoo web site should work. It may be 10 degrees to 20 degrees under the temp thou. There was help involving raising temp. Visit yahoo web site for home brew pcb manufacturing for more detailed info. I HAVE USED THIS METHOD TO SUCCESS WITH A HOUSE HOLD IRON. It is better than Photo paper. Never tried wax paper thou. Best Kevin PS dark colors will work also just hard to see pads and traces.
 

Thread Starter

Wendy

Joined Mar 24, 2008
23,798
Wax paper is cheap, around $1.25/roll. One roll is good for 30+ images, but it gets used up in the kitchen before then. It is also very thin, which is a big issue for my laminator. It chokes on the PCB material I use, I suspect it is going to have a relatively short life. Which explains my search for alternate heat transfer techniques.

Then there is the alignment issues. Even with tape, things scoot around, which renders it impractical for two sided boards.
 

kbyrne

Joined Dec 10, 2011
93
With guide holes my method works a/ok for two sided boards. My problem is finding a way of creating a pocket for placeing the board into to deliver a double sided board perfect every time no matter if it is vinyl due to perfect toner transfer or photo paper. I have never tried wax paper. Does any one know of a procedure to accomplish this?
 

kbyrne

Joined Dec 10, 2011
93
Just a update of success: Tools used exact:
1.Hewlett Packard Laser Jet, 600 dpi. Highest resolution setting (5).
2. oracle 631 off of E-Bay color Light blue.
3. GPC Creative Laminator. Approx Cost $30.00.
Two boards done But one problem exists. Need 1200 X 1200 Dpi Laser printer. Next time go over work with etchant pen and finger nail polish with fine artist brush. Also try out wax paper per Bills article. Nice work your site. Best Kevin
 
Last edited:

spinnaker

Joined Oct 29, 2009
7,830
I tried Bill's method tonight and I must say I got much better results then I ever had before.


In the past, I would often get pitting on the traces. I suspect the ferric chloride I was using was weak, I would need to leave it in too long and it would start eating away at the toner. Or perhaps it just reacted with my toner. These traces are pretty much flawless.

Even the Luqitin tinning worked out better. But it is still not perfect. I think maybe I need to wear rubber gloves when handling after toner removal. It looks like a thumb print in the lower right were it did not cover well.

I like the wax paper because it allow you to see through the paper making alignment much easier. The muratic acid / hydrogen peroxide solution makes it easy to see when the etching is done.


Bill,

Thanks for posting this method. Waht did you use for tinning?


Now on to drilling. I really need to invest in a mini press. I currently use my full size bench press which works pretty well but I imagine a mini press is easier to deal with.
 

Attachments

spinnaker

Joined Oct 29, 2009
7,830
I tried again. Scrubbed the board really well with one of those copper Scotch Brite pads then followed up with a green one. Plus I wore rubber gloves. Much better results.


No matter how hard I tried before I was never able to get results like this. I am really pleased. I suspect the pitting I spoke of in the previous post was throughout all of the traces, even where they might not be easily seen and this caused the Liquitin not to stick.
 

Attachments

strantor

Joined Oct 3, 2010
6,875
I leave the toner on until after drilling. Leave the toner on, and run drill-aid.ulp right before printing. This will make little centers for your drill bit. With a bit of feathering, the board will auto-center itself under the bit. much better.

edit: I *assumed* you're using eagle; if not, then no drill-aid.ulp for you. But still toner might help center your bits. not sure.
 

spinnaker

Joined Oct 29, 2009
7,830
I leave the toner on until after drilling. Leave the toner on, and run drill-aid.ulp right before printing. This will make little centers for your drill bit. With a bit of feathering, the board will auto-center itself under the bit. much better.

edit: I *assumed* you're using eagle; if not, then no drill-aid.ulp for you. But still toner might help center your bits. not sure.

That is a great idea. I will keep it in mind for next time. Plus this liquitin can wear off if you handle it too much.

I am using Diptrace. What does "then no drill-aid.ulp" mean?
 

strantor

Joined Oct 3, 2010
6,875
What does "then no drill-aid.ulp" mean?
To expound on nerdegutta's answer, it is a script within eagle that places a donut inside each drill spot, for the express purpose of what I mentioned. it turns all your pads' drill spots' inner diameters to very small, while leaving the outside diameter the same. So the etchant will only take away a very small dot in the center of the pad. This leaves a divot in the center of each pad which is the depth of the toner + the copper (assuming you leave the toner on), which is just enough depth to center your drill bit. think of it like a tiny punch-mark; when you drill a hole in metal, you hit the intended spot first with a hammer and punch to make a divot to center your bit so it does not walk away across the surface of the metal.

You might be able to accomplish the same in diptrace, but I wouldn't know how.
 

Thread Starter

Wendy

Joined Mar 24, 2008
23,798
I have never tinned a board. I have some Crystal Clear Acrylic Krylon I am going to try, I'm told it will move out of the way of solder.

My boards are not as pretty after a few months, but none have failed due to lack of tinning.

Can you post a link about the tinning compound?

I suspect your FeCl was cold, the reaction proceeds much better if the liquid is warm, the hotter the better (but don't get carried away with it).

One of the nice things about HCl/H2O2 is it is self heating. With etching etching/sparging and warmth is always good. The sponge substitutes nicely.
 
Last edited:

spinnaker

Joined Oct 29, 2009
7,830
I have never tinned a board. I have some Crystal Clear Acrylic Krylon I am going to try, I'm told it will move out of the way of solder.

My boards are not as pretty after a few months, but none have failed due to lack of tinning.
Looks like you did in your photo above. The traces look silver.


Can you post a link about the tinning compound?

http://www.circuitspecialists.com/421-125ml.html

It is Liquid Tin . I was calling it Liquitin. Kind of expensive but a little goes a long way. I contacted MG with my issues and they sent me 3 or 4 bottles just for the cost of shipping so as long as it has a long shelf life I should be set for a long time.


I suspect your FeCl was cold, the reaction proceeds much better if the liquid is warm, the hotter the better (but don't get carried away with it).

One of the nice things about HCl/H2O2 is it is self heating. With etching etching/sparging and warmth is always good. The sponge substitutes nicely.
No I would warm it before use.
 

spinnaker

Joined Oct 29, 2009
7,830
Bill,

How many times have you used the same batch of chemicals. Say you just do one small board. Will the chemicals continue to work after a couple of days or is there a chemical reaction that starts when you mix it then dissipates as it ages?
 

Thread Starter

Wendy

Joined Mar 24, 2008
23,798
The quantities I use are so small I just throw it away after use. I have made several boards from the same batch, but it is also incredibly cheap, not worth keeping.

It is also fast, as I said in the main article. Using a sponge I am done in much less than 5 minutes.

HCl is around $5 for a gallon, peroxide under $1 per bottle,
 
Top