Copying from UNO R3 to my own empty board?

dendad

Joined Feb 20, 2016
4,641
You con't need the cable, just run leads from the board. Soldering on a homemade cable with a connector makes it easier to use.
 

Thread Starter

Terrypin

Joined Feb 5, 2016
113
You con't need the cable, just run leads from the board. Soldering on a homemade cable with a connector makes it easier to use.
Could you please spell out the connections as I’m nervous about zapping the mini. What Arduino UNO pins to what mini pins?

Terry Pinnell, East Grinstead, UK
 
Last edited:

dendad

Joined Feb 20, 2016
4,641
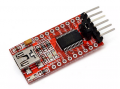
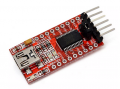
I you got one of these ...
FT232RL.png
you will find they are the correct connections to go straight to the Arduino Pro Mini board, and you could get away with not adding the header to the Arduino, just plugging the USB to serial converter board directly into the Arduino, or using 5 female to female jumper leads.
Just ensure the GND on the Arduino goes to the GND on the USB board. A couple of times I have hooked them together back the front but the Arduino survived ok.
 

Thread Starter

Terrypin

Joined Feb 5, 2016
113
I you got one of these ...
View attachment 179900
you will find they are the correct connections to go straight to the Arduino Pro Mini board, and you could get away with not adding the header to the Arduino, just plugging the USB to serial converter board directly into the Arduino, or using 5 female to female jumper leads.
Just ensure the GND on the Arduino goes to the GND on the USB board. A couple of times I have hooked them together back the front but the Arduino survived ok.
No, I was referring to your reply “You don't need the cable, just run leads from the board.”. I asked exactly what the pin connections are from the UNO R3 board to the separately prepared ATM328P.
 

Thread Starter

Terrypin

Joined Feb 5, 2016
113

Thread Starter

Terrypin

Joined Feb 5, 2016
113
I would recommend you use an Arduino Mini Pro.
https://www.ebay.com.au/itm/Pro-Min...m41fc8ed93a:g:nj8AAOSwqhtcgzrU&frcectupt=true
I use these as a "component" on some of my boards as I cannot buy the parts themselves for anywhere near this price.
($2.14 AU). That is $1.49 US. And has a crystal, voltage regulator, reset switch, LED and misc Rs and Cs.
A USB to TTL programming lead is needed to program them, but you only need one lead.

These boards fit on a breadboard and once you get the code running on a Uno, just recompile for the Mini Pro. or develop it straight to the Mini Pro, skip the Uno.
I bought a couple and soldered on the pins. I know it’s probably obvious to you but could you please spell out exactly what steps you take to “just recompile”? At present I’m still using the method you described without a cable, just connecting from Arduino UNO to the separate breadboarded 328 circuit.
 

dendad

Joined Feb 20, 2016
4,641
By "Just recompile..." I mean develop your code on a Uno or Nano or whatever Arduino you choose. Then when you get it going, recompile it to suit your stand alone Atmel processor, however you have that set up. It is probably quicker to debug your cone on an Arduino as it has the serial out where as your final target may not.
Still, I think the price to use a separate Atmel processor, regulator etc would be more than a ready built board.
Have fun :)
 

Thread Starter

Terrypin

Joined Feb 5, 2016
113
By "Just recompile..." I mean develop your code on a Uno or Nano or whatever Arduino you choose. Then when you get it going, recompile it to suit your stand alone Atmel processor, however you have that set up. It is probably quicker to debug your cone on an Arduino as it has the serial out where as your final target may not.
Still, I think the price to use a separate Atmel processor, regulator etc would be more than a ready built board.
Have fun :)
Thanks, understood.

I’ve decided to abandon the approach described in that article. The connections were clear but the subsequent text explanation was over my head. For now I’ll continue to take advantage of the DIP socket and simply use the UNO to program each 328P. That way I understand what I’m doing!

When my TTL converter arrives I’ll re-examine this.
 
Top